Glamour Lighting Tutorial: The Beauty Dish

A beauty dish is a large, bowl-like reflective circular dish which ranges anywhere from 16 to 30 inches in diameter and is mostly used when shooting portraits and glam-style imagery.
Creating a generally softer light is one of the functions of a beauty dish. Its coated interior which reduces basic highlights is what causes the light to appear softer in the first place. But if a dish has a silver coating, it will make light “edgier” and shadows more defined. Nearly all beauty dishes have a little panel that “floats” over the flash tube so that no direct light can be emitted from the reflector. All (scattered) illumination comes from the silver or white bowl of the dish.
The beauty dish has long been the primary modifier in the glamour photography industry. The light that this vital modifier creates is a mixture between a softbox and a parabolic reflector, though it does sit much closer to harsh light on the spectrum.
The shadow transitions and high-lights have all rather sharp, high contrast qualities and because of this you will recognize that beauty dishes tend to accentuate every detail of your subject (model’s flaws included…). You will need to pay extra attention to the placement of your model in correlation to your lights in order to hide any flaws that a beauty dish may bring to light.
The best distance to use a beauty dish at is around eight feet (2.5m) from the subject. Placed at closer distances, four to six feet, the beauty dish can create what many refer to as the “liquid wrap” effect. If placed at farther distances, over eight feet, the overall effect of the beauty dish is more comparable to a “hard” reflective umbrella.
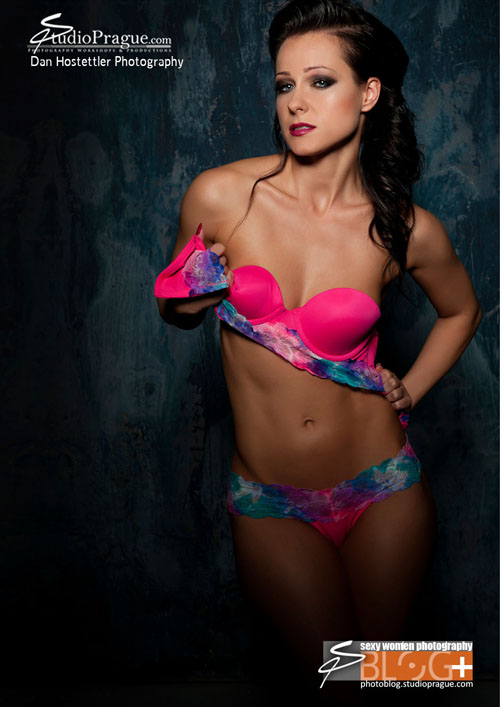
The effect you are looking for with a beauty dish is a circular catchlight, which is a highly desired look both in beauty and fashion photography.

The Beauty Dish’s “Sweet Spot”
As mentioned before, a liquid wrap effect appears – which many photographers try and avoid – if the beauty dish is placed at a distance of four to six feet (1.2 – 1.8m). In addition, the contrast increases as well as the saturation on the subject’s skin. Placed in the right distance – around 8’/2.5m – a crisp but yet appealing light is created which highlights the finest of details. The sweet spot can easily be recognized once you achieve the incomparable look this modifier is known for: soft, sparkling light yet with edgy shadows and more visual depth structure than a regular softbox.
When the beauty dish is between six and twelve feet (2 – 3.5m) from the subject, it has a very soothing and tanning effect (one could say the light gets “boring”). You will still enjoy a higher contrast and saturation just as you would if it were closer to the model but this time without the unpleasing hot spots.

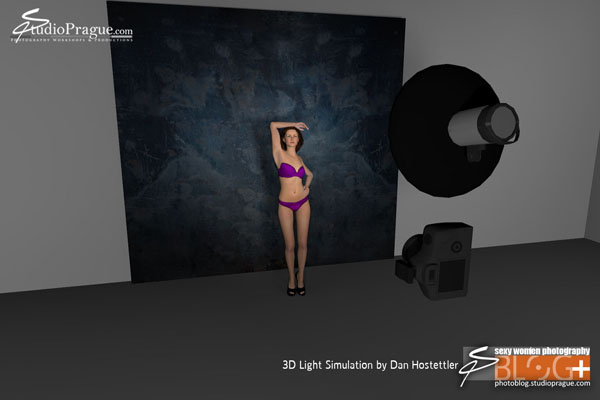
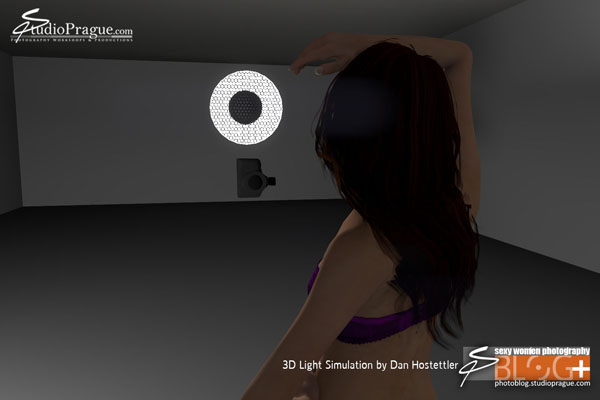
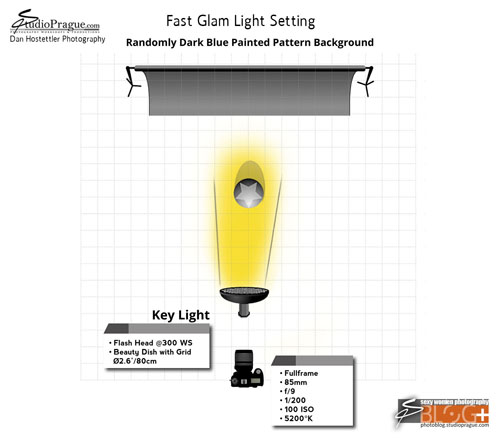
Lighting Diagram
Credits
- Photography: Dan Hostettler
- Model: Melisa Mendini
- Hair & Makeup: Aneta Lozkova
- BTS Photography: Jan Prerovsky
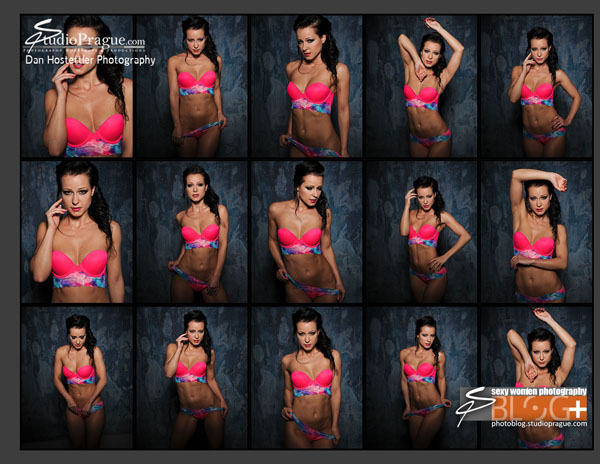
Contact Sheets

Video Tutorial
—
ESSENTIALS: Studio Lighting for Nude Photography – by Dan Hostettler
If you liked this article there’s much in Dan’s 280 page book, which features Jenni Czech and Melisa Mendini, delivers the perfect “one size fits all” access: theory, showcases and exercises photography newcomers, amateurs, aficionados and versed pros.
And, Model Mayhem readers can get a 25% discount by using the promo code: MAYHEM25
Dan Hostettler
Dan has been a professional beauty and nude photographer for more than 15 years. He is Swiss born and currently living and working in Prague (Czech Republic). Dan founded his flagship business, StudioPrague, which includes a dedicated production company that has received international recognition and offers private, high-end workshops. Aside from his own creations, Dan has been internationally published and featured among others on and in GQ Online, The India Times, FashionONE TV, GoodLight Magazine, MUZE Magazine, FOTOdigital. His book,ESSENTIALS: Studio Lighting for Nude Photography, is on sale now.
Follow Me:


May 13, 2015 at 1:06 pm, DrToast said:
I always thought the sweet spot of the dish depends on the diameter of the dish.
March 21, 2015 at 7:11 pm, GGB said:
Very nice tutorial, and a hot girl. You make it look easy. 🙂
December 05, 2014 at 5:44 pm, sjs said:
Thanks for the educational tutorial. Wondering if you have an example of what the “light wrap effect” looks like. If it is a bad thing, would like to know how to catch it myself. thanks! Second question, what brand is your beauty dish, and what is its size?
December 09, 2014 at 1:55 pm, Dan Hostettler said:
Hi SJS, you’re welcome.
1) “light wrap effect”: l don’t have an example right now but it’s on my list for a next shoot. I will create some imagery where the lighting went “wrong” with a BD. Hopefully I can share it here. Or at least I will provide a link to the set.
2) BD is just a generic bowl, silver coated, 32 inch/80cm & a 30 degree grid. No voodoo at all. The modifier incl. grid costs about USD 90.
December 04, 2014 at 5:08 pm, Charlie Loeven said:
I noticed that the aperture is F 9. I would think that would be to much. Maybe f 4 or 2.8.
Just an observation.
December 05, 2014 at 12:53 am, Dan Hostettler said:
Hi Charlie, thanks for commenting.
I was shooting with 85 mm. f2.8 would be a problem. f4 could work. But all’s depending on how blurry (or not) the background should appear.
May 13, 2015 at 12:16 pm, Richard said:
Often times with strobes of any sort you have to use higher F-stops to decrease the amount of light since you can only decrease the ISO so far and can only increase the shutter reasonably to MAYBE 1/250th. Plus, lower F-Stops don’t have much use in a studio with a plain backdrop since the blur isn’t very useful. Just my cents 🙂
May 13, 2015 at 3:14 pm, Bob Jones said:
For closeup photography, f9 gives you a wider sweet spot for focus and depth of field. It also depends on how low power you can get with the beauty dish. I noticed he actually shot these low key with more shadows. Shooting at f8/f9 will give you a better opportunity to play with the shadows.
Richard, You don’t want to have a shutter speed of 1/250 th – the shutter speed for the camera in studio with these types of strobes is less important than the f stop anyway. Also, 1/250 is probably too close to the fastest sync speed for the camera shutter. I’ve found 1/160th to be a better speed. People have said you can go to 1/250th but I’ve seen the false shadows created by the shutter.