|
Forums >
Digital Art and Retouching >
How does he do this
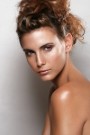
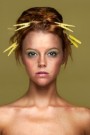
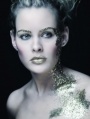
Robert Randall wrote: When the port is taken into account, I think having more "flexible" standards is implicit in his post. Maybe the moral of the story is anything's easier if you just stop being so damn picky about the quality of the results. Oct 19 09 10:54 am Link look familiar...  the dress...u can probably achieve that with Realflow http://www.realflow.com/n_cs_whole.html Oct 19 09 11:25 am Link Kiko Land - thanks for the links. Nagfx - things look simple to the untrained eye... try to duplicate what you see before suggesting a tutorial. I started doing more serious retouch 2 weeks ago, so I'm a newbie... but I know what I don't know. d00dle, it does look similar, but to achieve realistic look like water you'll need good caustics render, and for milk you should probably have to get one of the light-simulators and render a good SSS (sub-surface scattering)... and all those only mimic reality. very cost/time ineffective... besides it looks from the backstage photos that he is using 3.5% milk  Oct 19 09 12:04 pm Link re- photography wrote: Jesus people: it's CG. Oct 19 09 02:05 pm Link Does it really matter what was used to create the image? If it is CG, or PS, or clever studio work... Does it change whether the image is interesting or not? I like his images. I find they grab my attention... In a good way. Oct 20 09 01:39 pm Link IMXA Creations wrote: Sure it matters. Many of the people in here don't possess skills in 3D programs, many think they can do the task in an alternate fashion. Whether they can or not, it would be nice to know the genesis of the original to aid in further conversation about the process. Typically, that is how humans have been able to gain information and learn. Oct 20 09 02:07 pm Link IMXA Creations wrote: That depends on the context. IMXA Creations wrote: In general, no. But that wasn't the point of the question, was it? Oct 20 09 02:46 pm Link Hate to pee on your cornflakes all...this effect is called a milk dress. It is achieved with hyper speed photography in the studio. You need ridiculously fast strobes or an arsenal of speed guns, a tripodded camera, a patient model who can hold a pose, a milk tosser and about 60 layers of photoshop. While you may see it everywhere now, this separates the pack a bit. This is my next venture and only came across your question while doing research. Nov 08 14 04:27 pm Link Dan Favarger wrote: I'll believe you and your method if/when you can replicate the shots Nov 08 14 05:30 pm Link You can find a video of the process somewhere...maybe by the original artist who kind of brought this effect into the lime-light. It indeed is: 1) Model holds pose 2) Someone pours milk on her over and over 3) The various images are then edited and stitched together in PS. Shaping and forming the milk from the various photos. EDIT: http://blog.aurumlight.com/ Check that out I hate the thought process of "I don't know how nor do I have the ability to do it....so it's CG." Not that doing that effect in CG would make it any less impressive. Nov 08 14 06:01 pm Link I agree with Abby and here is someone doing it even better. http://aurumlight.com/ Its not how you do it that matters, use your imagination. The image in the end is all that matters. If you know Photography, Illustration or CGI at an advanced level, Im sure you can reverse engineer it. Nov 10 14 08:29 am Link The way I've done it is to get the set up for the model done and lock the camera down on a tripod so it won't move. I then shoot the model in the pose and get a facial expression I want. From there I then shoot the liquid being poured so I have a solid foundation of shape to use later. I then shoot a lot of images of her being splashed with the liquid. It takes two people, one to work the camera and one to splash. You need to work a timing signal out between the two of you so that you get the images you need. Throwing the liquid is key, different techniques will give you different looks and timing issues. Also using different containers to splash out of will affect the look of the flowing liquid. Lots of experimenting needed. You then take all the images and use just a section of each pour or splash that works together with the overall image and patch them together using warps and liquidfy to match them up. Then blending all the layers together with masking and color corrections. I create an outline of the pose and form as the top layer so I can more easily line up the pieces. For the liquid I use about 4 gallons of warm water mixed with two containers of non dairy coffee creamer and finger paint for color. Yes I'll even use white paint for the milk look. You can vary the amount of creamer used to increase or decrease opacity of the liquid. I rarely splash more than a cup or two at a time. The concept is easy, it's the amount of work to seamlessly put it all together that makes it hard. There's a good amount of skill and technique needed for the post work with multiple correction and DB layers needed to smooth everything out, but it is fun to do. Nov 10 14 11:55 am Link  Moderator Note! Moderator Note!Just noting this is a zombie thread from 5 years ago, with now 4 recent posts. Please keep that in mind if responding. Nov 10 14 12:50 pm Link Blue Lotus Art wrote: Since nobody else has answered, I am going to assume this is a serious question, and answer it myself. CGI stands for computer-generated imagery. Nov 10 14 01:40 pm Link Nov 10 14 01:46 pm Link Ruben Sanchez wrote: Good link ! Nov 10 14 02:04 pm Link Dan Favarger wrote: Ummmm this thread is 5 years old? check the dates when you're looking through old forum posts.. Nov 10 14 05:22 pm Link I was assis on some of this milk shoots. But in first one where he use only shoots and photoshop no render. It was bought a lot of milk. Then we shoot a lot of while put milk on model in way as he saw this dress. Then we shoot more for some more effects like strings, corsets and etc. Then it was all compared through photoshop with help of liquify and difference layer option to compare layers and off layer masks. Nov 12 14 03:57 pm Link There's actually a great tutorial I've been wanting to try on Phlearn.com - similar sort of idea, with composite assembly and blending layers. Check this page out - http://phlearn.com/product/liquid-portrait Nov 13 14 02:48 am Link easy, Liquid Splash Brushes : all those tuts is an waist of time trust me just paint with the brush and and mask out what you dont want , just google Liquid Splash Brushes Nov 13 14 10:37 am Link |