
Photographer
KADIVEiMAGE
Posts: 68
Hampton, Virginia, US
Frederic Photography wrote:
My contribution to this wonderful thread !
![https://lh4.ggpht.com/_wvWbhgds6hE/Su_L8PyUP0I/AAAAAAAACrI/gRR84Wx_34Q/LightingSetup%282%29.gif]()
![https://modelmayhm-1.vo.llnwd.net/d1/photos/091016/22/4ad951c137fc5.jpg]()
Here is my simple but effective setup ! DO you know the F stops you use?

Photographer
Frederic Photography
Posts: 24
Los Angeles, California, US
Quote :
DO you know the F stops you use? Yep f5.6 !
Photographer
PAVEL KONDRATIEV
Posts: 2
Moscow, Moscow, Russia
![https://pics.livejournal.com/metall_cello/pic/000wzhty.jpg]() Regarding the background light. Its not critical reflector can be halo. Can soft box is a gradient or exactly highlighted background. You can do without the background. Regarding the power devices. Values are for Rekam master 600. That is, these devices the maximum pulse power of 600 joules, and the minimum 30. For stripboks need to put impetus on 90 joules F90. Background to try, it all depends on the distance model to the background.
Photographer
Panascape Photography
Posts: 143
Cape Town, Western Cape, South Africa
![https://farm3.static.flickr.com/2556/4017383562_357f52f419.jpg]() Print on HP backlit material behind model with 2m Wafer soft box behind the print. SB-900 with orange gel, between the print and the hay bales pointing upwards at a poly board angled at 45°. Entire front of the set covered by a huge sheet of white cloth forming a box around the front. 2 x Bowens mono lights, one camera left and one camera right angled to provide fill by bouncing off the cloth and the white ceiling. 1 x Bowens DX 750 Pro Mono with beauty dish, shooting through the cloth towards the model. 1 x SB-900 camera right with orange gel and Strobies beauty dish aimed at the models face. I knows its a complicated setup, but the combination of the illuminated background and the lighting was to try make the picture look like natural lighting. ![https://farm3.static.flickr.com/2628/4029339851_d4f72019fc.jpg]() ![https://farm3.static.flickr.com/2754/4050402868_3cd5b2f3a7.jpg]() Beauty dish moved to camera right for the above shot.
Photographer
Brian Rolfe Photography
Posts: 495
Benfleet, England, United Kingdom
ok I've got a simple but effective one for you... clamshell set up, medium softbox on floor angled up around 45 degrees and gridded & socked beauty dish about 2 feet above model angled down... model is standing and about 2/3 feet from lights ![https://modelmayhm-8.vo.llnwd.net/d1/photos/091105/09/4af309c9bcd75.jpg]()

Photographer
PhotographLayne
Posts: 179
Lockhart, Texas, US
BR_Photographic wrote:
ok I've got a simple but effective one for you...
clamshell set up, medium softbox on floor angled up around 45 degrees and gridded & socked beauty dish about 2 feet above model angled down... model is standing and about 2/3 feet from lights
![https://modelmayhm-8.vo.llnwd.net/d1/photos/091105/09/4af309c9bcd75.jpg]() Very nice.

Photographer
Nick of Vegas
Posts: 1486
Las Vegas, Nevada, US
Tuesday bumpity back to the top.
Photographer
Mister Sifuentes
Posts: 1078
San Antonio, Texas, US
A shoot I did a few weeks ago. ![https://farm3.static.flickr.com/2663/4044608062_b347c99e65_b.jpg]() ![https://farm4.static.flickr.com/3194/4044037393_08f0621828.jpg]()
Hair Stylist
Skip Gue
Posts: 188
Miami, Florida, US
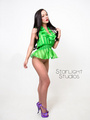
Photographer
Starlight Studios
Posts: 9
Salt Lake City, Utah, US
NSE Films wrote:
I'm not entirely sure I understand what you're asking. But basically, f/number stats (at least the way I include them) are indicating what aperture my light meter reading gave me when I set the flash to a certian power and a certain distance.
For example, I want my mainlight to be correctly exposed, but also want some rim light in there, one stop over exposed. For arguments sake, I'll decide I want to shoot at f/16, so I'll place my mainlight and power it up till I get a reading of f/16 on my meter (taking an incident reading). Then I'll set up my rim light and power it up till I get a reading of f/22 on my meter (again, taking an incident reading). I will then set my camera to f/16; the mainlight comes out exposed correctly and the rimlight, as my meter gave me a reading of f/22, ends up one stop over exposed.
Understand?
So when I write f/11 on my diagram, I'm referring to the incident meter reading I was given. God bless you. I've been looking for that answer forever!

Photographer
Jan Garcia
Posts: 4
Irvine, California, US
X-processed FashionWerk wrote:
The shot:
![https://farm3.static.flickr.com/2587/3978263234_0b535d85db_o.jpg]()
The setup:
![https://farm3.static.flickr.com/2589/4005354830_f5b4aebb78_o.jpg]()
No PP pretty much, in-camera b/w Awesome photo! Thanks for sharing.

Photographer
Larsh Photography
Posts: 29
North Augusta, South Carolina, US
This is an amazing post.....very benificial to the learning photographer, I will definitly come back to this one again and again! Thanks everyone for shareing your knowledge!
Photographer
Hipek
Posts: 36
London, England, United Kingdom
metall-cello wrote:
![https://pics.livejournal.com/metall_cello/pic/000wzhty.jpg]() I olways thing about this lighting setup when I stay in shop front to the mirror,

Photographer
Marco Vallentin
Posts: 1123
København, Hovedstaden, Denmark
In September 2009, I won the titel "Artist of the Month" on www.ModelInsider.com : ![https://farm3.static.flickr.com/2544/3974400215_9c555ba81b_o.jpg]() The middle picture is of the Dutch Suicide Girl "I Am Kip" (MM #220346),
and here is how I shot her, at Etxea Erasmus Executive Guest Suites,
in Amsterdam (The Netherlands).
I wanted my front lights to paint an almost shadow-free look,
but also wanted to create a distinct separation between Kip and the background.
( all five heads used are Elinchrom Style Fx400s )
I used two hairlights/kickers. One of them was mounted to an AutoPole via a MagicArm,
and the other one via an ArticulatedArm and SuperClamp to the hinge of the window frame:
![https://farm3.static.flickr.com/2526/4128238611_82efb81792_o.jpg]()
All cables were carefully hidden to allow full fredom of shooting,
and to keep Photoshoping an option, and NOT a necesity !
For the hairlights/kickers, I used 8"/50degree reflectors, with accessory holders,
32 dregree grids, barndoors, and Rosco ½CTB.
I later added Rosco CineFoil to both heads to further increase control/minimise flare,
and I also always use a sheet of Rosco ToughFrost between the reflector and grid,
for improved efficiancy / less hotspotting.
The room looked like this:
![https://farm3.static.flickr.com/2691/4129007732_4f0b4d4d29_o.jpg]()
In front of the bed is a large cupboad with a 16/9 television on top.
This TV was unplugged and moved into annother room.
On each side of the cupboard I placed two AutoPoles.
Between them, I connected a piece of MultiTube.
To the multitube I connected my Key head with a Profoto 4x6'RF SoftBox.
Even with both diffusers in place, the Profoto box has serious hotspotting issues (!),
so over the tube I also used Elins translucent deflector (#26305)
For fill, I used two 40" transparant brollies, one in each corner of the room.
These were positioned low (to not add light to the top of the bed)
and were gelled warmer than my key, by sheets of Rosco ½CTO
I was shooting simultaneously with two cameras;
an EOS20D and Mamiya 645 ( with Kodak EPP100 ).
On the 20D I wanted to use my EF 28-80mm f/2,8-4 (L) USM.
To do this, I had to sit inside the cupboard and shoot !
[ Etxea Erasmus is a "sex-hotel" that primarily caters for homosexual guests.
Kip and a handfull other MM-models I got to shoot during this particular trip,
had much fun over the fact that I wasn't a homo "climbing out of the cupboard"
- but rather a hetero climbing INTO it  ] ]
To also record the rooms tungsten bedside lamps,
I used 1/30 sec shuttertime - and a tripod - still inside the cupboard !
On the 645 I was shooting Kodak EPP @ ISO100, so I didn't want to change ISO setting on my 20D,
as this could have created unnecesary confusions...
I decided to shoot at a target apperture of f/4,
and wanted my fill to be ½EV lower.
f/4 - ½EV is f/2,8½ which was the setting for my key.
Half of f/2,8½ is f/2,0½, but since I was using TWO fill souces
each one was rated at f/1,4½
One of the heads couldn't be adjusted down to this low setting by electronic means,
so I had to add a piece of Rosco ND4, and re-adjust for f/1,4½
Each of the kickers were set for f/2,8½. The two of them combined would meter at f/4½,
but I like blond hair to record a bit on the hot side, and this also looks GREAT on film ;-)
During one of Kips costume changes, I also added a SpeedLite under the bed,
gelled yellow, and controlled by a radioremote:
![https://farm3.static.flickr.com/2634/4128239485_e8d0d8b8d6_o.jpg]()
This is my favorite picture from our shoot:
![https://farm4.static.flickr.com/3519/3945119163_5ddb99a038.jpg]()
(click for large version)
The collage on the wall, is selected works by fellow DeMask-photographer Trevor Watson,
and is in every way left there intentionally.
The lower part of the frame is lifted about half an inch away from the wall, by a small piece of clay,
to minimise reflections from the large Profoto softbox.
( picture of my location kit here )
---
edit: to answer a few mails about my set-up, let me stress
that ceiling bounce was NOT an option in this particular room.
Photographer
DC Chavez
Posts: 355
Redondo Beach, California, US

Photographer
Urs H
Posts: 1
Mettmenstetten, Zurich, Switzerland

Photographer
Ivan Outerbridge
Posts: 490
Hamilton, Hamilton, Bermuda
My Contribution. This photo got Honorable mention in the 2009 Bermudian Magazine Photographic Competition. Theme: "The Light Fantastic" ![https://farm3.static.flickr.com/2510/4156229719_822b53dbc7.jpg]() Setup ![https://farm3.static.flickr.com/2646/4156229737_e29f07e9b7.jpg]() Camera: Nikon D3x Two strobes with bounce umbrellas for fill, mini slave strobe inside of Bible(bouncing off of pages), bare strobe behind model. Exposed for the mini strobe so fill is next to nothing. Shot on Black Background. Model - Mayhem #729086
Photographer
Aurora Films
Posts: 3
Dallas, Texas, US
I love this thread. Thanks a ton for the Lighting Digram PSD file. That thing is awesome. I thought I'd share a shot I did over the weekend. Diagram: ![https://www.timtruelove.com/images/tt_LightingSetup_diagram.jpg]() PS: I hate hooting in the rain...or even in the drizzle. I kept getting droplets on the lens and the UV kept fogging up. I had 29 models to shoot through during a 4 hour period. It was hectic. Photos of the Setup and Set: ![https://www.timtruelove.com/images/tt_LightingSetup_photo1.jpg]() ![https://www.timtruelove.com/images/tt_LightingSetup_photo2.jpg]() And the result: ![https://www.timtruelove.com/images/hishers-0149.jpg]() ![https://www.timtruelove.com/images/hishers-2-3.jpg]()
Photographer
Anton Edvard Kristensen
Posts: 1
Trondheim, Sør-Trøndelag, Norway
Well here is my shot and setup  the setup: ![https://farm3.static.flickr.com/2478/4172698293_d419bd61d2_o.jpg]() and the result ![https://farm3.static.flickr.com/2618/4171363602_a7614446d0_b.jpg]()
Photographer
Blackula Photography
Posts: 790
Los Angeles, California, US
ok this thread seriously needs to make a comeback !!

Photographer
Studio LWP
Posts: 525
Las Vegas, Nevada, US
3 Speedotron 2403 packs, 3 Speedotron 102 heads and 1 Speedotron 103 head. Main: Speedotron 103 head in a 22" Speedotron Beauty dish with Speedotron Grid Background light: 1 Speedotron 102 head with 7" reflector covered in tough frost Rim Lights: 2 Speedotron 102 heads with 7" reflectors covered in tough frost. Silver reflector at models waist level. ![https://farm5.static.flickr.com/4058/4218763263_1cca68dca6.jpg]() ![https://modelmayhm-7.vo.llnwd.net/d1/photos/091221/20/4b30498b7f247.jpg]()
Photographer
rfordphotos
Posts: 8866
Antioch, California, US
my meager contribution to a very informative thread... ![https://farm5.static.flickr.com/4002/4224570214_8da65e6c38_o.jpg]() ![https://farm5.static.flickr.com/4048/4224577114_5efd182e16_o.jpg]()
Photographer
Tom Couture
Posts: 218
Portland, Maine, US
Brandon Ching wrote:
OK OK... from a shoot the other night.
![https://www.brandonching.com/diagrams/LightingSetup_7115.gif]()
![https://www.brandonching.com/gallery/albums/kayko_01-11-07/IMG_7115_landscape.jpg]() I was actually bummed out when I realized this was a composite. Done well but still, I don't see why that couldn't have been shot all at once to achieve the same result.
Photographer
Marc Mansville
Posts: 12
Brno, Jihomoravsky, Czech Republic
Thanks to all those who placed their setups here. This thread is the real thing. I am sure, I will come back here also next year. ![https://marco.herrndorff.com/mm/LightingSetup_002_Linda.jpg]() Greets from Prague (Czech Republic, Europe), Happy New Year 2010! Marco
Photographer
akigrafie
Posts: 2
Tuttlingen, Baden-Württemberg, Germany
Another one to keep this great thread updated! ;-) ![https://www.akigrafie.de/skunk.jpg]() ![https://www.akigrafie.de/LightingSetup.jpg]() Greets from the snowy Germany... www.akigrafie.de
Photographer
L Cowles Photography
Posts: 833
Sun City West, Arizona, US
So much great stuff here. It's hard to get to everything that was posted. Don't know if this was posted before, but Lowell has a neat tool to show how light shows on a model. You can move your curser to various postions and the light moves with it. Great tool for a newbie. http://www.lowel.com/edu/foundations_of_lighting.html

Photographer
KashifJ
Posts: 142
Melbourne, Victoria, Australia
Photographer
PhotographLayne
Posts: 179
Lockhart, Texas, US
BBBBBBBBBUUUUUUMMMMMPPPP!!!!!!!!!!!!!!

Photographer
DaveDavis
Posts: 21946
Manteca, California, US
Photographer
Marc Mansville
Posts: 12
Brno, Jihomoravsky, Czech Republic
akigrafie wrote:
Another one to keep this great thread updated! ;-)
![https://www.akigrafie.de/skunk.jpg]()
![https://www.akigrafie.de/LightingSetup.jpg]()
Greets from the snowy Germany...
www.akigrafie.de I just wonder about the reflex in her sunglasses. A plane's cabin interior?
Photographer
akigrafie
Posts: 2
Tuttlingen, Baden-Württemberg, Germany
m-fotoMarco wrote:
I just wonder about the reflex in her sunglasses. A plane's cabin interior? That was made in PS.
Photographer
Ishmon Portrait Designs
Posts: 66
Dallas, Texas, US
I LOVE this thread and I'm enjoying all the different light techniques, but, I'm fairly new and I can't TAKE it anymore!!! LOL......what does "Bump" mean????
Photographer
robert christopher
Posts: 2706
Snohomish, Washington, US

Ishmon Portrait Designs wrote:
I LOVE this thread and I'm enjoying all the different light techniques, but, I'm fairly new and I can't TAKE it anymore!!! LOL......what does "Bump" mean???? bump just moves the topic up a few notches, we try and keep this on the first page because it is such a valuable asset to this site
|


 Beauty dish moved to camera right for the above shot.


 ]
] 


