|
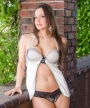
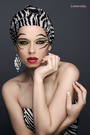
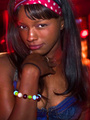
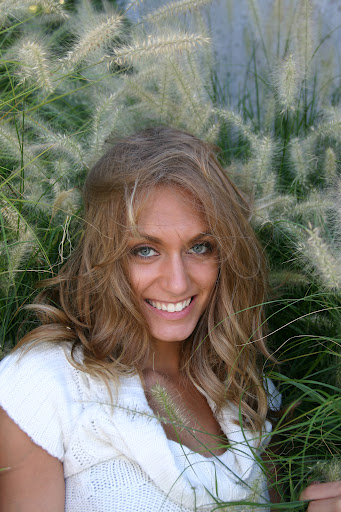
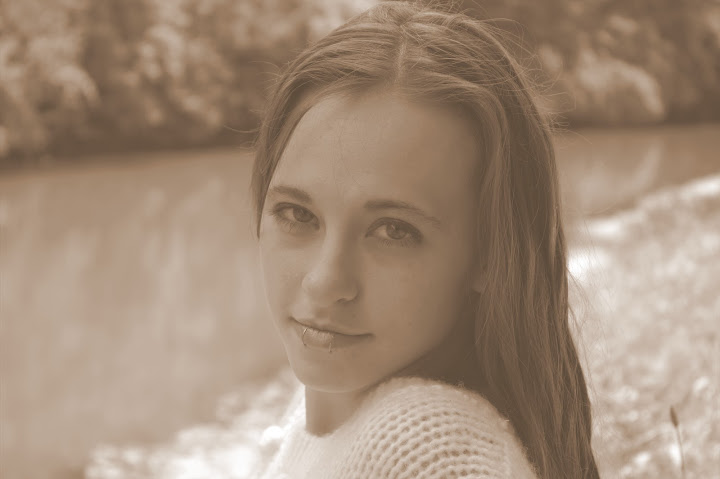
...or add something to my punch I need a solid critique ladies and gentlemen (I am giving you the benefit of the doubt) to get ready for the holiday season. I will be looking at the port of each person, who comments for examples of what they say. Thanks so much to all. Roland A. Sep 02 12 09:39 am Link Your style is weighted toward head and shoulders portraits. I only saw 3 photos out of 33 that showed the model's feet. Many of the photos that I stop at for more than a few seconds show a well posed model in a special location. The location can make a photo stand out. To get portraits to stand out today, they need to be tack sharp with exceptional post production of skin tones. If you are not doing good dodge/burn and blemish clean up on frequency separated layers, you are not going to stay at the front of the crowd. I don't mean to sound critical. You have a number of well composed and well lit shots. To have punch today, the bar has been pushed up pretty high. Sep 02 12 10:36 am Link OK, I AM seeing a somewhat flat look to the images in your portfolio. This is just the way the camera "sees" the light entering it. I have been dealing with this issue for years. I started with adding saturation, (something I think nearly every photographer, who wants more "punch" tries). But, the main problem is, that the range, (0-255) seems too short to make the adjustments necessary the give the WHOLE image the desired punch, before "running out of room" on the two extremes of the histogram - (it is so easy to run a spike up either, or both sides of it). I have been converting, and saving EVERY image, from the RAW to a TIFF format THREE times, one with the exposure slider left in the middle, and two with the exposure slider set at the two, opposite extremes, ("over exposed" by two stops, and "underexposed" by two stops). I can "tonemapp" these three in Photomatix, plus I can combine them in Photoshop, (deleting out the blown highlights in the "overexposed" one, and the solid black areas in the "underexposed" one), to give me all the room in a single layered image I need to make aggressive tone adjustments, (curves, levels, etc.), without exceeding the range we are normally limited by. I am able to get all the "local contrast", and DIMENSIONALITY I want, better shadow and highlight detail, smoother gradients, AND keep the image "real looking". It is, of course, my own judgment, and taste, where to stop, and call it "finished", but the desired look becomes completely under control, when the tools at your disposal are used with complete understanding, and consciousness. The whole process takes a book to explain, but minutes to do, (or as long as the artist decides to take to "finish" the image), so I have written only this abbreviated description. I realize this was probably not very helpful, but, combining punch and realism in one image, is a problem that can take years to get completely under control, (if one even decides this is the problem). -Don Sep 02 12 10:39 am Link Jim Nelson Photography wrote: Thanks Jim and to others who have and will weigh in; I am looking for critical so I can get to a whole new level. Your comments are most appreciated. Sep 02 12 02:41 pm Link Don Garrett wrote: Don, I have noticed the flat look as well, and it is has been an area of concern. I was not sure how to address that issue and I have experimented with playing with the saturation in the past with unsatisfactory results. I will try the strategy you laid out. Sep 02 12 02:54 pm Link  This would lack punch, looks like you left a print laying in the sun and it faded  This is a great pose But lighting issues, tip of nose hot [Fill flash or reflector] The iron work behind the model is a distraction, as is the skyline you included [Shoot lower so the sky is the bigger part of the background, compose image to include more of the model] This is worth a re-shoot  Mid day sun is not a photographers friend unless you control the light Deep dark eye sockets Use fill flash, scrim or both. Could also move model to open shade Sep 03 12 04:22 am Link Punch (as I think you are using the word) comes from several areas - but it's almost impossible to attain without good lighting, contrast and tonality. The first thing I'd do is improve the lighting and contrast. Lighting is more important than contrast and needs to come first, but in the end you need all three. Once you can control the lighting, you can control the contrast - and the tonality will pretty much take care of itself, Once you've done those things, the next step is to focus the attention on the model - make the subject "pop" in other words. You want the model to be perfectly sharp - and the eyes (especially the one nearest the camera) to be the sharpest thing in the photo. Learn to throw the background waaaaay out of focus so it does not compete with the model. Another thing you can do is make the background much lighter or darker than the model. Use lighting and composition to direct attention to the model. Select your shooting area for the background and lighting. Using a longer lens will help to throw the background out of focus and give you more control of the background. You'll be using a smaller sliver of the background, and moving around will help you find the best sliver. Better cropping (preferably in the camera with only fine-tuning in Photoshop) will help too. In this photo I find it difficult to concentrate on April (my favorite model, btw; I’ve shot more with her than any other three models combined) because of the cluttered background – especially the tower growing out of her back. Also, she’s not really sharp. The lighting isn’t good, and there are “sockets” around her eyes. It’s a cool pose though. Midday sun makes for awful lighting – unless the sky is overcast. It creates a whole set of problems that require a whole set of solutions. My favorite solution is to do my outdoor shooting in the 2-2.5 hours before sunset. (If I were a morning person, the 2-2.5 hours after sunrise would be just as good.) I don’t want to sound like a commercial here – but if you’re serious about improving, because of your location, I’d look into JT Smith’s Supershoots workshops. JT is my mentor. He lives in Pike County (I think) in Illinois, and he does workshops each year in St. Louis, Peoria and several other cities (Nashville, Cincinnati, Las Vegas, etc., etc.). You’d get two days of shooting with multiple models, MUA’s, hair stylists, studio lighting and mentoring for probably not much more than you paid April for your shoot. Also, April participates in a lot of JT’s shoots, especially in St. Louis and Peoria. St. Louis is in about three weeks. Peoria is usually in January (which means it's pretty much in studio). Sep 03 12 04:55 am Link Lee & camerosity I agree with everything you said: the shoot with Elon and her companion is one I would def. Have set up for tone mapping if I had known how; I practiced what Don outlined earlier, with some images in my boneyard and I saw a real improvement (although I need practise) in the detail and dimensionality. April is a fantastic model! Everyone keep her busy - I drove four hours to meet up with her because at that time I needed someone to reinspire me and she was the fix; my skills were the bottle-neck to outstanding images. I will look into that workshop. Megan is one of my faves Inspite of the raccoon effect, This has been a special image because you hopefully get a sense of her wonderful personality and demeanor. (We had just gotten kicked out of the IMA so we relocated to a college campus in the area) Bloomington photogs contact her. Sep 03 12 05:31 am Link Natural Body Photo wrote: Oh, I neglected to mention... April lives in Peoria (actually Creve Coeur, which is kinda a suburb of Peoria), and she does a lot of JT's workshops. If you do the workshop, shooting April is part of the deal and already paid for up front. Nov 13 12 10:48 am Link There are a lot of problems i'm seeing. You have a flatness issue as already said. They either lack a true highlight, shadow, or both which isn't working for most of your photos. I also don't really like your white balance in a bunch of the photos. The cool tone isn't working for me. On top of that I think you need to work better overall with posing your models/friend's/clients or finding the best moments and lighting to photograph them in. You have some odd face shadows in bright sun and some faces in the shade that are too dark. And for some reason you put these photos at the bottom of your profile page and not even in your portfolio. These are so much better and could be perfect with a few post process tweaks. https://lh6.googleusercontent.com/-vRWR … G_8274.JPG https://lh6.googleusercontent.com/-9gef … 81.CR2.jpg Nov 14 12 07:43 pm Link 1. Learn studio lighting ... it'll help your available lighting technique too. 2. Improve your photoshop skills ... the right 'tweaks' can make a HUGE difference. 3. Avoid shooting in the midday sun, it make for horrible shadows. 4. Get closer ... "If your photos aren't good enough, you're not close enough" - Robert Capa 5. use a reflector (below, to the side, behind), it'll put 'snap' into a some of your photos. (refer to #1). 6. Shoot at different times of day (including dusk and night) for different qualities of light. (refer to #1 and #3) 7. Shoot in different locations ... indoors (and near windows), rooftops, against interesting looking walls. 8. Study great photos carefully ... make a collection of your favorites and revisit them frequently ... imitate your faves, it's a fantastic way to learn. 9. shoot, shoot, shoot, shoot every every every day! Nov 14 12 07:56 pm Link |


