|
Forums >
Digital Art and Retouching >
Retouching techniques
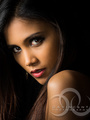
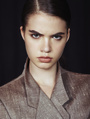
I want to know what the more advanced technology than the Dodge & Burn I think that the DB can not retouch the picture on the the skin texture (I'm writing in Chinese translated by Google +)     Jan 11 13 12:27 am Link Perfect skin, DB retouch could not using what techniques?       Jan 11 13 12:46 am Link Actually what you're seeing in these images are mostly a combination of extensive healing and cloning, dodge & burn and split frequency/bandpassing/etc (with also very competent color correction and treatment work). The images you posted in the second post are done over heavily with a split frequency technique. They are almost too unnatural looking to be honest. The first batch of images you posted are just very thorough and extensive dodging & burning (at a very small scale and on a global scale [carving]). It can be a lot of work but to get fantastic results like those you have to put in the time. Jan 11 13 01:58 am Link The first set of image is definitely of better quality, regarding the retouch only, than the second set of image. I think it's all dodge and burn as for the texture work, which makes it look much richer. Second set of image looks like a lot of blurring going on on the low pass layer when splitting the frequency (which Paul mentioned speaking about Band Pass), which makes it look like the texture is flying over the colors. It looks fake (plastiky), overdone and definitely not the type of file I would expect to find in high-end magazines and even less the type of files I would use as a reference if you are training (especially the one before last). That said, it is a tool that has its use when necessary. To retouch the skin, there are the main techniques that I use (in that order) : I start with texture, then light, color and sharpening. Because everything is non destructive (as everything is done on adjustment layers), you can work all of them at once (apart from sharpening which I always do at the end of my retouch). I mean by that working on texture, then light and go back to working on texture if you realise more work needs to be done on it. TEXTURE - Healing on the split frequency. Natalia Taffarel explains what this is here (also explains what band pass is at the end of the article) : http://nataliataffarel.tumblr.com/post/ … nd-cloning LIGHT - Dodging and Burning. A set of two Curves, one to darken, the other to lighten For me, this is the bulk of my work, that's where most of the magic happens. I start dodging and burning at a really low zoom level (20-50%, but that depends on your image resolution) and I zoom closer when needed. Best to start general and go specific, not the opposite, to avoid losing perspective. - Inverted high pass (only to go a little faster with some tasks, but should be use lightly as it can become really obvious). Again, Natalia Taffarel explains the technic here : http://nataliataffarel.tumblr.com/post/ … -high-pass There is another way to create the inverted high pass where you use the high layer of the frequency separation technic (instead of using the High Pass filter in photoshop). COLOR - Color Correction. .A set of 6 curves, one for each color (red, cyan, green, magenta, blue, yellow). A hue/saturation adjustment layer to desaturate the image totally. I invert the masks of all these layers, and I start painting white on the mask where I think it's needed. (same as dodging and burning but with colors). I find this technique really handy when I have color shifting from the dodging and burning. .a blank layer between the high and low layers of my split and I paint colors there. - General color correction with the different tools available, such as Selective Color, Curves (which is my favourite as you can tell) and Color Balance SHARPENING - High Pass filter or the high layer from a final split separation. What do you guys use? Jan 11 13 03:28 am Link 花一些時間在眼睛 Take some time with the eyes. These are really nice, except IMO the eyes. I have not spent any time, but I hope you can see the improvment. 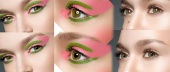 Barry Jan 11 13 04:22 am Link They look fakey if you ask me. But even though I like the second image on the first set it works there but i still would bring it back some. Chinese market like images really retouched so they will probably be fine with that style. Not a fan of second set it has a telltale definite filter look I can't imagine retaining a client with that style for too long. Jan 11 13 12:55 pm Link OTTO poste1 wrote: LOL, wow that is complicated. Jan 11 13 01:12 pm Link first set, too much, looks like CGI, second set better. Those looks can be achived with D&B but it will took you time. Jan 11 13 01:16 pm Link whatever it is, it's greatly overdone, IMHO Jan 11 13 01:55 pm Link Rg Retouching wrote: Its not complicated, its detailed. Jan 11 13 10:05 pm Link Careful..retouchers of those images are on MM. Jan 11 13 10:13 pm Link Avilio wrote: pleasure Jan 13 13 03:04 am Link Avilio wrote: haha, mine was detailed. It's gotten simpler as time goes on and you will be using few tools and have gotten your favorite adjustment layers for looks, etc, etc, you will see. : ) Check out Kruno's new freckle girl retouch on youtube, something like that but different we all have our favorite go to tools I like the clone instead of the healing. Learn to mask it is very important also. Jan 14 13 06:56 am Link Avilio wrote: I'd second that, it's a very instructive reply, I've been doing it ages and still learned a thing or two from the links! Thanks Otto Jan 14 13 09:26 am Link Holy details!  I personally dont like that D&B highlight look, it looks like blown highlights/over exposed to me. With most of my presets in LR and my post style I dont ever do much skin work. lol Im a pee on in a small town, high end is not needed for me. I do old school Gaussian blur when its needed! ha! Set at about 14, one layer, and kick back my fill/opacity. Then sharpen. I know its such a no no for a pro retoucher. Jan 14 13 10:55 am Link ".A set of 6 curves, one for each color (red, cyan, green, magenta, blue, yellow)." Otto, ¿podrías ampliar esto? ¿Sería una selección por color range y luego un manejo de luminancia y tonalizado individual? ¿Podrías obtener el mismo resultado con un Selective Color? Tengo un workflow bastante parecido, así quedaría el layers panel de un PSD: -Supporting Layers (Jonas Wendorf) -Enfoque (HP+levels+desaturation en softlight) -Curvas (contraste, luminancia general o sectorizado) -Color (Selective Color, gradient map, saturation layer, color layer) -Dodge and Burn (localizado con curvas Multiply/Screen + General con capa grismedio-softlight) -RAW (smart object) + Liquify filter -Camera RAW, corrección tonal (HSL individual), algo de spot removal (verificando la fuente y resultado con un preset prefabricado de alto contraste en ByN). En caso que tenga una capa dibujada (clonados, montajes) irían e una carpeta Extras entre el RAW y el D&B. Espero tus comentarios!  Dec 22 13 10:46 pm Link First set is good global DNB, great local DNB (maybe it is on purpose fake looking). Second set is great global DNB, but local gives it away because they abused the bandpass technique, thereby a bit of fake effect, but is by no means a bad retouch, quite the contrary. Still, these are all very good images and all are examples of DNB. You need to use a tablet. P.S. Everyone gave you good advice. I agree with everything.Dec 22 13 11:47 pm Link Lets learn English , I need also a teacher ))) Mw you are great for beauty fake , when you try to be natural ....things began to be harder no? So drop the IHP and do a selective DB , Im also fake btw Dec 23 13 03:40 am Link |