
Photographer
Diddy Visuals
Posts: 55
London, England, United Kingdom
I come across this pics on the net and would really love everyones suggestion on how it was achieved, especially the retouching. Notably, the sky and skin tone and the overally colour grading. Click on the link to view. Thanks guys http://fashiongonerogue.com/alessandra- … ver-story/
Retoucher
FLEXmero
Posts: 1001
Madrid, Madrid, Spain
Selective colouring. It is THAT easy. The valuable part is to choose the colors that look good.
By selective colouring I mean making decisions like: That sky would be this color. And then skin should resonate by being this other color. The way you make those things go the color you want them to is up to you.
It can be as simple as making adjustments like curves layers with the proper masks or you could even bring the image to photoshop with colors halfway done during the raw process.
Many here will give you complex explanations on how this is done. Some will be plausible ways, but I can assure that 99% of the times, this is done in the most archaic way: Curves adjustments and good judgement.
The text I wrote in bold letters is the answer to most "how was this done" posts.
In the industry, at least in EU, we like to use the word "edit" to the image selection process. For what you are asking about, we're not afraid to use the word retouching.

Retoucher
a k mac
Posts: 476
London, England, United Kingdom
It looks like unskilful compositing to me.

Photographer
M Pandolfo Photography
Posts: 12117
Tampa, Florida, US
It's very heavy on the d&b but save the image you're talking about and bring it into Photoshop and read the various levels. It's not selective color but rather color grading...in this case a very heavy blue-tone and magentas.
I'm sure you'll also find that there are no true blacks in the image.
Peano has a great tutorial on how to achieve the look...if I could find it (from another thread).
Maybe he'll pop in and link it.
Photographer
M Pandolfo Photography
Posts: 12117
Tampa, Florida, US
FLEXmanta wrote:
Selective colouring. It is THAT easy. The valuable part is to choose the colors that look good.
By selective colouring I mean making decisions like: That sky would be this color. And then skin should resonate by being this other color. The way you make those things go the color you want them to is up to you.
It can be as simple as making adjustments like curves layers with the proper masks or you could even bring the image to photoshop with colors halfway done during the raw process.
Many here will give you complex explanations on how this is done. Some will be plausible ways, but I can assure that 99% of the times, this is done in the most archaic way: Curves adjustments and good judgement.
The text I wrote in bold letters is the answer to most "how was this done" posts.
In the industry, at least in EU, we like to use the word "edit" to the image selection process. For what you are asking about, we're not afraid to use the word retouching. So you're answer to "How do I get this look?" is to say it was done with good judgement and curves adjustments?
Help the OP out if you know how it was done, by providing the steps necessary...not some obtuse response that doesn't remotely answer it.
Photographer
M Pandolfo Photography
Posts: 12117
Tampa, Florida, US
FLEXmanta wrote:
Selective colouring. It is THAT easy. The valuable part is to choose the colors that look good.
By selective colouring I mean making decisions like: That sky would be this color. And then skin should resonate by being this other color. The way you make those things go the color you want them to is up to you.
It can be as simple as making adjustments like curves layers with the proper masks or you could even bring the image to photoshop with colors halfway done during the raw process.
Many here will give you complex explanations on how this is done. Some will be plausible ways, but I can assure that 99% of the times, this is done in the most archaic way: Curves adjustments and good judgement.
The text I wrote in bold letters is the answer to most "how was this done" posts.
In the industry, at least in EU, we like to use the word "edit" to the image selection process. For what you are asking about, we're not afraid to use the word retouching. What selective coloring? How do you make the sky that color? What curves adjustments? What "proper" masks? What was done during the RAW process?

Photographer
RSM-images
Posts: 4226
Jacksonville, Florida, US
. "How was this VOGUE edit done" The edit was the determination to publish the image(s). The retouching of the image(s) is a different matter entirely.  .
Retoucher
ST Retouch
Posts: 393
Amsterdam, Noord-Holland, Netherlands
This is very simple color grading.
Like FlexManta said .
It is very simple open selective color adjustment layer and play there with colors from red up to neutral an black.
Special attention on neutral colors .
Later if is necessary just add curves adjustment layer.
These files are with very simple basic color grading.
By the way 4th file form above , file with fur , it is unbelievable what they made , so fake and amateur work with extracting , just have a look on fur and halo edges around her legs.
Regards!

Retoucher
Rafael_Alexander
Posts: 89
Atlanta, Georgia, US
Im amazed at how many times i see this combo of complementary colors stir up the same question. Im sure if you search the backlog of MM forums this question has been answered.....

Retoucher
Krunoslav Stifter
Posts: 3884
Santa Cruz, California, US
Michael Pandolfo wrote:
So you're answer to "How do I get this look?" is to say it was done with good judgement and curves adjustments?
Help the OP out if you know how it was done, by providing the steps necessary...not some obtuse response that doesn't remotely answer it. Omar is actually right. It is that simple but it's not that easy. Curves adjustments + good judgment.
Me, him or anyone can't give you step-by-step because output will always be relative to the input. Applying the exact same color toning to another image can be a disastrous and would not work. If you don't have a proper judgment about what colors go together in what context, something a forum post like this can't explain than you would most likely make a mistake even if we explained exact step-by-step on how to do it here. You need to know the why before you learn the how, and for the most part "how do I get this look" threads are made by people who don't understand the difference between a principle and a technique.
There are plenty of tutorials on how to use curves and what is the underlaying principle behind it. You learn that. You learn principles of masking and the techniques to apply them and than you need to posses a good judgment for the right color treatment in what context. Since context is everything. If you were to apply the same color relationships to another kind of image with a different type model, you would be wrong since it would not be appropriate even though the same colors are used. Not only do you need to know what colors match and or compliment each other you also need to know in what particular context.
Michael Pandolfo wrote:
Help the OP out if you know how it was done, by providing the steps necessary...not some obtuse response that doesn't remotely answer it. Sorry to say that we can explain it to someone, but we can't make them understand it.

Photographer
NothingIsRealButTheGirl
Posts: 35726
Los Angeles, California, US
Michael Pandolfo wrote:
What selective coloring? How do you make the sky that color? What curves adjustments? What "proper" masks? What was done during the RAW process? Find a photo with a blue sky
add a selective color layer
go to Blue, and pull cyan and yellow to the right and magenta to the left.
See if it works for you.
Photographer
Diddy Visuals
Posts: 55
London, England, United Kingdom
your right,maybe i didnt word the question quite well. Just want to know what tool was used to achieve the green sky, skin tone and the colour grading of the overall image and i take it from there. Thanks guys
Photographer
Diddy Visuals
Posts: 55
London, England, United Kingdom
your right,maybe i didnt word the question quite well. Just want to know what tool was used to achieve the green sky, skin tone and the colour grading of the overall image and i take it from there. Thanks guys

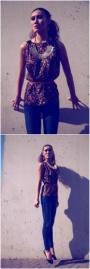
Retoucher
Peano
Posts: 4106
Lynchburg, Virginia, US
dayo awe photography wrote:
Just want to know what tool was used to achieve the green sky, skin tone and the colour grading of the overall image and i take it from there. Selective color for the sky and skin, curves for the overall grading. For others who might need a few more hints: Place sample points in these four places ...
![https://img820.imageshack.us/img820/6441/color1u.jpg]()
1 and 2 (darkest shadows and brightest highlights) will tell you there's been some cross-processing in curves. At 1, for instance, the values are 29.12.40, so pull up the shadow end of the respective curves to get those values. Similarly for the highlights, but you'll be pulling down the highlight ends.
At 3, the sky values are 74.138.138. Open a selective color adjustment layer and in the blues panel, adjust the red, green (magenta), and blue (yellow) sliders to hit those target. If you can't get all the way to them in the blues, then go to the cyans panel and adjust the same sliders.
For the skin tones at 4, use the same selective color layer but make adjustments in the reds -- and possibly the yellows, but more likely just the reds.
Try it with this image, which is pretty similar to the target image (note where I placed sample points):
![https://img692.imageshack.us/img692/9361/newcolor.jpg]()
You should be able to make it come pretty close to your target image just by nudging the RGB values in those four places:
![https://img35.imageshack.us/img35/8954/newcolor2.jpg]()

Photographer
Ruben Vasquez
Posts: 3117
Las Vegas, Nevada, US
Regarding the first image, if you look at the shadow cast by the model and compare that to the sky, it's obvious the two don't match. Looks like a circular gradient was used to vignette the top of the sky.
If you have an idea of what the colors are supposed to be, than it makes it easier to reverse engineer an images color grading rather than blindly pushing around color sliders. With that in mind, I'm guessing that's a Labrador dog the model is walking which means it's supposed to have a black coat. It's not. It's actually purple; a near even mix of red and blue. Skies are typically very blue and will have a little or a lot of red in them (for sunrise and sunset), or a little bit of green pushing the colors towards cyan during the day but in this case, it's far more green than it is blue. To correct this, all you would need is a simple "S" curve in the blue channel so in order to get this affect in the first place, reverse that. Make a curves adjustment layer and set the layer blend mode to color; bring the blue up in the shadows and down in the highlights. Likewise, do the same thing in the red channel to but to a lesser extent in the skies and more so in the shadows to give it that purple tone. Make some adjustments to the green channel to fine tune the affect.
Photographer
Diddy Visuals
Posts: 55
London, England, United Kingdom
Thanks peano, tried on the sample image and it worked. I know where to take it from now ....u rock man
Photographer
NothingIsRealButTheGirl
Posts: 35726
Los Angeles, California, US
dayo awe photography wrote:
Thanks peano, tried on the sample image and it worked. I know where to take it from now ....u rock man And what did you get when you did this:
The Space Cowboy wrote:
Find a photo with a blue sky
add a selective color layer
go to Blue, and pull cyan and yellow to the right and magenta to the left.
See if it works for you.
Retoucher
FLEXmero
Posts: 1001
Madrid, Madrid, Spain
dayo awe photography wrote:
your right,maybe i didnt word the question quite well. Just want to know what tool was used to achieve the green sky, skin tone and the colour grading of the overall image and i take it from there. Thanks guys See, that's the thing. It doesn't matter what tool they used to make that sky greenish. There are at least 10 ways to turn one color into another. If that is the type of insctructions you are looking for, then that means that you need to start basic, and then move on to using images like this one to develop a color style.
Peano did answer your question in a correct way. Ultimately you should be able to achieve the same results by eyeballing the colors. Sometimes the color reading in two different images will result in 2 completely different looks, as it happens with Peano's example. So, you will have to work by perception or feeling, if you like, to get a certain look.
The use of curves, the understanding of RGB and the control of light is an absolute must for anyone wanting to do this level of work.
Some years ago, I would also ask the same things you are asking right now. Now I find myself in the situation of retouching images like this particular one every day, and I know better than I did back then.
The immediate reply to almost everything colour related question can and should be "curves". Now, the question should ALWAYS BE: Where can I learn the use of curves to control RGB rather than how did they do it in this one image right here.

Photographer
JoshuaBerardi
Posts: 654
Davenport, Iowa, US
AKMac wrote:
It looks like unskilful compositing to me. \
Agreed.
Wardrobe Stylist
Accute Styling
Posts: 49
New York, New York, US
so interesting how many posts go off the rails with our community insulting one another.
if only we could all just be adults and respect other's opinions and ask questions instead of attacking.
Photographer
Star
Posts: 17966
Los Angeles, California, US
dayo awe photography wrote:
I come across this pics on the net and would really love everyones suggestion on how it was achieved, especially the retouching. Notably, the sky and skin tone and the overally colour grading. Click on the link to view. Thanks guys
http://fashiongonerogue.com/alessandra- … ver-story/ sometimes I just look at the sky and shout, really!
you come into my backyard, try and do something close to my style, and this is the crap you produce for 10x's what i make for a shoot.
Really sky! really!
Photographer
Oscar Partida
Posts: 732
Palm Springs, California, US
FLEXmanta wrote:
Peano did answer your question in a correct way. Ultimately you should be able to achieve the same results by eyeballing the colors. Sometimes the color reading in two different images will result in 2 completely different looks, as it happens with Peano's example. So, you will have to work by perception or feeling, if you like, to get a certain look.
The use of curves, the understanding of RGB and the control of light is an absolute must for anyone wanting to do this level of work.
Some years ago, I would also ask the same things you are asking right now. Now I find myself in the situation of retouching images like this particular one every day, and I know better than I did back then.
The immediate reply to almost everything color related question can and should be "curves". Now, the question should ALWAYS BE: Where can I learn the use of curves to control RGB rather than how did they do it in this one image right here.[/quo
+1
love
Retoucher
FLEXmero
Posts: 1001
Madrid, Madrid, Spain
AKMac wrote:
It looks like unskilful compositing to me. I doubt the job was based on compositing. I believe there are strong colorizations with very defined masks. Sometimes we work like that.
I agree that it's probably not the best of qualities, but you have to give some credit to the retoucher. Deadlines are often agains you, and you have to deliver. For instance, I am retouching 30 images right now, and have to deliver in 5 days (which in high-end is just CRAAZY). I can't screw up, cause the magazine is just as important as this one and the model very very famous. So, this is what happens: you concentrate on the main look and on delivering all images and overlook other things like detailed color deviations and masking, that you would pay far more attention if the deadline wasn't so tight.
Also, there's the changes. Sometimes, in terms of retouching quality, the best version of these images is the first one that the retoucher delivers. The image was considered finished by someone with good judgement. Then chaos kicks in when the editor and the photographer start asking for changes. Each change arrives closer and closer to the deadline. You are hours from delivering and still can't believe that it has been decided that all skies should be desaturated once more at the last minute. As a retoucher you know that desaturating a sky isn't that simple, as skin has to follow along. So you work and work and work, and then you just couldn't care less. You do as "they" say, deliver and brace for other retouchers critique  Then 2 months later you look at the images again to realize that the images work, and nobody cares about selections or detailed stuff anymore, only retouchers. Then 2 months later you look at the images again to realize that the images work, and nobody cares about selections or detailed stuff anymore, only retouchers.
Retoucher
a k mac
Posts: 476
London, England, United Kingdom
I agree that the use of composites would be surprising, but they certainly look like them - and bad ones too. Whether they are badly masked composites or just badly masked, they still look amateurish, which is surely inexcusable at this level, despite tight deadlines etc.
Retoucher
ST Retouch
Posts: 393
Amsterdam, Noord-Holland, Netherlands
AKMac wrote:
I agree that the use of composites would be surprising, but they certainly look like them - and bad ones too. Whether they are badly masked composites or just badly masked, they still look amateurish, which is surely inexcusable at this level, despite tight deadlines etc. +1
4th file from above with fur is the example of fake and amateur composite work.
Halo edges on fur, legs and hair without professional color decontamination with extracting plus strong colorization and the results are like this;)
There are no excuses here with deadlines or anything else, because for top professional high end retouchers this is funny job when they work with half body shots.
Real tigers in retouching can make at least 10-20 files per day like this with full high end manipulations.
And , without any dead pixel.
Dead pixels are for amateur retouchers.
Retoucher
FLEXmero
Posts: 1001
Madrid, Madrid, Spain
ST Retouch wrote:
+1
4th file from above with fur is the example of fake and amateur composite work.
Halo edges on fur, legs and hair without professional color decontamination with extracting plus strong colorization and the results are like this;)
There are no excuses here with deadlines or anything else, because for top professional high end retouchers this is funny job when they work with half body shots.
Real tigers in retouching can make at least 10-20 files per day like this with full high end manipulations.
And , without any dead pixel.
Dead pixels are for amateur retouchers. Wait a minute. Did someone just call Thiago Auge an amateur retoucher?
Again. Who knows what they made the retoucher do. That particular one does look like it's composited. Who cares! As a retoucher, sometimes you just have to do what they say. Specially when "they" means Vogue.
What's with the unsolicited critique? Rules stop me from criticizing you, yet you can criticize a real professional who isn't here to defend himself?
Once again you show your lack of knowledge about real life fashion editorial retouching. It doesn't really get more high end than Vogue, whether it's Vogue US, Paris, Brazil or even Ukraine. Vogue is vogue. It's all Condé Nast. 10-20 images per day is just inconceivable in high end editorial when images are done by just one retoucher. Please show an example of your work experience that shows the value of the statement you just made. One single comercial fashion editorial example. That's all I'm asking for to value your statement.
What do dead pixels have to do with all this? Is that really the criteria you think is used to assess the quality of a retoucher? Dead pixels??
And, by the way, the hard edge colourization thing is an intentional effect. Some take it to more extreme levels and in fashion world... we LIKE it.

Retoucher
Natalia_Taffarel
Posts: 7665
Buenos Aires, Buenos Aires, Argentina
FLEXmanta wrote:
Wait a minute. Did someone just call Thiago Auge an amateur retoucher? Lol... really? you're going to argue with armchair retouchers?
I'm not seeing the "bad composite" look - I'm noticing a strong contrast based in basic color theory taken to an extreme to create depth and a classic pin up painterly look
But what do I know? Even better what does the editor in Vogue knows?
Retoucher
Ornaments
Posts: 12
Brighton, England, United Kingdom
Retoucher
Rob Mac Studio
Posts: 1105
London, England, United Kingdom
FLEXmanta wrote:
What's with the unsolicited critique? Rules stop me from criticizing you, yet you can criticize a real professional who isn't here to defend himself? This is a good point, can anyone explain this paradox?
|


 Then 2 months later you look at the images again to realize that the images work, and nobody cares about selections or detailed stuff anymore, only retouchers.