
Retoucher
George Thomson
Posts: 699
Concord, California, US
Skin Smooth (free) version is limited to 8bit, RGB (Pro) version, works with 16bit, RGB, CMYK, and Lab the plugin is available for download through the Adobe Exchange: https://www.adobeexchange.com/ UPDATES: SkinSmooth 2.0 for CC ( http://goo.gl/uDdU4E ) - new: rasterize the corrective inverse wavelet to Dodge and Burn layers Free upgrade for current users: SkinSmooth 1.5 for CS6/CC ( http://goo.gl/TZZpBr ) ( available until August 20th ! ) - there are a lot of major improvements and bug-fixes - I strongly recommend you update asap if you are current user (it will not be possible after Aug 20th) The Trial versions are fully functional, but limited to 8bit, RGB. Full versions are compatible with 8/16bit, RBG/CMYK/Lab ("help" instructions are no more there, I assume you know all those techniques and this is only to help what you do - to do it faster and easier) ============================= OLD version ![https://lh6.googleusercontent.com/-Xwll4mJD1Lk/T-4rFJ0bBCI/AAAAAAAAGM4/Z9IooAht1-E/s341/SkinSmooth_v5.jpg]() ![https://lh5.googleusercontent.com/-oCs6hsOq6Zw/T-8Bjf2-8UI/AAAAAAAAGNk/anO31eplWyE/s600/SkinSmooth_v5_test.jpg]() Skin Smooth - manual: Optional: Skin Smooth - manual: Optional: You can start by making a selection of the areas you like to be corrected. Quick-mask is supported. Note: Preview is approximation of the chosen settings and shows the last created Skin Smooth layer (no matter which Skin Smooth layer is selected). Tip1: You can have multiple Skin Smooth layers at the same time. Dynamically adjust settings for each by first selecting (clicking on) the target layer. Tip2: If the result is not pleasing right away and you notice colour-bleeds or luminosity halos around the skin edges, press [halo] and using large hard-edged brush draw with close to (the inverted) skin colour below the masked skin layer (you can be sloppy). Tip3: Selecting "Force Skin" before you create new Skin Smooth layer, will avoid colour bleeds around skin-edges (however you can still use [halo] if necessary). [SKIN] - Selects skin tones. It can be used throughout your work-flow. (It is not required for creating a skin-targeting Skin Smooth layer). [NEW with Force Skin] - Creates new adjustable band-pass correction for the skin only. Creates better colour smoothing, but selection depends on standard skin-tones (mask is not adjustable). [NEW without Force Skin] - Creates new adjustable band-pass correction. Some discoloration halos may show, but can be manually corrected (see [HALO] button information). Selection depends on a mask based on standard skin-tones which is fully adjustable. [HALO] - In case any halos show around skin-edges (in any Skin Smooth mode), pressing [HALO] will create a layer below the skin-masked target. Draw with close to skin colours around where halos occur. [SPLIT] - Creates a 3-band image split in place of the Skin Smooth layer (based on selected values for band-pass). Any changes you have made below the Skin Smooth layer after it was created will be taken into account when you create a [SPLIT]. Adjustable approximation of the smoothing will be added as adjustable layer named - "Strength". Results will be the same whether the source Skin Smooth layer was created "with Force Skin" or "without Force Skin". Tip 1: Setting "Strength" to 0 will create exact split of the image. Tip 2: Manually setting positive contrast values in "Strength" layer (ex: Contrast: +25) will sharpen the image (based on the selected band-pass). [INFO] - Application information. [Rast] - Rasterizes Skin Smooth layer, adding a disabled mask for your convenience (select mask and paint with white on the areas you like corrected). STRENGTH - Strength-Colour controls colour blending depending on Strength-Luminosity (overall corrections). (i.e. if you have strength-lum at 0, strength-col will have no effect) Photoshop Bug [SPLIT]: When looking below 66% zoom level photoshop's proxy rendering is flawed. You may notice colour-shifts when the image is split in 16 bit CMYK, luminosity shifts in Lab-split and other inconsistencies with different type of images due to incorrect calculation in PS's preview. To be sure you see the real final result, check your image with at least 66% (66%~100%) zoom.
Retoucher
George Thomson
Posts: 699
Concord, California, US
This is automatic version of the Smooth Split.
As I imagine some would like to have the options of setting start and end of the frequency band, so since this is be separate and automatic it will give some choice depending on your needs.
I suggest you don't load both (SkingSmooth and SmoothSplit) at the same time, as it may not work properly.
This version is much more automatic, it automatically sets the latitude of the frequency band, and lets you focus more on the visual results, than on the "numbers".
Still, when you set the SkinSmooth it will give the target frequency radius in the layer's name so you have a better idea which layer targets what.
I made it much more easier to apply the chosen smooth levels selectively. After rasterizing just paint on the mask where you like this SkinSmooth layer to be applied.
hope you'll find it useful
cheers

Retoucher
Krunoslav Stifter
Posts: 3884
Santa Cruz, California, US
Cool!
By why the need to repost? The last thread was doing fine, wasn't it?
EDIT: Nevermind, I just read your second post.
Retoucher
George Thomson
Posts: 699
Concord, California, US
Krunoslav-Stifter wrote:
Cool!
By why the need to repost? The last thread was doing fine, wasn't it?
EDIT: Nevermind, I just read your second post. yes... I think this will be way too automatic for some people 
that's why I left SmoothSplit separately...
(and trying to avoid numbers and talk about "bands" and "splits")

Photographer
Jay Lee Studios
Posts: 1239
San Diego, California, US
so do i do the skin split then the skin smooth cause skin smooth alone isnt doing anything
Retoucher
George Thomson
Posts: 699
Concord, California, US
2020 Visions wrote:
so do i do the skin split then the skin smooth cause skin smooth alone isnt doing anything ... you mean besides smoothing the skin...
make sure you have the SkinSmooth.jsx in the right place
and that it is not a .txt for example
Photographer
Jay Lee Studios
Posts: 1239
San Diego, California, US
so the 2 files need sep. folders?
Retoucher
George Thomson
Posts: 699
Concord, California, US
2020 Visions wrote:
so the 2 files need sep. folders? make sure you have the correct files, with the correct extensions (.jsx and .swf) in the same folder:
[PS] \Plug-ins\Panels\PhotonicTools\SkinSmooth.jsx
[PS] \Plug-ins\Panels\PhotonicTools\SkinSmooth.swf
if you use SmoothSplit (the other plugin) just un-check it in the Window>extensions list (have only one of the plugins turned on at the same time)
Photographer
Jay Lee Studios
Posts: 1239
San Diego, California, US
both are in this folder
C:\Program Files\Adobe\Adobe Photoshop CS5\Plug-ins\Panels\PhotonicTools

Photographer
Normad2
Posts: 583
San Francisco, California, US
Does it need CS5? Does not seem to work on CS3 
Retoucher
George Thomson
Posts: 699
Concord, California, US
2020 Visions wrote:
both are in this folder
C:\Program Files\Adobe\Adobe Photoshop CS5\Plug-ins\Panels\PhotonicTools if you see the interface then you have loaded it
(make sure you don't use SmoothSplit)
If nothing happens when you press "Create" (after you have opened your image) then something is wrong with your JSX file (which makes the interface talk with PS)
so make sure the .jsx file is in place
(try downloading it again)
normad-moth wrote:
Does it need CS5?
Does not seem to work on CS3 I think you need at least CS4.
That kind of interface was not supported before then.
sorry
Photographer
Jay Lee Studios
Posts: 1239
San Diego, California, US
Photon Mayhem wrote:
2020 Visions wrote:
both are in this folder
C:\Program Files\Adobe\Adobe Photoshop CS5\Plug-ins\Panels\PhotonicTools if you see the interface then you have loaded it
(make sure you don't use SmoothSplit)
If nothing happens when you press "Create" (after you have opened your image) then something is wrong with your JSX file (which makes the interface talk with PS)
so make sure the .jsx file is in place
(try downloading it again)
I think you need at least CS4.
That kind of interface was not supported before than.
sorry smooth skin comes up im just not sure how it works and how do i do the skin split i cant see that one thats my issue i want to do a split then smooth
Retoucher
George Thomson
Posts: 699
Concord, California, US
2020 Visions wrote:
smooth skin comes up im just not sure how it works and how do i do the skin split i cant see that one thats my issue i want to do a split then smooth .. actually it's as simple as it can be.
1) press Create, this will make a new "skin-smoothing" layer
2) use the slider to remove from pores to blotches
3) repeat from 1) and select with the slider another problem part of the skin
4) you can go back to any "skin-smoothing" layer and use the slider again to re-adjust it if you want
5) when you are done, press "Rasterize" on each layer and then you can paint in the mask for selective skin-corrections
I made an example here:
https://www.modelmayhem.com/po.php?thre … st13915925
there is attached PSD that shows how you can use it
you can create a "skin-smoothing" layer above anything you want
select whichever layer you like, and everything below it will be used as a "source" when you press "Create".
Photographer
Jay Lee Studios
Posts: 1239
San Diego, California, US
yea but im talking about mainly the split so i can then do the smooth on it or does the smoothing one do it on its own?
Retoucher
George Thomson
Posts: 699
Concord, California, US
2020 Visions wrote:
yea but im talking about mainly the split so i can then do the smooth on it or does the smoothing one do it on its own? roughly speaking the splitting is done by the plugin itself
you don't need to do any splitting, just press "Create" and that is it
Retoucher
Blue Wren Creative
Posts: 154
Brisbane, Queensland, Australia
Just wondering if you know of any vesions or any similair plugins that would work for photoshop 7?

Photographer
Sean Baker Photo
Posts: 8044
San Antonio, Texas, US
Chennae wrote:
Just wondering if you know of any vesions or any similair plugins that would work for photoshop 7? IIRC, PS7 didn't support scripting, much less Smart Objects. The best you can do at that point is to use an action, such as those posted in numerous other threads (unless you want to get into OS-level UI scripting, which is a whole other monster).

Photographer
Ryan Bater
Posts: 3631
London, England, United Kingdom
Could we see an example if it in use before trying, thank you so much for the help!!
-Ryan
EDIT: never mind, read up! thanks mate.
Photographer
Ryan Bater
Posts: 3631
London, England, United Kingdom
I'm being a pain now.. how do you save the second file? there's no save as button, (A)!
Retoucher
George Thomson
Posts: 699
Concord, California, US
I don't know something similar for PS7. Ryan-Bater wrote:
I'm being a pain now.. how do you save the second file? there's no save as button, (A)! it looks like some browsers don't have much options for saving files...
here's a ZIP archive with both files. Download and unpack.
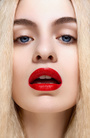
I am running some test to compare it with Portraiture, here are some of the results:
(if you can do better with Portraiture I would like to see that,
I have the PSD with the original file and with the SkinSmooth layers.)
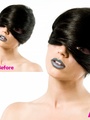
Edit:
this one may be a better example:
https://www.modelmayhem.com/po.php?thre … st13915925
![https://mobilefiles.ca/split/SkinSmooth-demo_small.jpg]()

Photographer
normad
Posts: 11372
Saint Louis, Missouri, US
Photon Mayhem wrote:
I think you need at least CS4.
That kind of interface was not supported before then.
sorry no worries ^_^
thanks so much for htis 
I just need to save money to get CS5 :S
or maybe I should wait for MS-CS6
Retoucher
PWF Retouch
Posts: 290
Jacksonville, North Carolina, US
I wish I could get these to work! I have CS5 and can't get them to show up. I know I'm adding them correctly. Are they for MAC only? I am using a PC

Photographer
Warren Joyce
Posts: 62
Perth, Western Australia, Australia
PWF Retouch wrote:
I wish I could get these to work! I have CS5 and can't get them to show up. I know I'm adding them correctly. Are they for MAC only? I am using a PC They work perfectly for me on PC.
Retoucher
George Thomson
Posts: 699
Concord, California, US
PWF Retouch wrote:
I wish I could get these to work! I have CS5 and can't get them to show up. I know I'm adding them correctly. Are they for MAC only? I am using a PC follow the instructions precisely
sometimes when you download the files when you save them their extension changes (the .jsx and .swf should not be changed)
I have added a "zip" archive with both files (the link is in the OP)
in case you have problems downloading the files directly, download the "zip"
unpack and place the file in the proper folder (check instructions)
Retoucher
Krunoslav Stifter
Posts: 3884
Santa Cruz, California, US
Photon Mayhem wrote:
I am running some test to compare it with Portraiture, here are some of the results:
(if you can do better with Portraiture I would like to see that,
I have the PSD with the original file and with the SkinSmooth layers.) I don't mean to cirque, but it's the wrong example that can be misleading.
This image, especially this crop of the image, doesn't need any skin smoothing plug in, or any automated skin smoothing at all. It looks like it's a portrait shot with shallow DOF. You don't apply the portraiture or any other kind of skin smoothing software, because most of the image has lost the details and is smooth already. More than it needs to be, actually. Instead you get rid of the small bumps in the skin. In this example healing tool would do the job just fine. Precise and selective D&B in combination with healing would give you the best results.
Such a shallow DOF where the nose gets blurred and the eye is sharp, is not the preferred way of shooting images where you test these kind of plug ins. Plus you need to get rid of all the bump, blemishes and everything else that doesn't represent uniform texture. And than you apply such a filter - carefully and controllably always with masks. Also, one radius for everything has been discussed before as a bad solution, because the skin is organic. And not only dose it have differently shaped skin pores, but they also flow in different directions. Depending of what area of skin you are working on. Treating it as uniform texture, will almost certainly give results that are not desirable in retouching. Treating it as such isn't much different than any of the taboo filters for blurring that ship along with Photoshop. And that kinda defeats the purpose of developing advance plug-ins such as Portraiture or your attempt.
It's about using the right tool for the job, and here you did an overkill causing collateral damages. You basically blurred out most of the good skin texture that was left after DOF. Can you imagine looking at this as thumbnail? It would look like somebody blurred the life out of the image.
If you want to kill the fly you use flyswatter or rolled up newspaper, you don't nuke the surroundings.
Just my 2 cents.
Retoucher
George Thomson
Posts: 699
Concord, California, US
Krunoslav-Stifter wrote:
I don't mean to cirque, but it's the wrong example that can be misleading.
This image, especially this crop of the image, doesn't need any skin smoothing plug in, or any automated skin smoothing at all. It looks like it's a portrait shot with shallow DOF. You don't apply the portraiture or any other kind of skin smoothing software, because most of the image has lost the details and is smooth already. More than it needs to be, actually. Instead you get rid of the small bumps in the skin. In this example heeling tool would do the job just fine. Precise and selective D&B in combination with healing would give you the best results.
Such a shallow DOF where the nose gets blurred and the eye is sharp, is not the preferred way of shooting images where you test these kind of plug ins. Plus you need to get rid of all the bump, blemishes and everything else that doesn't represent uniform texture. And than you apply such a filter - carefully and controllably always with masks. Also, one radius for everything has been discussed before as a bad solution, because the skin is organic. And not only dose it have differently shaped skin pores, but they also flow in different directions. Depending of what area of skin you are working on. Treating it as uniform texture, will almost certainly give results that are not desirable in retouching. Treating it as such isn't much different than any of the taboo filters for blurring that ship along with Photoshop. And that kinda defeats the purpose of developing advance plug-ins such as Portraiture or your attempt.
It's about using the right tool for the job, and here you did an overkill causing collateral damages. You basically blurred out most of the good skin texture that was left after DOF. Can you imagine looking at this as thumbnail? It would look like somebody blurred the life out of the image.
If you want to kill the fly you use flyswatter or rolled up newspaper, you don't nuke the surroundings.
Just my 2 cents. I agree that this is not the "Right image" for this... but it was the only thing I could find on the www.sxc.hu that was close.
I usually don't take pictures of people, but occasionally I do some portraits... I did go through my stock, but the ones that were appropriate, the models had really good skin/makeup so it was pointless to use them as an example.
If you have a good picture and can show a better use/example, please do.
I thought its better to have some example to compare with Portraiture, even if it's not the best one.
.. and if someone is able to make a video on youtube to show how it works it will be awesome

Makeup Artist
Sal W Hanna Designs
Posts: 581
Huntington Beach, California, US
Very interesting action/plug in. Don't think I'd use this much, but thank you for posting it.
Retoucher
Krunoslav Stifter
Posts: 3884
Santa Cruz, California, US
Photon Mayhem wrote:
I agree that this is not the "Right image" for this... but it was the only thing I could find on the www.sxc.hu that was close.
I usually don't take pictures of people, but occasionally I do some portraits... I did go through my stock, but the ones that were appropriate, the models had really good skin/makeup so it was pointless to use them as an example.
If you have a good picture and can show a better use/example, please do.
I thought its better to have some example to compare with Portraiture, even if it's not the best one. Have you tried, Forums > Digital Art and Retouching > Challenges, Contests, and Samples? With photographers permission, off course.
Retoucher
George Thomson
Posts: 699
Concord, California, US
Krunoslav-Stifter wrote:
Have you tried, Forums > Digital Art and Retouching > Challenges, Contests, and Samples? With photographers permission, off course. Of course, I asked a couple of photographers, but didn't get a response.
I did a skin-only retouch of one of them, and posted the link to the sample's thread...
Edit:
this one may be a better example:
https://www.modelmayhem.com/po.php?thre … st13915925
![https://mobilefiles.ca/split/SkinSmooth-demo_small.jpg]()
I'm sure others can do better using the tool, but this was again just inside 5min for a quick test.
Retoucher
Krunoslav Stifter
Posts: 3884
Santa Cruz, California, US
Photon Mayhem wrote:
I'm sure others can do better using the tool, but this was again just inside 5min for a quick test. I think it has the same effect (read problem), as Portraiture or IHP does when used with one pass, one radius value. It makes the skin look like plastic with pores or bumps. It's hard for me to put it in words and describe it.
So, I'm afraid manual labor even with this plug in is still necessary. Selective application with various radius values is the key.
Retoucher
George Thomson
Posts: 699
Concord, California, US
Krunoslav-Stifter wrote:
I think it has the same effect (read problem), as Portraiture or IHP does when used with one pass, one radius value. It makes the skin look like plastic with pores or bumps. It's hard for me to put it in words and describe it.
So, I'm afraid manual labor even with this plug in is still necessary. Selective application with various radius values is the key. actually it does have variable radii, they are just calculated dynamically.
when you move the slider from "pores" to "blotches" the target radius is calculated based on the size of the image, and from there the low and high frequency cutoff (which changes dynamically and gives narrow band towards the high-frequency and wide band towards the low-frequency)
it is far from perfect of course, but different layer of frequency smoothing is not a limitation
open the PSD and you can see that I have picked 4-5 different frequencies (target radius is in the name of the layer, and only applied them in certain places (although with a quite wide brush)
full resolution PSD (200Mb) :
http://mobilefiles.ca/split/SkinSmooth-demo.psd
I guess personal taste has to play in this too... what you talk about is "loss of Mid-frequency".
Retoucher
Krunoslav Stifter
Posts: 3884
Santa Cruz, California, US
Photon Mayhem wrote:
actually it does have variable radii, they are just calculated dynamically.
when you move the slider from "pores" to "blotches" the target radius is calculated based on the size of the image, and from there the low and high frequency cutoff (which changes dynamically and gives narrow band towards the high-frequency and wide band towards the low-frequency)
it is far from perfect of course, but different layer of frequency smoothing is not a limitation Yes, but somehow the final effect is still far from perfect. One thing I like about Portraiture is their auto skin tone mask feature. I think I read somewhere, that they used numerous skin tone values and let the program do the calculation based on the certain values that appeared on the largest numbers of images. And than they made that as the default values with some tolerances so now by default you get a decent skin tone mask. I hope that made sense.
SKIN TONES MASK
Portraiture provides a powerful skin tone masking tool with an Auto-Mask feature to allow for fine smoothening control across all skin tones present in the subject image. Auto-Mask recognizes the skin tone range of the image automatically and, accordingly, creates an optimal skin tones mask for that particular image.
Auto-Mask provides an excellent starting point for manually fine-tuning the automatic results, if desired. With many available slider controls and the two Color Picker tools, you can further fine-tune the Auto-Mask results to create the most optimal skin tones mask for your image and for your portfolio requirements.
Auto-mask is also very useful when batch processing. Because it creates the masks automatically based on the image's unique skin tone range, each image will be treated individually during the batch process, thus enabling an efficient workflow technique when choosing to apply detail smoothening only to skin tones for a large number of images.
Additionally, Portraiture allows for outputting only the masked range of the image to enable further adjustments to the skin areas.
http://www.imagenomic.com/pt.aspx?f=stm
Retoucher
George Thomson
Posts: 699
Concord, California, US
Krunoslav-Stifter wrote:
Yes, but somehow the final effect is still far from perfect. One thing I like about Portraiture is their auto skin tone mask feature. I think I read somewhere, that they used numerous skin tone values and let the program do the calculation based on the certain values that appeared on the largest numbers of images. And than they made that as the default values with some tolerances so now by default you get a decent skin tone mask. I hope that made sense.
SKIN TONES MASK
Portraiture provides a powerful skin tone masking tool with an Auto-Mask feature to allow for fine smoothening control across all skin tones present in the subject image. Auto-Mask recognizes the skin tone range of the image automatically and, accordingly, creates an optimal skin tones mask for that particular image.
Auto-Mask provides an excellent starting point for manually fine-tuning the automatic results, if desired. With many available slider controls and the two Color Picker tools, you can further fine-tune the Auto-Mask results to create the most optimal skin tones mask for your image and for your portfolio requirements.
Auto-mask is also very useful when batch processing. Because it creates the masks automatically based on the image's unique skin tone range, each image will be treated individually during the batch process, thus enabling an efficient workflow technique when choosing to apply detail smoothening only to skin tones for a large number of images.
Additionally, Portraiture allows for outputting only the masked range of the image to enable further adjustments to the skin areas.
http://www.imagenomic.com/pt.aspx?f=stm ... have you actually tried Skin Smooth?
personally I am quite happy with the automatic skin-masking it does
Retoucher
Krunoslav Stifter
Posts: 3884
Santa Cruz, California, US
Photon Mayhem wrote:
... have you actually tried Skin Smooth?
personally I am quite happy with the automatic skin-masking it does No I haven't yet. Waiting for you to stop updating and come out with final version.
Just kidding, I haven't tried it yet but I will sooner or later. The reason I mentioned skin tone mask is because it can limit the effect based on color and not the level of detail. So you can leave out the shadows or highlights from being effected. I have to take a closer look of your creatin to see if that works any better.
Retoucher
George Thomson
Posts: 699
Concord, California, US
Krunoslav-Stifter wrote:
No I haven't yet. Waiting for you to stop updating and come out with final version.
Just kidding, I haven't tried it yet but I will sooner or later. The reason I mentioned skin tone mask is because it can limit the effect based on color and not the level of detail. So you can leave out the shadows or highlights from being effected. I have to take a closer look of your creatin to see if that works any better. imho the masking is most important for situations when you have high contrast next to the skin (let say black hair) which will produce dark halos if you are correcting the low-freq. (and Skin Smooth masks skin quite well)
don't bash it before you've tried it.
I don't plan on any updates soon, so give it a go.
Retoucher
Krunoslav Stifter
Posts: 3884
Santa Cruz, California, US
Photon Mayhem wrote:
don't bash it before you've tried it.
I don't plan on any updates soon, so give it a go. I will, and I didn't bash it. I pointed out the obvious problem of all the automatic skin smoothing filters/plugins on the market including yours. I did that based on your examples, but don't worry I'll check it out sooner or later.
Retoucher
George Thomson
Posts: 699
Concord, California, US
Krunoslav-Stifter wrote:
I will, and I didn't bash it. I pointed out the obvious problem of all the automatic skin smoothing filters/plugins on the market including yours. I did that based on your examples, but don't worry I'll check it out sooner or later. the examples are more or less a matter of taste
as you get what you want (it's just way easier with this tool)
I'm sure you can get better results with more precise application of the smoothing layers if you want to (I made their application with a quite wide brush)... but in short - your concern that you need variable radius and skin masking is take care of.
Photographer
Marcus Turner Photo
Posts: 201
Chicago, Illinois, US
I'm completely new to photoshop and editing. I decided to dl the free trail and play around with it. One thing I would mention is that your instructions are simple and clear to person who is familiar to Photoshop. I have no idea how to export this picture or do preview the before and after images for a comparison.
However I find the program rather neat
Retoucher
George Thomson
Posts: 699
Concord, California, US
MT Imaging wrote:
I'm completely new to photoshop and editing. I decided to dl the free trail and play around with it. One thing I would mention is that your instructions are simple and clear to person who is familiar to Photoshop. I have no idea how to export this picture or do preview the before and after images for a comparison.
However I find the program rather neat don't worry, it's not a "free trail" it is completely free for ever.
Photographer
Marcus Turner Photo
Posts: 201
Chicago, Illinois, US
I hope to see a video tutorial about this because i'm completely lost
|


