|
Forums >
Photography Talk >
Lighting Setup Tutorials: basic to advanced
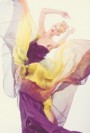
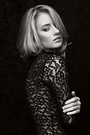
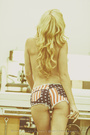
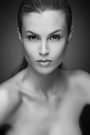
Mac Swift wrote: thanks, definitely something I will try. I don't have stip lighting though. Is there anything I could use instead that would give similar effect? I have a large softbox (4.5x6 ish I think), a 3' octobox a snoot, reflectors... Jan 28 07 11:49 pm Link One softbox, one nude model.  Jan 29 07 01:52 am Link Photography by Amber wrote: I don't see why you couldn't use the softbox as the main and the ocotbox below the model. You might have to feather it away from the model a bit but it should do the trick. The main thing is to watch the level of the lower light as you don't want to cast upward shadows on the model's face. Just play with it for a bit until you get the levels right. I am still playing with the setup and tweaking it as I really like the effect it has. I'll see if I have a full shot of the setup to show you the position of everything. Jan 29 07 12:45 pm Link Thanks so much! I really appreciate the feedback and everyone's tips on this thread. thanks a bunch!!! Jan 29 07 05:07 pm Link Ok...here is the set up. Excuse the quality as I cranked up the fill lighting in ACR to show the softboxes. I don't think I had the reflector set up in this shot. This gives you an idea at least :-)  Jan 29 07 09:36 pm Link fawk this is best thread every, exactly what ive been looking for! Definetly reassuring that I can get some solid shots with minimum lights but also that I need to save up all my nickles and dimes! Thanks guys! Jan 29 07 10:59 pm Link Window light. No supplemental, no reflectors.  Jan 29 07 11:02 pm Link  Two lights. One with a 30 degree grid to the right of the model (left in the photo) about 3 feet away aimed down from 8 feet up. Second hair/rim light from behind the model in the opposite direction with a 20 degree grid. The color on the door was ambient light from 3 60 watt light bulbs. I metered to the door and then adjusted the other lights accordingly. The final shot was aimed at a mirror and shot through the reflection with the arch of the mirror framing her. In reality, the model is about 3 feet to the right of me. Jan 29 07 11:23 pm Link Mark M Gong Photograph wrote: Wonderful image. Thanks so much for sharing! Jan 30 07 02:54 am Link bump it up! Jan 30 07 09:30 am Link Meehan wrote: Yup..! ;-) Jan 30 07 07:42 pm Link Bumpity bump bump!!!!! Jan 31 07 02:20 pm Link i made this on microsoft paint...sorry  makes my new avatar. Jan 31 07 02:42 pm Link Nikki MM#281091   anyone need the chimp? just send me your email  Jan 31 07 03:45 pm Link what a great beach shot Beach..of course the model ain't so bad herself Jan 31 07 03:50 pm Link This is by far the most useful thing on this entire website. There are some really fabulous images posted and seeing the light setup is great. Since a bump is needed I doodled this for everyone. Nothing fancy.  gets this  p.s. Brandon Ching... he's one bad mutha... Shut Yo Mouth! I'm just talkin' 'bout Brandon Ching! Feb 01 07 10:04 am Link and more?? Feb 01 07 01:35 pm Link Beach wrote: Awesome shot and awesome model! Feb 01 07 05:08 pm Link Ok, this one is inspired by that other thread. Questions, comments: welcomed. -D.   Yes, it's an Antoine Verglas rip off. So what? HAHAHA. Feb 01 07 06:59 pm Link how the heck do you rotate the items on here? all i can do is move them around. but i can rotate them. how do you do that? i bet it's hecka simple. i'm going to kick my butt if it is. anyone want to help? Feb 01 07 07:04 pm Link ASCimages wrote: on PC.. Ctrl+T Feb 01 07 07:38 pm Link Feb 02 07 12:17 am Link David Poata wrote: Good job everyone. This thread was a great idea. I hate to jump in so late but what were the settings for this shot? camera/lighting? Feb 02 07 12:51 am Link Lucaspictures wrote: *wacks head* just go with f8-f11, side light one stop over (the rest of this coment has been censored) Feb 02 07 07:06 am Link Lucaspictures wrote: 1Ds MK II, ISO 100, 1/160 @ around f8. Beauty dish set at f8, rim L bout 1/3-2/3 of a stop brigter than key L, Silver reflector underneath bouncing fill onto her profile Feb 02 07 08:45 am Link David Poata wrote: Thanks alot David. Feb 02 07 09:50 am Link Great Thread. Feb 02 07 02:12 pm Link Mark M Gong Photograph wrote: You lost me. lol Do you have a diagram? Feb 02 07 02:17 pm Link ArtChick Photos wrote: Ask and you shall recieve Feb 02 07 02:52 pm Link Nice work guys and thanks for the continued additions! Feb 02 07 04:17 pm Link :: Bumps :: These are great references. Thanks to the photographers who have contributed greatly to the lighting setup thread. I've got to get me some lights and apply the principles learnt. Feb 02 07 07:31 pm Link bump Feb 05 07 02:03 am Link ASCimages wrote: In PS go to FREE TRANSFORM. Feb 05 07 09:49 am Link Back to the top we go with this one. Feb 06 07 01:59 pm Link bump Feb 07 07 03:05 am Link This is a very simple outdoor setup from a recent shoot in the Arizona desert.   Feb 07 07 04:05 am Link Bump-bumpity-bump! Feb 08 07 09:43 am Link I've been playing with continuous lighting for the past few months. Here's are two lighting set ups.   And the results:   If you want to see more on the process, check this out: http://uvscphoto.blogspot.com/2007/02/u … small.html Feb 08 07 01:48 pm Link Feb 08 07 01:49 pm Link Here is the one from this past weekend.   Feb 08 07 01:51 pm Link |