|
Forums >
Digital Art and Retouching >
Blending tan lines
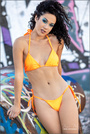
I imagine that this will be several layers using curves or color balance and masking in the portions that I need...but...I'd love to hear how other people do it. Full sized sample is available here: http://www.flickr.com/photos/8527271@N07/3802227297/  Obvious tan lines and glowing cleavage. It's my photo so go ahead and have some fun if you like. I have done NO editing whatsoever other than resizing and changing resolution for web posting. This was just a "hey dad, I wanna do some photos" night.  Aug 10 09 03:11 pm Link Wanted to give it a try. You will get much better from others but wanted to give it a practice. I left some trace of it I think. I wanted to keep it looking somewhat natural. I didn't try to tackle the shadow under her chin  Aug 10 09 03:45 pm Link yeah, I caught the shadow later. I didn't see it with the modeling lights. Bad on me! damn.... Aug 10 09 04:12 pm Link About five minutes of work painting on the low frequency layer. This kind of thing is where frequency separation really shines. Aug 10 09 04:21 pm Link Looking back, I should have painted cleavage. It looks a little flat now. Aug 10 09 04:24 pm Link (deleted post) I confused this thread for another where the topic creator said "have fun." I posted a version with painted in cleavage, but it seems inappropriate. Aug 10 09 05:49 pm Link mikedimples wrote: lol ur funny! Aug 10 09 05:54 pm Link J Nicholas Photography wrote: Use me next time I have no tan lines :} Aug 10 09 05:55 pm Link Ekaterina Vladi wrote: Aug 10 09 08:18 pm Link J Nicholas Photography wrote: Okay you don't seem the type to be offended by some cleavage. Here's some boob-o-rama. Aug 10 09 08:35 pm Link 1. Open a curves or levels adjustment layer. 2. Click on the curves icon so the layer mask isn't active (no white frame around the mask icon). Inside the curves or levels dialog box, double-click the white dropper icon to open the color picker. 3. Click the dropper on the tanned skin to set that color for the white dropper. 4. Close the color picker and click the white dropper on the untanned skin. 5. Invert the mask and paint with white to darken the white areas.  Aug 11 09 06:12 am Link Thanks for all the helpful responses! I'll try my hand it it tonight and see what happens. Super good tuff! Aug 11 09 07:13 am Link mikedimples wrote: Uhh nope...not easily offended at all... Aug 11 09 07:14 am Link mikedimples wrote: Mike: you are talking about working on a Low frequency LP filter layer, correct? Maybe I need to go read the "why LP sucks" thread again! Aug 11 09 07:15 am Link https://www.modelmayhem.com/pic.php?pic … up_id=&ua= Had to o it on this image. I simply created a new layer, and painted the tan line with a soft brush, sampling the skin color often (CTRL+ Click with the brush tool). Adding back skin texture: I then applied a bit of Gaussian blur to that layer. I click on the new layer in the layers palette and clicked select pixels. Go back to the background layer and hit Ctrl+J to create a new layer containing the original tan line area. Move that layer to the top and put it into softlight mode. Desaturate that layer Image Adjustments Desaturate Run Filters Other High Pass on that layer to bring back skin texture. Change Opacity on both new layers to taste. Aug 11 09 07:22 am Link wow, this one looks great!!! I want to know how to do this, can somebody give me the tutorial Aug 11 09 03:09 pm Link Peano wrote: That's not how I did the last one, but it's how I'll do the next one... Aug 13 09 09:28 pm Link Peano wrote: I finally got some time to try this out. So far this seems to be the easiest "quick and dirty method" to do it. Thanks again to everyone for the help. Aug 14 09 08:27 am Link mikedimples wrote: Great edit..Love the booby-illusion Aug 14 09 08:31 am Link Peano wrote: Amazing Peano.. Excellent edit Aug 14 09 08:33 am Link Just out of curiosity what is that on her right shoulder/neck? Aug 14 09 08:40 am Link Prose Photography wrote: It was jewels from the thingy (technical hairdresser term) holding her hair up. Aug 14 09 08:43 am Link Rafael Telles wrote: Many thanks. Aug 14 09 09:32 am Link |