Photographer
Jerry Bennett
Posts: 2223
Philadelphia, Pennsylvania, US
W.G. Rowland wrote:
Don't want to rerail my thread because it didn't have a major direction in mind and nice to see people actually discussing this stuff vs just dissing it..
But when we get worked out what works and doesn't with straight dodge and burn..
Do these techniques produce interesting and useful effects applied in other ways (for example) with other blending modes..
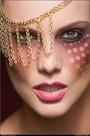
I'm hedging towards trying to figure out how to get some of those super-saturated color looks I'm seeing here and there.. (Yes, the much maligned Dave Hill is a good example). Try this: convert to LAB. Open new layer and set blend to Soft Light or Overlay. With this layer selected, go to Apply Image, set first parameter to "Background", and second to "a". Repeat with second parameter set to "b". You're applying Soft Light to the color channels and leaving the luminosity alone. And of course, you can mess with all the adjustments on this layer, too.

Photographer
Robert Randall
Posts: 13890
Chicago, Illinois, US

Bob Randall Photography wrote:
You know what might be interesting... Who uses hard mix and linear burn and pin light and linear light and difference and exclusion and how do they use them. I have never found a reason to use pin light or hard mix in anything. I've use exclusion and difference to make masks. A slice of oblivion wrote:
Linear Burn/Linear Light combined with a low opacity (15-20%) Photocopy layer can do some interesting effects to darker details or darker textures. I've also used these at times when oversharpening with High Pass to get something a little more extreme to look at. I'll check it out. I'm usually not pressing the images very hard so I don't have a familiarity with them.
A slice of oblivion wrote:
I've pretty frequently used the color selection tool in a field of leaves or flowers on some random midpoint, duplicated that later, applied a slight distortion or motion blur, then dropped it in as Pin light with a slight Hue shift to get something a little surreal without looking cartoony. Sounds like fun, I'll try it.
A slice of oblivion wrote:
I haven't really found a good use for Exclusion or Difference though. But I was playing around last night with some smoke effects and Difference made the smoke look more like flame. It was fun to play with, but I doubt I would use it for much though. If you make a highlight mask and a shadow mask, you can use calculations to create a midtone mask from the difference between the two aforementioned masks. It's a cool tool.
Photographer
Hipgnosis Dreams
Posts: 8943
Dallas, Texas, US
Bob Randall Photography wrote:
If you make a highlight mask and a shadow mask, you can use calculations to create a midtone mask from the difference between the two aforementioned masks. It's a cool tool. interesting...
I love this thread. I plan on bumping it well through the weekend. I have a ton of editing to do on Sunday and think I'll play around with a lot of these techniques then.

Photographer
RBDesign
Posts: 2728
North East, Maryland, US
Question for Bob Randall.
You have mentioned the use of apply image in a number of posts and once walked me through some image editing with it personally. PS and I are barely on speaking terms. Could you please please please explain to a complete idiot like me what does apply image do exactly?
Thanks
RB
Photographer
Perish Photography
Posts: 10835
El Paso, Texas, US
RBDesign wrote:
Question for Bob Randall.
You have mentioned the use of apply image in a number of posts and once walked me through some image editing with it personally. PS and I are barely on speaking terms. Could you please please please explain to a complete idiot like me what does apply image do exactly?
Thanks
RB The Apply Image command lets you blend one imageâs layer and channel (the source) with a layer and channel of the active image (the destination).
from adobe help 
Photographer
RBDesign
Posts: 2728
North East, Maryland, US
Perish Photography wrote:
The Apply Image command lets you blend one imageâs layer and channel (the source) with a layer and channel of the active image (the destination).
from adobe help Thanks for the quote but I can read too. I was asking Bob to explain it in a practical context, where he uses it and why. When I read that I am like, yea ok, why do we want to do this?
RB
Photographer
Perish Photography
Posts: 10835
El Paso, Texas, US
RBDesign wrote:
Thanks for the quote but I can read too. I was asking Bob to explain it in a practical context, where he uses it and why. When I read that I am like, yea ok, why do we want to do this?
RB i would think maybe you wanted something to look like a ghost? or perhaps a stop motion trail of sorts.
u know i think i know what your getting at, it just seems like a fancy copy paste command...lol
Photographer
RBDesign
Posts: 2728
North East, Maryland, US
Perish Photography wrote:
i would think maybe you wanted something to look like a ghost? or perhaps a stop motion trail of sorts.
u know i think i know what your getting at, it just seems like a fancy copy paste command...lol As I said Bob Randall has brought it up in a number of threads and actually walked me through and image edit that used it (He was sort of like ok do this, do that, do this). I didn't get it, still don't get it and would love him to grace me/us with a tutorial that makes the light bulb go on.
RB
Photographer
Jerry Bennett
Posts: 2223
Philadelphia, Pennsylvania, US
RBDesign wrote:
Thanks for the quote but I can read too. I was asking Bob to explain it in a practical context, where he uses it and why. When I read that I am like, yea ok, why do we want to do this?
RB Lots of reasons! My pink avatar? Shot it on a deep, saturated red background. I applied the red channel to a layer..... and I have a totally new pic!

Photographer
Tog
Posts: 55204
Birmingham, Alabama, US
RBDesign wrote:
As I said Bob Randall has brought it up in a number of threads and actually walked me through and image edit that used it. I didn't get it, still don't get it and would love him to grace me/us with a tutorial that makes the light bulb go on.
RB I could, but it'd be second hand at this point.. I think waiting for the horse to speak is best.
Photographer
MB Photography
Posts: 769
Paradise Valley, Arizona, US
Perish Photography wrote:
i would think maybe you wanted something to look like a ghost? or perhaps a stop motion trail of sorts.
u know i think i know what your getting at, it just seems like a fancy copy paste command...lol It's not just a fancy copy/paste command. Because you can control the source image and the source channel as well as the blending mode you can do all sorts of things, from creating masks to increasing contrast. Best thing is to experiment..
Model
dirtbikesctt
Posts: 102
Houston, Texas, US
Check out some of the art in my port! Hope you enjoy it.
Photographer
Robert Randall
Posts: 13890
Chicago, Illinois, US
RBDesign wrote:
Thanks for the quote but I can read too. I was asking Bob to explain it in a practical context, where he uses it and why. When I read that I am like, yea ok, why do we want to do this?
RB Suppose you have an image that is flat and lifeless. You could run a curve on it to increase contrast, but maybe you want to control specific ranges of tone such as highlight to get a more pronounced effect.
Create a curve layer and accept it without making any adjustments to the curve. What you see is a curve with a little white box next to it which is a mask layer. Click on the mask layer, then go to the upper level of the menu where it says "image/apply". You will get a little menu with options leading you to a mask. The source is the file from which you will choose either the luminance value of the file (RGB) or one of the three individual channels of the file. You be the judge of which one of the four choices you make. Set the blend mode to multiply and click OK. You now have a positive view of the image in gray scale in the mask for the curve. You could simply use this mask and make your highlight move in the curve, but you would find the mask isn't compressed enough and the curve effect would be fairly even across the entire file. So, do another apply in the same exact manner onto the mask of the curve and watch how the shadow areas plug up and the highlights isolate and stand out. Keep doing the apply in multiply until you are happy with the mask you've made. Now push the crap out of your curve and watch those highlights jump off the page.
You could load the luminance value of the file as a selection and fill the mask multiple times with black to achieve a similar effect in the mask, but the resulting mask wouldn't be as smooth as a mask made with the apply tool.
Photographer
RBDesign
Posts: 2728
North East, Maryland, US
Bob Randall Photography wrote:
Suppose you have an image that is flat and lifeless. You could run a curve on it to increase contrast, but maybe you want to control specific ranges of tone such as highlight to get a more pronounced effect.
Create a curve layer and accept it without making any adjustments to the curve. What you see is a curve with a little white box next to it which is a mask layer. Click on the mask layer, then go to the upper level of the menu where it says "image/apply". You will get a little menu with options leading you to a mask. The source is the file from which you will choose either the luminance value of the file (RGB) or one of the three individual channels of the file. You be the judge of which one of the four choices you make. Set the blend mode to multiply and click OK. You now have a positive view of the image in gray scale in the mask for the curve. You could simply use this mask and make your highlight move in the curve, but you would find the mask isn't compressed enough and the curve effect would be fairly even across the entire file. So, do another apply in the same exact manner onto the mask of the curve and watch how the shadow areas plug up and the highlights isolate and stand out. Keep doing the apply in multiply until you are happy with the mask you've made. Now push the crap out of your curve and watch those highlights jump off the page.
You could load the luminance value of the file as a selection and fill the mask multiple times with black to achieve a similar effect in the mask, but the resulting mask wouldn't be as smooth as a mask made with the apply tool. Bob,
First off, thank you very much. I am starting to see the light. So generally you use it to create masks using the same image as the source? Am I getting it or am I still lost?
RB
Photographer
MB Photography
Posts: 769
Paradise Valley, Arizona, US
Thanks Bob, I've been doing similar things by creating masks for my curves adjustments from my RGB channels but your method is much easier..
Photographer
Tog
Posts: 55204
Birmingham, Alabama, US
RBDesign wrote:
Bob,
First off, thank you very much. I am starting to see the light. So generally you use it to create masks using the same image as the source? Am I getting it or am I still lost?
RB You're getting it.
Photographer
Jerry Bennett
Posts: 2223
Philadelphia, Pennsylvania, US
Bob Randall Photography wrote:
Suppose you have an image that is flat and lifeless. You could run a curve on it to increase contrast, but maybe you want to control specific ranges of tone such as highlight to get a more pronounced effect.
Create a curve layer and accept it without making any adjustments to the curve. What you see is a curve with a little white box next to it which is a mask layer. Click on the mask layer, then go to the upper level of the menu where it says "image/apply". You will get a little menu with options leading you to a mask. The source is the file from which you will choose either the luminance value of the file (RGB) or one of the three individual channels of the file. You be the judge of which one of the four choices you make. Set the blend mode to multiply and click OK. You now have a positive view of the image in gray scale in the mask for the curve. You could simply use this mask and make your highlight move in the curve, but you would find the mask isn't compressed enough and the curve effect would be fairly even across the entire file. So, do another apply in the same exact manner onto the mask of the curve and watch how the shadow areas plug up and the highlights isolate and stand out. Keep doing the apply in multiply until you are happy with the mask you've made. Now push the crap out of your curve and watch those highlights jump off the page.
You could load the luminance value of the file as a selection and fill the mask multiple times with black to achieve a similar effect in the mask, but the resulting mask wouldn't be as smooth as a mask made with the apply tool. The beauty of PhotoShop.... You can use each of the tools, etc. in a multitude of ways......
Photographer
Robert Randall
Posts: 13890
Chicago, Illinois, US
RBDesign wrote:
Bob,
First off, thank you very much. I am starting to see the light. So generally you use it to create masks using the same image as the source? Am I getting it or am I still lost?
RB That is an accurate description of one way to use it. You can also use apply image to make collages using a different source file, as well as duotones and tinted images. When you invoke a mask as a filter in the apply image menu box, you can start to get really finite in your use of the tool. I would imagine Ravens Laughter and that Scott fellow are pretty handy with these methods. Once you understand Apply Image, Calculations become easy to use and it is an invaluable tool.
Photographer
RBDesign
Posts: 2728
North East, Maryland, US
W.G. Rowland wrote:
You're getting it. oooh oooh, hooray,
I am soon going from PS retard to PS special person. How about a remedial lesson on calculations or better yet gradient maps? or both?
RB
Photographer
Robert Randall
Posts: 13890
Chicago, Illinois, US
MB Photography wrote:
Thanks Bob, I've been doing similar things by creating masks for my curves adjustments from my RGB channels but your method is much easier.. Well, just to complicate matters a bit, remember you have at least 10 individual channels at your disposal when you use this tool. RGB, LAB, CMYK. There are some complex ways of creating HSB as well, which gives you 13 channels to play with.
Make a CMYK separation of a duplicate copy of a portrait using UCR and set the black generation to 40%. Convert the file to CMYK and inspect the black channel. It's pretty thin, right. Now go back to the original RGB image and click on the red channel to isolate it. Click on the eyeball next to the composite RGB channel to see the file in full color view. Remember, you are really only active in the Red channel. Go to the upper level menu and click on image apply image. Choose the duplicate file as the source and use the black channel to apply into the red channel. Watch as all the red contamination in the shadows simply vanishes.
13 channels + your imagination = priceless.
Photographer
Jerry Bennett
Posts: 2223
Philadelphia, Pennsylvania, US
Bob Randall Photography wrote:
Well, just to complicate matters a bit, remember you have at least 10 individual channels at your disposal when you use this tool. RGB, LAB, CMYK. There are some complex ways of creating HSB as well, which gives you 13 channels to play with.
Make a CMYK separation of a duplicate copy of a portrait using UCR and set the black generation to 40%. Convert the file to CMYK and inspect the black channel. It's pretty thin, right. Now go back to the original RGB image and click on the red channel to isolate it. Click on the eyeball next to the composite RGB channel to see the file in full color view. Remember, you are really only active in the Red channel. Go to the upper level menu and click on image apply image. Choose the duplicate file as the source and use the black channel to apply into the red channel. Watch as all the red contamination in the shadows simply vanishes.
13 channels + your imagination = priceless. Ooooh.... Something tells me I'm staying in tonight!
Photographer
5th Floor Photography
Posts: 745
New York, New York, US
Bob Thanks,
I've been stuck with this area of PS.
Since I don't have great PS knowlege I'll give a basic tip I knew but never used in PS.
Ctrl C to copy a selected mask
Ctrl V to paste said mask on another layer
Great when you combine with inverse selection
I had just never thought of using these basic shortcuts in PS

Photographer
epo
Posts: 6196
Columbus, Ohio, US
I have been dodging and burning using dodge/burn layers...
hit alt/new layer and set the new layer to dodge or burn and select the option to fill with the appropriate neutral color, then make a second layer for the other. I dodge and burn on each of these layers without actually touching the below image. Usually with a brush down at 4-5% opacity.
Photographer
Robert Randall
Posts: 13890
Chicago, Illinois, US
Eric Owens wrote:
I have been dodging and burning using dodge/burn layers...
hit alt/new layer and set the new layer to dodge or burn and select the option to fill with the appropriate neutral color, then make a second layer for the other. I dodge and burn on each of these layers without actually touching the below image. Usually with a brush down at 4-5% opacity. Did you mean linear or color burn, and linear or color dodge?
Photographer
RBDesign
Posts: 2728
North East, Maryland, US
Bob Randall Photography wrote:
Did you mean linear or color burn, and linear or color dodge? Damn it,
I want some more better on gradient map.
RB

Photographer
Brian Morris Photography
Posts: 20901
Los Angeles, California, US
Bob Randall Photography wrote:
You know what might be interesting... Who uses hard mix and linear burn and pin light and linear light and difference and exclusion and how do they use them. I have never found a reason to use pin light or hard mix in anything. I've use exclusion and difference to make masks. Try this guy http://www.bertmonroy.com/
Photographer
Kevin Connery
Posts: 17824
El Segundo, California, US
Bob Randall Photography wrote:
You know what might be interesting... Who uses hard mix and linear burn and pin light and linear light and difference and exclusion and how do they use them. I have never found a reason to use pin light or hard mix in anything. I've use exclusion and difference to make masks. Exclusion and Difference are more analytical tools than visual ones, though some graphics can use them for effect. I've never found (yet...) a photographic use for them other than to analyze or build masks. Hard Mix is handy for specialty posterization effects, but it's not something I've found useful for natural-looking photos.
Photographer
Kevin Connery
Posts: 17824
El Segundo, California, US
Another approach for dodging and burning, if you want to preserve detail, is to create a new adjustment layer (curves, levels, whatever) with no changes in it, then set the blending mode to screen (for dodging) or multiply (for burning). That avoids a lot of the color changes common when painting in overlay/softlight/multiply/screen/etc with black and white. By default, this will dodge or burn the whole layer; invert the default/automatic mask if you want to paint in detail instead.
If you actually want to use the dodge and burn tools, you might want to make a good B/W copy of the file first, and dodge/burn that layer (set to luminosity). This reduces the color shifting dodge and burn can cause while letting you set your D&B ranges (highlight/shadow/midtone), which isn't practical with other tools...directly.
If you find yourself using unmodified luminosity masks often, consider using the Blend If... options to emphasize shadows or highlights in the Gray channel. Or R,G, or B independently, if that's appropriate for the image. (I like masks, but if I can get PS to do the work for me without actually generating a 'real' one, I'll go with it.)
Photographer
IMagus Digital Fine Art
Posts: 545
Saint Paul, Minnesota, US
Some nice tips here that I will likely try but I'll be honest with you - I never use the dodge and burn except for a bit of a cosmetic touch up before I finish a piece. That's what I love about PS ~ it's like a artistic musical instrument that can be played many many different ways. Honestly my best technique is not to have one really but mostly it's a process of experimentation - the rest is instinct, knowing what looks great  .. but that's just me refreshing thread for a change that I actually found useful.

Digital Artist
Koray
Posts: 6720
Ankara, Ankara, Turkey
IMagus Digital Fine Art wrote:
Some nice tips here that I will likely try but I'll be honest with you - I never use the dodge and burn except for a bit of a cosmetic touch up before I finish a piece.
That's what I love about PS ~ it's like a artistic musical instrument that can be played many many different ways. Honestly my best technique is not to have one really but mostly it's a process of experimentation - the rest is instinct, knowing what looks great
.. but that's just me
refreshing thread for a change that I actually found useful. same here...some interesting approaches that are good to know
Photographer
remerrill
Posts: 3880
Arcata, California, US
W.G. Rowland wrote:
Doesn't do anything at 50%.. This is true of many of the blending modes.. The point Bob is making is that if you use a blank layer (no info) vs using one that's 50% gray.. It's treated exactly the same.. Making the 50% gray part a pointless step. The reasons for filling your adjustment layer, or preferably it's mask, with 50% grey... as I learned them... 1) The grey is neutral, no color shift 2) allows you to make both dodge and burn adjustments at the same time 3) you can see what you are doing, the grey gives you a background to see your brush strokes 4) if you want to soften your effects you can apply a blur and the grey gives you a neutral for you brush strokes to mix with.
I have done this several times, I've made a dodge and burn layer, made first pass adjustments, blurred for smooth transitions, added more strokes for detail dodge/burn... worked very well
Photographer
Fotticelli
Posts: 12252
Rockville, Maryland, US
A slice of oblivion wrote:
I haven't really found a good use for Exclusion or Difference though. Difference is good for lining up layers. Never found any use for Exclusion blending mode.
I figured out a kick-ass trick for super-sharpening using the Difference blending mode.
Photographer
Robert Randall
Posts: 13890
Chicago, Illinois, US
Fotticelli wrote:
I figured out a kick-ass trick for super-sharpening using the Difference blending mode. Share it!

Photographer
RoadRunner Photography
Posts: 5197
Belle Vernon, Pennsylvania, US
Bob Randall Photography wrote:
Share it! Bob, thank you for sharing your ideas, tips and thoughts here. Much appreciated.
Photographer
epo
Posts: 6196
Columbus, Ohio, US
Bob Randall Photography wrote:
Did you mean linear or color burn, and linear or color dodge? The tutorial I originally got this technique from (I dont remember where) said to use color burn/color dodge, I have never tried the latter, but maybe I should.
Photographer
Jedediah Speer
Posts: 386
Chicago, Illinois, US
Bob Randall Photography wrote:
Try "command, option, shift, tilde" to load a selection of the luminance value of the file and "command, delete" with black as the background color to fill a new layer. It will save you some time. I may be retarded, but the keystrokes are alot easier for me to follow... Or maybe I just dont know enough about Photoshop to begin with.
...for example, I dont understand how to "duplicate the lightness channel"...
Im not trying to hijack, I swear!
Photographer
Jedediah Speer
Posts: 386
Chicago, Illinois, US
Jerry Bennett wrote:
Try this: convert to LAB. Open new layer and set blend to Soft Light or Overlay. With this layer selected, go to Apply Image, set first parameter to "Background", and second to "a". Repeat with second parameter set to "b". You're applying Soft Light to the color channels and leaving the luminosity alone. And of course, you can mess with all the adjustments on this layer, too. Awesome!
Simple and straightforward enough to understand and broad enough that I can experiment with this as well!
Thank you!
Photographer
Jedediah Speer
Posts: 386
Chicago, Illinois, US
**sorry, duplicate post**

Photographer
Peace
Posts: 468
Dumont d'Urville - permanent station of France, Sector claimed by France, Antarctica
I've skimmed all of the posts and didn't see a reference to high pass filter in conjunction with blending modes. This example uses a copy layer with high pass filter set to maximum then blended with overlay. Other blending modes yield good results as well, depending on the image and the intended effect. ![https://img9.modelmayhem.com/070825/10/46d0451b56e29.jpg]()
Photographer
Jedediah Speer
Posts: 386
Chicago, Illinois, US
Bob Randall Photography wrote:
Suppose you have an image that is flat and lifeless. You could run a curve on it to increase contrast, but maybe you want to control specific ranges of tone such as highlight to get a more pronounced effect.
Create a curve layer and accept it without making any adjustments to the curve. What you see is a curve with a little white box next to it which is a mask layer. Click on the mask layer, then go to the upper level of the menu where it says "image/apply". You will get a little menu with options leading you to a mask. The source is the file from which you will choose either the luminance value of the file (RGB) or one of the three individual channels of the file. You be the judge of which one of the four choices you make. Set the blend mode to multiply and click OK. You now have a positive view of the image in gray scale in the mask for the curve. You could simply use this mask and make your highlight move in the curve, but you would find the mask isn't compressed enough and the curve effect would be fairly even across the entire file. So, do another apply in the same exact manner onto the mask of the curve and watch how the shadow areas plug up and the highlights isolate and stand out. Keep doing the apply in multiply until you are happy with the mask you've made. Now push the crap out of your curve and watch those highlights jump off the page.
You could load the luminance value of the file as a selection and fill the mask multiple times with black to achieve a similar effect in the mask, but the resulting mask wouldn't be as smooth as a mask made with the apply tool. Mr. Randall, you are a Scholar and a Gentleman.
This is FANTASTIC!!
Sooooo simple and you do a brilliant job in explaining WHY
[which, coincidentally, Is why I canât stand MOST PS threads].
Thank you soooo much!! I am ecstatic!
|


