|
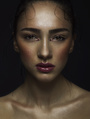
Hey! So I tried using the dodge and burn technique. Overall, I think this way is much more time consuming, however, it totally provides an amazing result. X3 So how do you think it went for my first shot? Ehh? Ish not terrible at least? XD Not orgasmic results, but still okay?  Mar 26 10 03:27 am Link Very well done  Mar 26 10 03:30 am Link Looks pretty good! There are a few spots that you missed though, particularly around her jawline, to the left of her lips, and towards the rear of her cheek near her hair. When I'm working on an image, one thing that I'll do is take a little break now and then (just a couple minutes), then come back to the image. As soon as I sit back down, I scan it with my eyes, and whatever they focus on, I fix. Try that out, and you may be surprised to see what you can find that you may have missed. Mar 26 10 03:31 am Link MEK Photography wrote: Ok, granted. But for her first attempt? I think she did great! Mar 26 10 03:36 am Link Looks good. Mar 26 10 04:37 am Link hey! Stop it! You'll put us out of work  Keep it up, you have the eye because of the make up thing. Remember hair is ALSO a part of the image. xx PS: When you're D&B it's good to have two adj on top, one for darkening/contrast and another to desaturate. This will help your eyes see imperfections better. One more thing. Always zoom out to make sure you're not only fixing small things, but also you're carving to get the skin tight. Keep it up! x Mar 26 10 05:11 am Link great work. you're getting compliments from VERY strong company. Another suggestion is to always step away from the image after a long d&b session. Sometimes you end up getting burnt out (haha, no pun intended) and get lazy in the other parts of the image. Also, use d&b for larger areas of adding contour to the face. study how light hits different planes of the face. and use large, soft strokes to add depth. I'll use like a 2% opacity large brush to dodge and burn different planes of the face. SLOWLY, build it up on a seperate d&b group. A little goes a long way. very well done! Mar 26 10 05:18 pm Link Natalia_Taffarel wrote: +1 Really good for your first attempt! As you get better you'll see more things that need fixing too. Mar 28 10 08:31 am Link Missed a few spots, but very good attempt. Keep it up. Love how you didn't flatten the face by being zoomed way in. It happened to me for the first time. I forgot to look at the image from the distance. And although, I clean the skin, it looked like flat surface. I have noticed that the best results comes from making three passes. First: Medium size areas. Second: Overall D&B for the shape. (some call it, "carving") Third: Zoom in and clear the little perfections. (Devil is in the detail) Mar 28 10 08:41 am Link MEK Photography wrote: Thanks! Good tips, makes a lot of sense. Coming back to it now a few days later, I see lots of little things here and there. XD Mar 29 10 11:30 pm Link Natalia_Taffarel wrote: Wow! It means a lot to get feed back from you! Your edits are amazing!!! Mar 29 10 11:33 pm Link Bret McMichael wrote: Totally. Makes sense, and really the same rule of "stepping back" and coming back with a fresh eye applies to pretty much all art and visual media. Haha, yet it's just so tempting to work hours on end without breaks. You just kinda, get in the zone. XD Mar 29 10 11:35 pm Link look great i think ur on the right track. could be better, ex. shadow @corner of her lip & cheek (her eye too) are completely removed...probably look better just lighten it up imo.Mar 30 10 12:14 am Link really good job its nice to see how fast you improve. thumbs up from me and keep it up! Apr 04 10 05:07 am Link looks good to me Apr 06 10 01:14 pm Link |