
Photographer
Maria Mylona
Posts: 171
London, England, United Kingdom
Hello everyone,
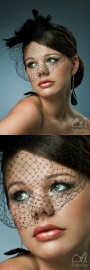
I have a question from a friend who is not on MM. He wants to create images before & after and he wants to recreate this mouse-over effect where you hover your mouse over the image and you get the after effect.
Do you know how this is done? Any tutorials you can direct me to?
Any help is much appreciated.
Thanks a lot!
Maria
Photographer
Maria Mylona
Posts: 171
London, England, United Kingdom
Thanks guys!!! much appreciated!!!

Photographer
ME_
Posts: 3152
Atlanta, Georgia, US
This was a feature in Photoshop CS2. I think they took out the direct code generator in CS3 (although you could still do it; it's just that PS didn't generate all the code for you automatically). Not sure if the automatic function was put back into CS4 or 5. But there are loads of tutorials and Javascript or CSS code generators that will help you. I kept CS2 just for this reason even though I used CS3 and then CS5 for normal PS work.
Or you can make an animated GIF so that no mouseover is needed.

Model
Maja Stina
Posts: 3622
Philadelphia, Pennsylvania, US
I know how to do this with CSS - It's really fast loading. Inbox me if you want to know. 
Retoucher
CM Retouching
Posts: 422
Paris, Île-de-France, France
There are several ways, here's the ones I know 1) using flash : not my advice as not everyone has flash on their device 2) using a javascript SCRIPT: can be really nice, advantage : you can download ready-to-use script 3) using javascript with html : the simplest way ! 4) using CSS 5) using photoshop to create an animated gif Tell me which one you want me to explain between 2, 3 or 5 (haven't tried others) Exemple of 3) http://clementmesnier.com/retouching/contact.php Exemple of 2) http://clementmesnier.com/retouching/redhair/ My personnal preference is 2) but it's less simple than 3) EDIT : correction on terminology for 3) as it uses javascript but without a script.
Photographer
Maria Mylona
Posts: 171
London, England, United Kingdom
CM Retouching wrote:
There are several ways, here's the ones I know
1) using flash : not my advice as not everyone has flash on their device
2) using javascript : can be really nice, advantage : you can download ready-to-use script
3) using html : the simplest way !
4) using CSS
5) using photoshop to create an animated gif
Tell me which one you want me to explain between 2, 3 or 5 (haven't tried others)
Exemple of 3) http://clementmesnier.com/retouching/contact.php
Exemple of 2) http://clementmesnier.com/retouching/redhair/
My personnal preference is 2) but it's less simple than 3) I would be interested in 5. As I have already a couple with other options but none with photoshop.
Thanks!!!
Retoucher
Solstice Retouch
Posts: 2779
New York, New York, US
CM Retouching wrote:
There are several ways, here's the ones I know
1) using flash : not my advice as not everyone has flash on their device
2) using javascript : can be really nice, advantage : you can download ready-to-use script
3) using html : the simplest way !
4) using CSS
5) using photoshop to create an animated gif
Tell me which one you want me to explain between 2, 3 or 5 (haven't tried others)
Exemple of 3) http://clementmesnier.com/retouching/contact.php
Exemple of 2) http://clementmesnier.com/retouching/redhair/
My personnal preference is 2) but it's less simple than 3) I really would be interested in knowing how to do the second method. I am not too literate in web coding etc however this fascinates me and I would love to know.
Retoucher
CM Retouching
Posts: 422
Paris, Île-de-France, France
Well for 5) the problem is that you have to specify the display time of the "before". So it's not interactive with the mouse and can be annoying for the viewer. Plus you'll lose image quality with the gif.
So if you're still interested I'll explain it when I get home from work. (basically you just need to use the 'animation' window)
-----------------------------------------------------
3) using HTML
really easy :
in the first src you specify the path for your photo 'before' (it can be a full path or a relative one)
onmouseover specify the path to your 'after' ( when you'll mouse over the 1st picture)
onmouseout specify the path to the photo you want to display when the mouse goes out of the photo. basically it's the same as the first one.
------------------------------------
2) I'll explain it later (at home) because it's a bit complicated. But the result is worth it.
Retoucher
CM Retouching
Posts: 422
Paris, Île-de-France, France
About 5) in photoshop 1- open both files in photoshop 2- copy paste one file above the other (select all-> copy or ctrl+a then ctrl+c) you have now 2 layers 3- window->animation 4- double click on 'background' to make it a layer (otherwise it won't appear in the animation window) 5- click on layer 0 (your before) and go to the end of timeframe to get a double arrow (like the one you get when you resize something) 6- drag it from the end to the middle = display the layer 0 from 0 to half the time 7- make the same step but inverted to get this : http://img27.imageshack.us/i/example2ud.jpg/ 8- now click on "layer 1" and then on play (at the bottom) : you've got your before/after 9- file-> save for the web -> gif 256 colors or more, loop forever result : ![https://www.clementmesnier.com/retouching/before-8.gif]() 10- you won the right to comment the retouch here : https://www.modelmayhem.com/portfolio/pic/23221880 11- thank you for your attention
Retoucher
CM Retouching
Posts: 422
Paris, Île-de-France, France
Solstice Retouch wrote:
I really would be interested in knowing how to do the second method. I am not too literate in web coding etc however this fascinates me and I would love to know. Unfortunately I haven't tried to automate it so basically you got to get dirty with the code (which isn't a problem for me as I'm a soon-to-be engineer)
so look at the code, if it sounds too complicated don't go further otherwise ask me and I can send you the folder that contains the images and the code, with some explanations.
view-source:http://clementmesnier.com/retouching/redhair/
( ctrl+u to see the source code of the page)

Photographer
AndrewFoto
Posts: 2366
Alexandria, Virginia, US
CM Retouching wrote:
There are several ways, here's the ones I know
1) using flash : not my advice as not everyone has flash on their device
2) using javascript : can be really nice, advantage : you can download ready-to-use script
3) using html : the simplest way !
4) using CSS
5) using photoshop to create an animated gif
Tell me which one you want me to explain between 2, 3 or 5 (haven't tried others)
Exemple of 3) http://clementmesnier.com/retouching/contact.php
Exemple of 2) http://clementmesnier.com/retouching/redhair/
My personnal preference is 2) but it's less simple than 3) MaryDoll wrote:
I would be interested in 5. As I have already a couple with other options but none with photoshop.
Thanks!!! To my knowledge, you cannot embed a function like mouseover into a GIF. I do a shit-ton of web development but I've never used or researched GIFs so I could be wrong. In PS, it generates the JavaScript for you to make it work.
I also do not know a way to do this in HTML without CSS or JavaScript. The example above uses a JavaScript function to change the image with the onmouseover handler.
The best way is to use CSS to keep it as cross-browser compatible as possible. Lots of people (and cheap pop-up blockers) disable JavaScript so going that route is not normally recommended unless you have to.

Photographer
Solstice Photo
Posts: 119
Houston, Texas, US
CM Retouching wrote:
Unfortunately I haven't tried to automate it so basically you got to get dirty with the code (which isn't a problem for me as I'm a soon-to-be engineer)
so look at the code, if it sounds too complicated don't go further otherwise ask me and I can send you the folder that contains the images and the code, with some explanations.
view-source:http://clementmesnier.com/retouching/redhair/
( ctrl+u to see the source code of the page) Thank you! I will follow up if I get lost along the way. I appreciate the time you are taking to do this, it will help a lot of people.
Photographer
AndrewFoto
Posts: 2366
Alexandria, Virginia, US
CM Retouching wrote:
@ Andrew foto
less than 2% of people have javascript disabled...
http://developer.yahoo.com/blogs/ydn/po … -disabled/
http://stackoverflow.com/questions/1211 … javascript
http://www.dator.fr/javascript-et-acces … pratiques/
I mean it's not like flash...
Oh and for 3) I didn't know that behind "onmouseover" there was some javascript.
and no gif can't do before/after based on the action of the mouse.
What is your proposition if we can't use flash neither javascript and still want to have a before/after based on the action of the mouse ?
Explain how do you do it with CSS because I don't know it... (unless it uses a trick with displaying the before as a background image and stuff like this but I didn't like this solution) In the head...
div.image
{
background: url(before.jpg);
empty-cells:show;
height: 50px;
width: 50px;
}
div.image:hover
{
background: url(after.jpg);
}
Then in the body...
The main reason I got away from JavaScript is because I had a few clients who did turn it off or had applications that turned it off and they were pissed about their site not working (assuming everyone else had the same settings of course). I figured that since CSS cannot be turned off, it was the better way to go.
Look at it this way: if 2% have it off but a few of those people are potential clients who get frustrated and walk away, it's a bad idea when other methods work without the hassle.
Retoucher
CM Retouching
Posts: 422
Paris, Île-de-France, France
Ok it's a solution (the one I was thinking)
and what if you want to display 30 before and after ? you are obliged to create one special class for each one of them? that's the reason why I don't like this solution.
Anyway now the OP has plenty of solutions, all have drawbacks, and she can choose the one she's the most confortable with.
Photographer
AndrewFoto
Posts: 2366
Alexandria, Virginia, US
CM Retouching wrote:
Ok it's a solution (the one I was thinking)
and what if you want to display 30 before and after ? you are obliged to create one special class for each one of them? that's the reason why I don't like this solution.
Anyway now the OP has plenty of solutions, all have drawbacks, and she can choose the one she's the most confortable with. I would do it with both classes and ids in the tags. Yes it can be more work but as with most coding, the proper way often is. I just do it because it works on IE, Firefox, Opera, Safari... just about every browser this side of Dillo.
And actually, when doing 30 at a time, I generate the CSS dynamically using a little createRollover() function I made. I spec the name, class, before, after, height, and width as values and it generates the CSS automatically. I then just call it by its ID in the body, modify common options manually in CSS via the class, and viola. Either that or XML works just as well.
Retoucher
CM Retouching
Posts: 422
Paris, Île-de-France, France
Ok that's smart. Not sure it's accessible to one who has no experience with coding though (same thing apply for my solution number 3)
Making sure every browser (and versions) is sooo annoying... at least now we can say byebye to IE6 support.
Photographer
AndrewFoto
Posts: 2366
Alexandria, Virginia, US
Ugh...IE6...
IE9 is the best thing Microsoft has done in a while. I can honestly say I do not develop for older Microsoft browsers except on critical functionality. It was utterly stupid that the #1 browser did not adhere to worldwide standards - likely because they wanted to hold on to that status. Every version broke half your code because of the way Microsoft decided to change things.
With Firefox beginning to severely errode IE's stance, Microsoft is finally coming toward these standards and CSS is not a complete PITA when it comes to many of the more obscure functions and features.
As for my technique, it is a bit more advanced and for obvious reasons, it only works on servers running a server-side scripting language like ASP.NET or PHP - I personally work with both and have found generating code on the fly works great for many situations. It can piss off the Google if you do it too often though.
Retoucher
Meerz Retouching
Posts: 149
London, England, United Kingdom
AndrewFoto wrote:
In the head...
div.image
{
background: url(before.jpg);
empty-cells:show;
height: 50px;
width: 50px;
}
div.image:hover
{
background: url(after.jpg);
}
Then in the body...
Thnx for that!

Photographer
IMAK Photo
Posts: 537
Eureka, California, US
MaryDoll wrote:
I would be interested in 5. As I have already a couple with other options but none with photoshop.
Thanks!!! 5 is one of the worst options listed. Gifs only have 256 colors and they tend to be much larger files than jpgs for photographs.
Photographer
AndrewFoto
Posts: 2366
Alexandria, Virginia, US
IMAK Photo wrote:
5 is one of the worst options listed. Gifs only have 256 colors and they tend to be much larger files than jpgs for photographs. Depends on the image. If there are large blocks of similar color, GIFs will almost always be smaller. GIF is also one of the few image types that permit animation without scripting.
I personally use PNG files where transparency is required and CSS for animation so I agree that they're more or less useless in today's world. If supported, you can also animage PNG files but this is not always cross-compatible.

Retoucher
Pari Retouch
Posts: 693
Nāshik, Maharashtra, India
CM Retouching wrote:
![https://www.clementmesnier.com/retouching/before-8.gif]() Aww thank you CM I wanted to do this from ages You are very smart in coding I see
Retoucher
CM Retouching
Posts: 422
Paris, Île-de-France, France
As a soon-to-be engineer I should better know how to code ^^

Artist/Painter
dave wright art
Posts: 128
Phoenix, Arizona, US
a gif before/after animation is your only choice if you want something to use in mm forums, or other places online that don't allow you to use custom code. but that's not a mouseover effect - the image change is based on time, not mouse behavior.
if you actually want a mouseover effect, where the image changes when you put your mouse over it, your best options are javascript or css.

Photographer
No One of Consequence
Posts: 2980
Winchester, Virginia, US
AndrewFoto wrote:
In the head...
div.image
{
background: url(before.jpg);
empty-cells:show;
height: 50px;
width: 50px;
}
div.image:hover
{
background: url(after.jpg);
}
Then in the body...
The main reason I got away from JavaScript is because I had a few clients who did turn it off or had applications that turned it off and they were pissed about their site not working (assuming everyone else had the same settings of course). I figured that since CSS cannot be turned off, it was the better way to go.
Look at it this way: if 2% have it off but a few of those people are potential clients who get frustrated and walk away, it's a bad idea when other methods work without the hassle. First off, CSS can be disabled or overridden by the user, so you can not rely on it. Furthermore there are lots of browsers in common usage that don't render CSS -- Googlebot, most importantly.
Your code works, but it's not search engine friendly and does not degrade gracefully. An improved version that fixes those issues would be:
.hidden { visibility: hidden; }
The other problem with it as written is that the URL is hardcoded in the css selector, so you can only use it for one pair of images. The simplest solution is to leave out the background in the image class and define them inline for each image. The other solution is to have something like:
#img1 { background: url(img1_before.jpg); }
#img1:hover { background: url(img1_after.jpg); }
#img2 { background: url(img2_before.jpg); }
#img2:hover { background: url(img2_after.jpg); }
...
...
Obviously you'd want to generate this programatically instead of hardcoding it.
Retoucher
CM Retouching
Posts: 422
Paris, Île-de-France, France
Thanks for the input Clyph. I'm not a CSS expert but it seems good.
Photographer
No One of Consequence
Posts: 2980
Winchester, Virginia, US
CM Retouching wrote:
Thanks for the input Clyph. I'm not a CSS expert but it seems good. No problem. I made a few small tweaks, so if you're copying it make sure you got them. PM me if you need any help.

Photographer
Halat Sophie Askari
Posts: 25
Oslo, Oslo, Norway
Is it possible to show a rollover image like that without having a webhotel? I use squarespace for my site, and there I have to have the image showing on my website at all times, but I really just want a link I can show the people I want.
Retoucher
CM Retouching
Posts: 422
Paris, Île-de-France, France
you can still use the html solution
Photographer
Halat Sophie Askari
Posts: 25
Oslo, Oslo, Norway
I figured it out with Squarespace.
Photographer
Maria Mylona
Posts: 171
London, England, United Kingdom
Apologies for not visiting the forum for some time!! I will try the photoshop version! It sounds easy! Thanks a lot CM Retouching wrote:
About 5) in photoshop
1- open both files in photoshop
2- copy paste one file above the other (select all-> copy or ctrl+a then ctrl+c)
you have now 2 layers
3- window->animation
4- double click on 'background' to make it a layer (otherwise it won't appear in the animation window)
5- click on layer 0 (your before) and go to the end of timeframe to get a double arrow (like the one you get when you resize something)
6- drag it from the end to the middle = display the layer 0 from 0 to half the time
7- make the same step but inverted to get this :
http://img27.imageshack.us/i/example2ud.jpg/
8- now click on "layer 1" and then on play (at the bottom) : you've got your before/after
9- file-> save for the web -> gif 256 colors or more, loop forever
result :
![https://www.clementmesnier.com/retouching/before-8.gif]()
10- you won the right to comment the retouch here : https://www.modelmayhem.com/portfolio/pic/23221880
11- thank you for your attention
Photographer
Maria Mylona
Posts: 171
London, England, United Kingdom
I would like to thank all of you for taking the time to reply! I have to say that I lost the game at some point with all the coding.
But like I said it is not really for me (though I will try the photoshop one just for the shake of trying)...
I am absolutely rubbish in coding and retouching .... (as well) hahaha.
But i love trying!
Thank you all for the help! I will forward the information to my friend who is doing those things.
Cheers and have a lovely evening!
Maria

Retoucher
Retouch by Sarra
Posts: 243
Fargo, North Dakota, US
CM Retouching wrote:
About 5) in photoshop
1- open both files in photoshop
2- copy paste one file above the other (select all-> copy or ctrl+a then ctrl+c)
you have now 2 layers
3- window->animation
4- double click on 'background' to make it a layer (otherwise it won't appear in the animation window)
5- click on layer 0 (your before) and go to the end of timeframe to get a double arrow (like the one you get when you resize something)
6- drag it from the end to the middle = display the layer 0 from 0 to half the time
7- make the same step but inverted to get this :
http://img27.imageshack.us/i/example2ud.jpg/
8- now click on "layer 1" and then on play (at the bottom) : you've got your before/after
9- file-> save for the web -> gif 256 colors or more, loop forever
result :
![https://www.clementmesnier.com/retouching/before-8.gif]()
10- you won the right to comment the retouch here : https://www.modelmayhem.com/portfolio/pic/23221880
11- thank you for your attention I think I might love you.. I've tried so many tutorials that haven't worked.
Retoucher
CM Retouching
Posts: 422
Paris, Île-de-France, France
Glad to help

Photographer
CandacePerry
Posts: 240
Dallas, Texas, US

CM Retouching wrote:
There are several ways, here's the ones I know
1) using flash : not my advice as not everyone has flash on their device
2) using a javascript SCRIPT: can be really nice, advantage : you can download ready-to-use script
3) using javascript with html : the simplest way !
4) using CSS
5) using photoshop to create an animated gif
Tell me which one you want me to explain between 2, 3 or 5 (haven't tried others)
Exemple of 3) http://clementmesnier.com/retouching/contact.php
Exemple of 2) http://clementmesnier.com/retouching/redhair/
My personnal preference is 2) but it's less simple than 3)
EDIT : correction on terminology for 3) as it uses javascript but without a script. WOW- I really like what you did with #2 (http://clementmesnier.com/retouching/redhair)!! Can you tell me the Javascript you used to get this affect? (Forgive me if this has already been mentioned above...scanned the thread and didn't see it)
Retoucher
CM Retouching
Posts: 422
Paris, Île-de-France, France
someone also asked it by pm so here's my answer : solution number 2 wrote:
Here's the script
http://www.clementmesnier.com/retouchin … reafter.js
Here's the css that goes with
http://www.clementmesnier.com/retouchin … eafter.css
Here's the html source code
view-source:http://www.clementmesnier.com/retouching/redhair/index.html
So in your folder with your images you must have these 3 files.
Then your before image must be the same size of your after image.
Here's the lines you can modify in the html file
$('.pic1').qbeforeafter({defaultgap:50, leftgap:0, rightgap:10, caption: true, reveal: 0.5});
$('.pic2, .pic3, .pic4, .pic5').qbeforeafter({defaultgap:20, leftgap:5, rightgap:10, caption: true});
let's say you want to add a 6th image the code would be
$('.pic1').qbeforeafter({defaultgap:50, leftgap:0, rightgap:10, caption: true, reveal: 0.5});
$('.pic2, .pic3, .pic4, .pic5, .pic6').qbeforeafter({defaultgap:20, leftgap:5, rightgap:10, caption: true});
-----------
for each image you have to precise the size like this :
.pic1 {width:467px; height:700px;}
.pic2 {width:600px; height:600px;}
-----------
and then when you want to use the photo you have to precise it again
by the way do you where I got the script ? It was used to show the before/after images of the japon nuclear disaster. I looked at the source code and adapted it for my purpose.
Clothing Designer
Burning Violet
Posts: 134
Bury Saint Edmunds, England, United Kingdom
I would suggest using the CSS version of this over the Javascript version as the CSS version is much faster to load.
Retoucher
CM Retouching
Posts: 422
Paris, Île-de-France, France
Burning Violet wrote:
I would suggest using the CSS version of this over the Javascript version as the CSS version is much faster to load. the output is not the same
with the css you have to go out of the image to see the before whereas with the javascript you can really play with the image : it's really interactive.
|


