|
Forums >
Digital Art and Retouching >
How to achieve this look/color??
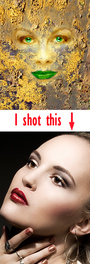
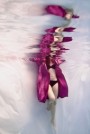
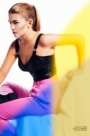
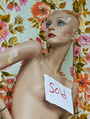
I'm going to do a shoot soon, and I want something like this: http://fashiongonerogue.com/doutzen-kro … e-sundsbo/ Anyone has tips on how to achieve this?? (both in post and on set..??) Jun 20 12 06:25 pm Link Working in Channels on skin tones. D&B to make more profound 3D effects. Desat the shadows a little bit. Harsh shadows tell you harsh lighting used. Jun 20 12 06:45 pm Link mshi wrote: What do you mean with "working in channels on skin tones"? Any specific tips on this? Jun 21 12 05:20 am Link Based on the slightly muddy, toned highlights, it looks like a flat color brushed in on a layer set to the "color" blending mode. On set, try misting the model with a glycerine/water mixture to get that wet sheen and specular highlights. Shoot with a hard light and make absolutely sure you don't blow your highlights. It'll look terrible if you have no texture in them. Jun 21 12 06:14 am Link Simen Platou wrote: for example, use a copy of the blue channel set it to luminosity blend mode. Jun 21 12 06:17 am Link in PP go into the selective colour option in the adjustments and play around a bit, also play with colour tone and photo filters. and probably some fake tans in there  Jun 21 12 06:23 am Link MB-2 wrote: Ah, great! Thanks a lot Jun 21 12 06:54 pm Link mshi wrote: Cool, thanks! Jun 21 12 06:58 pm Link REVIVE retouch wrote: Thanks! Jun 21 12 06:59 pm Link In post: a B/W adjustment layer in multiply mode. Tick the "tint" box and adjust to taste. Dodge for the highlights.  Jun 21 12 07:18 pm Link Peano, again shows his awesomeness Jun 21 12 07:23 pm Link I'd say use a gradient map on the skin. You can sample highlight midtones and shadows for the gradient from the skin, making the shadows a more rich chocolate color. Set the layer mode to color mode. As for the highlights, you can do it the amy dresser why by selecting the white with color range and painting with white layer, you can blur the layer if effect is too strong. in addition to what Peano said on having a b/w layer set to multiply. Also try duplicating the color layer, set that to black and white and blend mode to multiply. the photo will look really dark.. go to shadows and highlights and bump up the shadows, then adjust opacity to taste.. Jun 21 12 11:10 pm Link cinema photography wrote: As always. That's why I have saying that we should nominate him as MM member of the year. Jun 22 12 12:39 am Link Chuckarelei wrote: Agree! Jun 22 12 03:10 am Link MB-2 wrote: This is about right. You should really always try doing things in-camera. Jun 22 12 11:19 am Link Footnote: When using a B/W layer with tint in multiply mode, Portraiture will bring out the highlights. The contrast slider is the trick. (You can zero out all skin smoothing if you like.)  Jun 22 12 11:44 am Link I think the look you ask for is the same as this look from this album: https://www.facebook.com/media/set/?set … 632&type=1 I don't think you can achieve that by what peano says, as i have tried those tricks and havnt gotten there. I've been trying to achieve the look for a while. sadly enough i always see the pictures randomly posted by other people and not the retoucher, otherwise, i'd ask the person. Jun 24 12 09:25 pm Link FJMVA wrote: The skin tones look quite different to me. Jun 24 12 10:49 pm Link Peano wrote: That looks damn good! Jun 25 12 07:52 am Link Peano wrote: You think so? i just feel that the other image was over excessively burned thats all. Jun 25 12 11:16 am Link FJMVA wrote: That's a judgment call, of course. I was trying to get the color in the images the OP linked to. I think it comes pretty close. Jun 25 12 11:31 am Link Wow! This forum is a good one, lots of techiques i've never heard of. Thats an excellent piece of advice with the B/W set to multiply Peano, i've never used a B/W layer before. Can't say i've ever used a channel to alter skin tones either. Never heard of half this stuff.. now i've got lots to try out! I guess it's cause i usually try to make models less tan XD. Aug 09 12 07:58 am Link http://www.fashionphotographyblog.com/2 … s-vuitton/ this is behind the scenes kinda what your looking for Aug 09 12 06:47 pm Link Dec 04 12 12:35 pm Link MB-2 wrote: It looks like the skin is tinted orange - no other hue variation, then a hint of blue is introduced into the shadows. Dec 04 12 03:03 pm Link Try Hawaiian Tropic & blow. Dec 04 12 03:09 pm Link The post-processing looks like the Slickforce technique taught by Nick Saglimbeni. http://masteringretouching.com/ Dec 04 12 03:26 pm Link Simen Platou wrote: You want something like Doutzen...? (Whoe doesn't.. Dec 05 12 09:06 am Link FJMVA wrote: Yeah ... imo you CANNOT push light that hard in Photoshop (without it looking like digital art) - although what Peano's done is probably as close as you can get, digitally (without going to huge effort) Dec 08 12 06:59 am Link 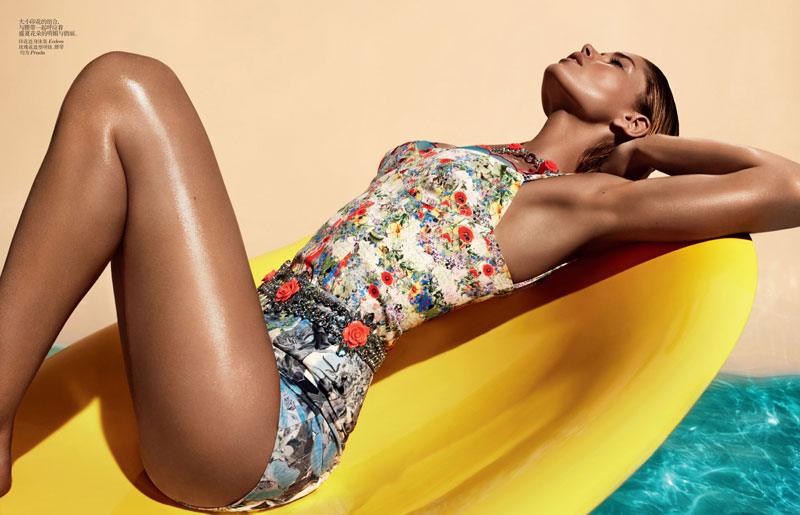 Uhm. Where's her right leg? Dec 08 12 07:50 am Link moving pictures wrote: I was just going to comment on that. heh Dec 10 12 01:04 pm Link  This its made with the gradient map tool Dec 10 12 03:46 pm Link moving pictures wrote: Darin B wrote:
Dec 14 12 06:23 pm Link try blending mode with linear burn on between 20-30 using the black and white channels. Play around with the channels ( red, gren, or blue )depends ont he pictures. But linear burn works. Jan 26 13 05:34 pm Link May 24 13 05:25 am Link moving pictures wrote: Her right arm is missing too. May 26 13 02:46 pm Link As for shooting: Obviously one strong light source to camera right, a little past (from the camera’s perspective) the model. It could have been shot outdoors or in an indoor pool with well-simulated sunlight. Because the sky shows in one of the photos lower on the page, I’d say outdoors is a fairly safe bet. If it was indoors, this raises the question of how the main (and probably only) light was placed. Since people don’t usually risk their lives and the life of the model by putting studio strobes with their insanely high-voltage capacitors in the water, I’d say that a speedlight held by an assistant, possibly on a pole would be a good guess. Because there is detail in the shadows, no matter where it was shot, there was a fill light or reflector. Light that harsh doesn’t leave detail in the shadows by itself. My guess is that a reflector was held by an assistant in the pool (or held just above the water by an assistant above the pool) to the model’s right (camera left). A reflector placed above the pool wouldn’t have filled in the shadows on the lower part of the model’s right arm as well. In fact, the lower part of her arm seems to be getting slightly more fill than her forearm. I doubt a glycerine-water mix was used. Glycerin and water looks more – well, watery. (Ken Marcus said Playboy photographers used one part glycerin to three parts water in a forum post a few months ago.) The glycerin causes the water to form droplets. I see no droplets. The model's skin has more of an oily look than a wet look. My guess is baby oil. May 27 13 12:32 am Link moving pictures wrote: Andrea Acailawen wrote: If you find one of the missing limbs, my guess is that the other one won't be far away. May 27 13 12:33 am Link If you read the link, the skin was prepared by Val Garland, meaning they used a bronze tinted self tanning lotion. I've seen muas use the bronzing lotions in demonstrations to give that tanned look, and there are many different shades that one can buy and use. I know that there's a bunch of techniques in photoshop to get this look, but I think the way they did it in the link, was to just use the lotion. Nicely done too. May 27 13 12:56 am Link One of the easiest ways to get similar color grading is to open new blank layer in photoshop , with eyedropper tool choose in swatches some darker/golden brown color , fill that blank layer with paint bucket tool , set blending mode to soft light and set opacity on that layer for example around 30%-50% depend from your taste. Add new selective color layer set colors to neutral and add black again depend from your taste if is necessary . This is simple color grading without to work on tens of layers with different blending mode , because for this level of work you don't need complex color grading which is very difficult . And don't forget on right leg Best Regards to All ST May 27 13 03:41 am Link |

 Hope it works out