|
Forums >
Photography Talk >
Catalog Photography
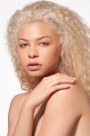
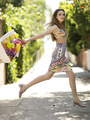
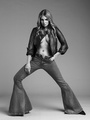
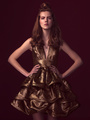
Hi there, So I have been contracted to an online shop to photograph the company's product for their business. I usually only do beauty work but this is a great opportunity for me. I know I have been over thinking this lighting It has to be much simpler than I am making it. I just wanna do the best job. It seems like every week when we get together to shoot my lighting changes. I can't get the same lighting as this. 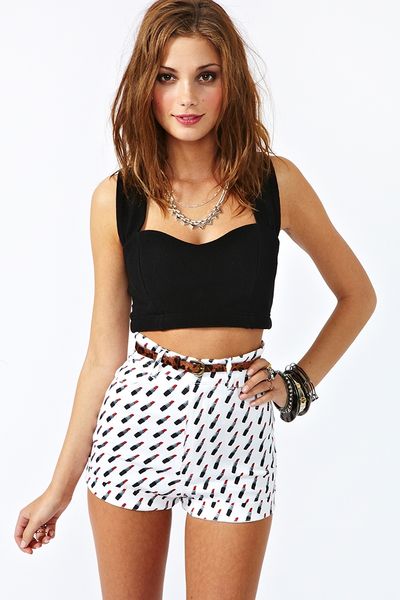 This is what the client wants. I'm working with a Canon 5D with a 28-135mm lens at f/3.5-5.6 Any advice or lighting diagrams would help greatly. Also the website my client is using has specific sizing. I have to make them "web res" but the images look so soft after all my photoshop work I'm not sure how to make them sharp without losing information. Thanks in advance. Joelle Sep 16 13 08:02 am Link For most catalog shoots 2 lights roughly 45degrees or more has always worked well. Sometimes the addition of a hair light can also work but in most cases better to keep a simple reproducible setup. I tend to use 2 86" PLM's most the time as faster to set up and I like the look but 2 softbox or umbrellas are usually the norm. Need to batch unsharp mask after resize action or if using Lightroom sharpen for web. I find Lightroom generally does a good job resizing in different sizes. Sep 16 13 08:20 am Link I shoot catalog work 4 times a year. My lighting setup for this customer: (2) AB800 w/med sb for white background (2) AB400 w/small sb on each side midway to b/g facing inward toward model for face on back shots (1) AB1600 w/octo for main With regard to lighting each to their own. We have this all dialed in, and it runs very smoothly. I use that scenario for shooting the model in the middle of the area, which gives us this.  We shoot 2 different scenarios. Model in the middle of the set, and model on the background with shadows If they want shadows, I turn down the b/g lights, take the octo off the strobe, and shoot with a 7" reflector only  - Sep 16 13 08:21 am Link That's a nastygal.com model so I assume the shot is from that site. They often have behind-the-scenes images and videos of their shoots, so you might want to check for that. You need to first create a clean white background with two lights (or 1 or 50) making a white background 3/4 to 1 full stop brighter than the model. Light the model with a large softbox (like 5ft tall) for flat, soft lighting. You can see that the light source is angled. Although its use is sacrilege on MM, you may may want to use a light meter to document your lighting setup--should they have you back and you want to repeat the look you created. Sep 16 13 08:30 am Link Sep 16 13 08:32 am Link Here is how I would handle the situation. 1. Study the lighting and determine it is pretty broad with a very even BG that does not bleed onto the model and is not even a pure white. 2. I would set up a very even lit BG at 1.5-2 stops brighter than model. 3. Then light model with extra large shoot through umbrella or even 10*10 foot softbox. HUGE broad light. Just a tiny bit of shadow. 4. Do a few test shots, Get client to write off!!!! 5. WRITE everything down!!! Write down your lighting schematic, write down your f-stops, write down how far the lights are from the BG, how far your model stands...Write it all down and map it out. 6. For jobs that are several days of identical products, I try to shoot them all in a row so that I just leave up my gear. Marking the floor too. But write it all down. 7. For web sized, try sharpening AFTER your size the web images... Sep 16 13 08:34 am Link Thank you all SO MUCH!!! Sep 16 13 08:34 am Link Oh and one trick I use for web work that has to be the same.... When I am cropping in Photoshop, I make a "perfect" crop/size template, of ONE image and then I KEEP that image open convert it to B&W. Then use that image as a template for all the others, just do my crop/resize, then slide the new image on top of the template image and make sure they line up correctly. Even just having it on your screen helps to make sure that all the images match. Sep 16 13 08:42 am Link I do that look all the time for a particular magazine. I use 2 15x60 stripboxes to light the white seamless (keeps the lighting on the background more even then a bare head. The model gets 5 lights: - hair light -30x60 softbox from the right (fill) -32in octobox from above camera , slightly left (fill) - 20x28 softbox from the floor at camera position (fill) -and the main is a small 30in silver umbrella on a boom that can move around, about 1 stop more then the fill lights. Sep 16 13 08:53 am Link Smedley Whiplash wrote: Can you show a result of that... would be fun to see after reading the diagram. Sep 16 13 09:04 am Link Robert Randall wrote:
Sep 16 13 09:20 am Link Smedley Whiplash wrote: Similar result can be achieved just by using reflectors. And I really see no benefit of having a hair light? What does it do in this instance? Correct me if I'm wrong. Sep 16 13 10:07 am Link There is no rule as to the number of lights used, I've read posts from 2 to 5. You can use 1 light or 10 it's the client who picks up on your style and pays. Sep 16 13 10:14 am Link Jakov Markovic wrote: On the first model it's coming in from the side a little, so it's catching the side of her hair, and defining her cheek bones, and a bit of the shirt (this one could be categorized as a "kicker", which is all a hair light really is). On the second model, it's just putting a little extra light into an otherwise dark hair part on a blond model. Sep 16 13 10:24 am Link The beauty of this setup is that if you just change the background, and the placement of the small main-light umbrella, you get a completely different look with the very same setup. (no hairlight on this one, see how it's texture disappears on top))  Sep 16 13 10:48 am Link Catalog work I use to do all the time, so first thing is to make sure your lights are constant, last think you need to deal with is fluctuating powers of light. You can get real close to what your client wants, my preference is 1 light with over size softbox ( this will depend on what the color the walls are and how close they are to the model) and 2 lights behind the model with a softbox on each side hitting the background. You might want two lights on the front but if you have a big enough softbox I would go with one, if you want you can do an overhead light but go easy on it. Be sure what ever lighting you choose make sure it is easily repeatable Sep 16 13 11:10 am Link Yen Studios wrote: I do this, as well as a light under the main for fill, and I tape the tripod down as well as a spot on the seamless. Once the client approves the first look everything after that is pretty easy and fast. Sep 16 13 04:18 pm Link The only sample I have on me right now is this:  It's not identical to what you are trying to recreate, because the client wanted a slightly "edgier" look here. Basically what I have in this setup is a very large brolly box camera right at 45 degrees, and slightly above. Then I've got a medium sized brolly box camera left and behind the model to give her some edge light. We tried to keep it soft but edgy. To recreate your sample I would simply take my light from the left, and move it from behind the model, to about 45-60 degrees in front and fairly flat. Stick to 2 lights on the model if this is your first time. It will keep things simple and easily repeatable. Throw 2 light onto the background to get it flat white, though some of my clients prefer a slight gradient as in the sample I've posted, so obviously work that out with your client. Hope that somehow helps! Peter House - Commercial Photographer Sep 16 13 08:42 pm Link I shoot tethered with Phaseone. Always white balance the background and try and come up with a number for a clean white and keep it there... Like 245,245,245 Sep 16 13 09:04 pm Link Smedley Whiplash wrote: I don't see it that way. The reference shot could easily have been achieve without a hairlight. Sep 17 13 05:51 am Link
Post hidden on Sep 20, 2013 12:38 pm
Reason: other Comments: Over-sized photos. Please feel free to post again, but use smaller versions or use links only. Sep 17 13 06:14 am Link Sorry for the oversize.... liking from the cloud and not at home for resizing. Damned MM for not accepting BB code resizing.... Sep 17 13 06:40 am Link Smedley Whiplash wrote: Tnx, I was referring to OP's image when I mentioned the hair light, it's more obvious in your images. Sep 17 13 07:50 am Link Here is an image from a fashion catalog shoot I did recently. I used the Bron Para 220 as the main light and a 60" white umbrella on both sides to illuminate the white seamless background. White countertop material on the floor. You can see a one minute video from this shoot to have a look at the lighting setup. fashion catalog shoot   Sep 17 13 08:36 am Link Dan Howell wrote: If you really think about it, all I'm doing is creating an even wall of fill light (but it's slightly weighted to one side) with an intent to replicate a partly cloudy or overcast outdoor fill (which still usually has some direction to it). The small umbrella then becomes the sun, and you move it around on the boom to create direction, and adjust it's power setting to increase or decrease the ratio (and adjust the camera aperture accordingly). It's harder to do that with a single fill light on a full length shot (but not impossible). Sep 19 13 09:48 am Link You can see how the studio lighting was done for this (BTS video) --- Bigger setup than you need. Alex Gaudino 'Destination Calabria' making of --- at 1:10 https://www.youtube.com/watch?v=iMLNs4N3gjc Sep 19 13 12:29 pm Link Fun thread! Sep 19 13 12:33 pm Link DennisRoliffPhotography wrote: Great shots and good to see images in print! Sep 19 13 12:38 pm Link Joseph William wrote: Thanks. Here are a couple images showing the lighting. Sep 19 13 01:34 pm Link JoJo Photo wrote: Sep 20 13 12:50 pm Link DennisRoliffPhotography wrote: Very seldom do I say much about other photographer's equipment, but I am officially envious of you bron lighting and if that is your studio very nice, and how do you control your lighting with all those windows? Sep 21 13 04:19 am Link OK. I'm not being rude when I say this, but the harsh reality is is that as a photographer you are nowhere near the level needed for a commercial photographer. Firstly no two lighting setups are ever the same, and only the most amateur of photographers would keep with the same lighting setup over and over again. You need to analyse what is needed on the day, what space you have, what you are shooting and keep making adjustments through the shoot as neccesary. A completely different lighting setup may be needed between tops or bottoms or between dark or light clothing for example. Some styles may also need different lighting weather the look is urban chic or high fashion. You need to know all this and work it out very quickly once you see what you have to work with. Get it set and get shooting. You should also be able to shoot perfectly consistantly, make changes and then when the client books you again a month later for another shoot setup exactly the same and shoot more images that look exactly the same. This is the reality of bread and butter catalogue work. You also shouldn't need to be doing 'photoshop work' especially if its making them soft. Sounds like you are doing something wrong there. I'd suggest going back to basics and not trying to run before you can walk. Paul. www.photographybyriddell.co.uk Sep 21 13 04:45 am Link Photography by Riddell wrote: Um...not to be rude, but the OP's work is better than the work displayed on your MM page. Were you only looking at reference photo? That is what the client (one which she already has, btw) sent her, not one she took. Sep 21 13 05:50 am Link Dan Howell wrote: I didn't look at any portfolios of the OP or anyone else. Nor does it matter whether or not I'm a good photographer or not. Or even if I am a photographer at all. Sep 21 13 06:27 am Link Photography by Riddell wrote: The problem is you're commenting on a thread where a few professionals, who do this, have offered help along with a few of us who have done this sometimes. Sep 21 13 07:15 am Link Photography by Riddell wrote: I have a beef with the lighting setup over and over again. Now I'm not great at this, although I can do some good stuff from time to time, and I keep going back to what works for me. I know there are a few ways to do things, but given a set of equipment and types of shots, lighting really boils down to some pretty simple setups - or at least it does for me. Sep 21 13 07:20 am Link JoJo Photo wrote: Smaller sized images that are re-sized from larger ones usually need a bit of sharpening. Not too big of a deal, unless you're doing something in post that makes them softer. Sep 21 13 07:21 am Link Yen Studios wrote: I rented the Bron lighting that I used for this catalog shoot. And this project was shot on location at Kent State University's Fashion School. Ambient light from the windows was controlled by shutter speed. I shot at f/11 and 1/200. You can see how the ambient light looked in the example below where the bron main light failed to fire, and one with the bron para 220. Sep 21 13 11:22 am Link Photography by Riddell wrote: Heh heh, you might want to rethink this statement. Sep 21 13 02:28 pm Link Photography by Riddell wrote: You ARE being very rude when you say that, and MM does not allow critiques except for in the critique forum. You declaring that you're not being rude doesn't make it so. Sep 21 13 04:28 pm Link |