
Photographer
Philip Brown
Posts: 568
Long Beach, California, US
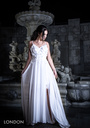
I'm kinda torn on this shot. I love the artwork framing the backdrop. But maybe the plants behind THAT, make it too busy...? ![https://lh3.googleusercontent.com/PNBhU63twIUnfyPnSjl0e3idr-7ko_Qllf3sdeSlwY85wid9uyIsn2AnDFhQ5va0LWNWifJ4AEED_8zrfXhra42DB4xsDOZXDC17xStEgKufYbK5u4VJFYWtqZdh5qrWpG0Jrcx7DvvvJCEfIWsJUnqj8W8s9pMG3iPThbtzImMjN4o5aJg253k67miRwRxOq0NCwGi-WkE54Em2fSldXTw1zlfHMEcr2bvYiPBh_ArgukG0r0eU7Ms6Zl2XqfnMii2QZvdsWNcN9esKIHeqSFWX43D_EuO6kDCzRXu1ASrIkVCqGDqu6M7GL3xd0esyCQQ4oLnxolegWb6S5D5N9SWwqLdX2t38chOO7hMNTppzj6RzDb3mqHCtr7C5WMhRPNCCTpqPVZiCinyZUBHptWNeludffxIqReg-4c-TIPNhVaww1VJwsZkArj-q51Qnt9QG-Ba0gi3YPjHjccWwZiBhk-uTedpiZMB29iRfqKxzt7p-o5h14qQBBD8nM-qPUTpi86DMvWWOEpMGh4DWN8wlJdADddDxRTixAPTp1bZ9JardbZUB3t4VZikEElG-7uOTy_ktGTKQiTGpJRrWxcppJK-WnF3h-qtfIHGMuGfS_ib4XqgJfoImfgWkKJVXXA4KWUpsmBNOR3QGze-qSvA969kR8Q5sOavTkatzbVFO5tQC1okd2WMY_6vNMap3MYgAboLclX0=s600]() (disclaimer: this is a reduced-size image for purposes of easy composition discussion. the full size looks crisper, and generally looks a bit better, colorwise.)

Photographer
Garry k
Posts: 30130
Vancouver, British Columbia, Canada
Its not bad
My eyes are drawn to 2 things though
The gap in the artwork above your subjects head - and the hair that has fallen into his eye
Both can be fixed

Photographer
Orca Bay Images
Posts: 33877
Arcata, California, US
IMO, it's ridiculously busy. It's far more intricate and way brighter than the model and his wardrobe. My attention is drawn to everything but the model.

Photographer
Camerosity
Posts: 5805
Saint Louis, Missouri, US
The eye is drawn to the lightest areas, the brightest colors and the contrastiest areas in a photo – all things being equal, in that order. That means they’re being led all over the image (except to the model).
The white lines are both the lightest and most contrasty areas.
Imo, the photo would have been better as an abstract without the model.

Photographer
FIFTYONE PHOTOGRAPHY
Posts: 6597
Uniontown, Pennsylvania, US

Learn how to use off Camera flash outdoors, a stop darker on Your background and the image would take on an entirely different look, imo.
It's about the Model.
fwiw

Photographer
64318
Posts: 1638
San Anselmo, California, US
The background in the photo is so unusual it does add interest to the whole image,, but it definitely detracts from the center of attention ( the model). Note the exposure on the model is spot on.. Too bad the the background is not out of focus.

Photographer
Shadow Dancer
Posts: 9779
Bellingham, Washington, US
My eye is drawn to the triangle on the upper edge with the patch of sky and brighter area of the tree.
Compositionally, it pulls me away from the subject.
Then, I look at the sides of the image. Eventually I get to the model, who is doing a pretty OK imitation of young Elvis in terms of his expression but should work on his sneer a bit.
In general, backgrounds should not distract unless they are the focal point of the image, that's why they are called backgrounds.
Photographer
Philip Brown
Posts: 568
Long Beach, California, US
Garry k wrote:
Its not bad
My eyes are drawn to 2 things though
The gap in the artwork above your subjects head - and the hair that has fallen into his eye
Both can be fixed How would you suggest the gap be "fixed" ?
photoshop blank sky?
random artwork similar to the sculpture?
Photographer
Philip Brown
Posts: 568
Long Beach, California, US
Camerosity wrote:
The eye is drawn to the lightest areas, the brightest colors and the contrastiest areas in a photo – all things being equal, in that order. That means they’re being led all over the image (except to the model).. So what do you do when the model is in a dark suit?
"contrast", right? .. so, I had a light background (artwork anyway) to contrast the model.
But... it doesnt work...
Maybe if the backdrop BEHIND the back art were white or something?
Photographer
Garry k
Posts: 30130
Vancouver, British Columbia, Canada
Philip Brown wrote:
How would you suggest the gap be "fixed" ?
photoshop blank sky?
random artwork similar to the sculpture? crop a bit lower and photoshop some of the artwork over the plants
Photographer
Philip Brown
Posts: 568
Long Beach, California, US
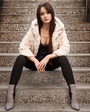
Thanks for the suggestion. And now for something completely different... ![https://lh3.googleusercontent.com/mXXt1eylXmV_0UxHa_ihsP8K2MdZ6Kt_xHhARXsUT-PCt3uEqj0NeS_2PUMDodaopO8T4cMJX4_z4Y2Y2MXxjPsBpRpdnWiadvzKqcANK4gZShvhZubrRWG7-GxIHcKjH4KMrDCNW0o8V9oTyZqUV8SPU1a3KTtnlZ_0r9Sp_LA8ocWAd1WHzJIx43Q-WwdnKeB-9cRKp8Evqo-gpFRYngycNSi29g3J3Dl1FYa0rbg31N9Xdb8CaY4HJjT3iG1QFIyr59K-ldnJh1RNQUQjkpicFSRoatcqrzWrw2cRMEGx7Q3ch0uyJEMDXhVSjRZPvsO3qWZ-ny3nIl-PUX__CurUKDFV3IWPYuvofKdp5t9WsBJU_gvpusR5dwqhDux7-mNyFOwbLMBIEUbon-Rm_sakyhBTgPlSzHUzgswotAm4W9sFqTZ02nvBg-t37S25qeTNI7V7rjMh3lxFhzxcTxJFWi7QsNKJJRR_jApKDh4L80fUcgB5gPIGx0hiCZkHXK556I3eqlgAz_3vmKO6GtlEG9fCRmr7cjNGCKVsniTS70CLb3OAhxAIvEX60o8ifT_LrftSRE0Oo-OPER8euchLdxiBFKNyI9oWGdQiFZAeyHmQ_B6LxL1C_glXoMVc_l2Gq8lX3TrVWWyrNQ=w600]() PS: this was a difficult shot to take. For those who are wondering about the choice of cropping... its not cropped at all  This was the only way I could get the desired angle of the building, with the model decently positioned in front of it. if I backed off a little, it wouldnt have worked :-/ I guess maybe a wider angle lens woudl have been better.
Photographer
Garry k
Posts: 30130
Vancouver, British Columbia, Canada
Philip Brown wrote:
Thanks for the suggestion.
And now for something completely different...
![https://lh3.googleusercontent.com/mXXt1eylXmV_0UxHa_ihsP8K2MdZ6Kt_xHhARXsUT-PCt3uEqj0NeS_2PUMDodaopO8T4cMJX4_z4Y2Y2MXxjPsBpRpdnWiadvzKqcANK4gZShvhZubrRWG7-GxIHcKjH4KMrDCNW0o8V9oTyZqUV8SPU1a3KTtnlZ_0r9Sp_LA8ocWAd1WHzJIx43Q-WwdnKeB-9cRKp8Evqo-gpFRYngycNSi29g3J3Dl1FYa0rbg31N9Xdb8CaY4HJjT3iG1QFIyr59K-ldnJh1RNQUQjkpicFSRoatcqrzWrw2cRMEGx7Q3ch0uyJEMDXhVSjRZPvsO3qWZ-ny3nIl-PUX__CurUKDFV3IWPYuvofKdp5t9WsBJU_gvpusR5dwqhDux7-mNyFOwbLMBIEUbon-Rm_sakyhBTgPlSzHUzgswotAm4W9sFqTZ02nvBg-t37S25qeTNI7V7rjMh3lxFhzxcTxJFWi7QsNKJJRR_jApKDh4L80fUcgB5gPIGx0hiCZkHXK556I3eqlgAz_3vmKO6GtlEG9fCRmr7cjNGCKVsniTS70CLb3OAhxAIvEX60o8ifT_LrftSRE0Oo-OPER8euchLdxiBFKNyI9oWGdQiFZAeyHmQ_B6LxL1C_glXoMVc_l2Gq8lX3TrVWWyrNQ=w600]() Not bad as well
but pay attention to the details
That tuft of hair falling down into his eye , the jacket collar , and the way his shirt is buttoned
Personally I would crop the shot something like this though - to bring more attention to the face
![https://photos.modelmayhem.com/photos/190120/15/5c45029166f88.jpg]()
Nice Natural Lighting Though - just a touch underesposed ( fixable though )
Photographer
Camerosity
Posts: 5805
Saint Louis, Missouri, US
Imo, you have two subjects that are competing with each other for attention. The greatest contrast is along the brightly-lit diagonal white lines, which contrast with the model (especially the model’s dark suit) as well as whatever is behind the white. However, since the white is lighter, the eye pays more attention to the white than the dark suit. Also, once you get to the suit, there is no contrast (in the suit itself), so the greatest contrast is outside the suit (and the model), which also tends to pull the eye away from the suit (and the model). Diagonal lines in a photo tend to make for interesting compositions – especially if a) the diagonal lines are made by the model (like the model’s arms and/or legs and/or b) the diagonal leading lines lead TO the model, possibly from different directions. In this photo, my eye begins in the vicinity of the upper left corner of the photo. Then it follows the (I don’t even know what the white things are) right past the model to the middle and lower right side of the photo – then to the lower left part of the photo and then back to the upper left. I can’t even tell anything about the artwork is. If it were more obvious what it is (and/or more brightly lit), you would have three subjects competing for attention. Imo, too many photographers try to place models in front of “interesting” backgrounds (or they pay no attention at all to the backgrounds). Most of my work is done in studio with either solid color or “Old Masters” backdrops that don’t compete with the model. If it’s a white or light-colored backdrop, the easiest way to focus more attention on the model is to use complimentary colors (in the wardrobe, possibly including the makeup) to make the colors pop. Colors that pop can also attract the eye to them When I’m shooting outdoors, I look for “dull” backgrounds that don’t compete with the model. Generally, these are backgrounds that are darker than the model and fairly uniform (and darker) in color and luminosity. Often, these backgrounds are in shade and are receiving less light than the model (as well as being inherently darker). With a dark suit, you would want a background that’s lighter than black (but not necessarily bright), to keep the suit from merging with the background. If the background is trees, for example, I look for slices of the background where the sky (which is much lighter) isn’t showing through the dark branches of the trees and is not creating contrasty patterns of splotchy light. Another way is to make the background overall lighter than the model (like the sky, for example). If the background doesn’t have “patterns” (like very prominent clouds) and is more like a white backdrop in studio), the eye doesn’t spend a much time there – especially if it isn’t TOO bright. I try not to shoot outdoors when the sun is overhead in the middle of the day. Bright sky makes for very harsh light with deep shadows (which generally is particularly unflattering to female models). I know a fashion photographer in Florida who typically takes a car (often with the model and MUA) to an outdoor location shoot, followed by a van full of equipment (including high-power, battery-powered studio strobes) and four assistants. It takes four assistants to simultaneously raise four 13-foot (or taller) light stands, each attached to corner of a 9x9-foot Scrim Jim over the model to diffuse the harsh light. If it’s windy, each assistant may each holding onto one of the light stands throughout the shoot to prevent the scrim from taking off like a sail in the wind. Unless the background is an essential ingredient of the photo (like a building that’s part of the “story”), throwing the background out of focus (the more out of focus the better) can help. If the background is “busy,” using a longer lens (like a 70-200mm lens) makes it possible to use a narrower “slice” of the background, which makes it easier to eliminate splotchy light (sunlight coming between tree limbs) and light-colored areas like sidewalks or white buildings. When you have a busy background (not necessarily right behind the model but farther away), this allows you to move around and find the least busy “slice” of background -- and then throw it out of focus. Once I shot a model in a 19th-century warehouse. On the first floor of the seven-story warehouse, the east and west walls had been removed, leaving only the square (and graffiti-covered) columns that support the structure. That meant that, at either the east or west side of the warehouse (depending on the time of day), the model could be lit by the open sky while being shielded from direct sunlight. One of the columns on the east side had particularly interesting graffiti, a greenish picture of a woman, painted on it. The green and the model’s wardrobe (which included violet/purple tones) were very close to complimentary colors, which made the colors pop. I could either shoot into the warehouse (which would result in a VERY dark and muddy background, since very light reaches the interior of the warehouse), or I could shoot from inside the warehouse toward the outside (east of the warehouse). Across the street was the first electrical power plant ever built in St. Louis, a stone building with large, arched windows in the front of the building, that had been vacant for decades. The sunlight was coming from the west, passing over the warehouse. The sun was bright, and it hit the windows in such a way that there was no way to avoid blowing them out. I used a wide aperture to make sure that the power plant was not in sharp focus. In post, I darkened the building and the sky, using a curves adjustment layer. I made the windows as dark as I could by using a curves adjustment layer (masked from everything but the windows) and duplicated that layer seven times, so that the windows became light (not quite medium) grayish instead of white. The photo was shot in mid-afternoon, but with the building and the sky darkened and the windows no longer stark (and blown-out) white, it appears to have been shot at night (with the windows, which were now gray, appearing to have been lit from the inside). If you’d like to see that photo (which, btw, is 18+ and is in one of my other portfolios), you can find it here: https://www.modelmayhem.com/portfolio/pic/35883008 Sometimes you have to get creative to keep the background from stealing the show.
Photographer
Garry k
Posts: 30130
Vancouver, British Columbia, Canada
Camerosity -If You are interested in a critique of said photo- I would love to give you one
Photographer
Camerosity
Posts: 5805
Saint Louis, Missouri, US
Garry k wrote:
Camerosity -If You are interested in a critique of said photo- I would love to give you one Go right ahead. Obviously you have something to say.
Photographer
Garry k
Posts: 30130
Vancouver, British Columbia, Canada
Camerosity wrote:
Go right ahead. Obviously you have something to say. Only because You had so much to say about it
Sorry though - It does not look real to me ( and the colors are not balanced )
Photographer
Camerosity
Posts: 5805
Saint Louis, Missouri, US
Garry k wrote:
Only because You had so much to say about it
Sorry though - It does not look real to me ( and the colors are not balanced ) Thank you.
You should see MY list of 26 areas where I need to improve this year. (Well, maybe you shouldn't. lol)
Photographer
Photo Art by LJ
Posts: 224
Las Vegas, Nevada, US
Unfortunately in that photo, there is a 'halo' around the model. Like Gary said, it doesn't look natural.
Photographer
Garry k
Posts: 30130
Vancouver, British Columbia, Canada
Camerosity wrote:
Thank you.
You should see MY list of 26 areas where I need to improve this year. (Well, maybe you shouldn't. lol) I got way more areas to improve on than that

Photographer
Philip Brown
Posts: 568
Long Beach, California, US
Camerosity wrote:
If the background is “busy,” using a longer lens (like a 70-200mm lens) makes it possible to use a narrower “slice” of the background, which makes it easier to eliminate splotchy light (sunlight coming between tree limbs) and light-colored areas like sidewalks or white buildings. I think this right here is the magic.
The first pic is a close crop of a much, much wider shot taken at 85mm.
If I ever got to shoot it again, I would probably frame it as viewed here, but with 200 or 300mm
Photographer
Camerosity
Posts: 5805
Saint Louis, Missouri, US
Garry k wrote:
I got way more areas to improve on than that That’s just my list for this year. Hopefully, we never stop learning and improving.
You’re doing okay, Garry. We all start at the same place, and we move forward as we can, as time permits, etc.
Photoshop is my nemesis, but I think I’m getting better.
I started shooting professionally with a paid internship at an afternoon newspaper the summer before high school (1962), and I worked part-time for the newspaper in high school. I got my first “real” camera three years before that. I’ve always shot since then, but not always professionally.
We shot on Royal Pan (Tri-X was available in 4x5 film packs but not sheet film) in 4x5 Crown Graphics. We developed the film in bulk in Kodak DK-50 in 3.5-gallon tanks. I was a whiz at dodge-and burn – and at making the dark areas of a print come up faster and darker by rubbing them with my fingers in the developer tray.
Because all of its packaging was yellow, Eastman Kodak was known as The Great Yellow Father. I was known as Yellow Fingers.
My best client in college (and several years beyond) was Neiman-Marcus.
Fwiw, I did my first digital shoot in late September 2011. (I think there are still four photos from that shoot in my portfolio. You can probably tell which ones they are.) I got Photoshop in early October. Retouching my first photo took seven weeks. I started over about once a week.
The photo you critiqued was shot on Sept. 29, 2012, and I was less than a year into Photoshop. Now that I’m between studios and looking for a new space to shoot in, I’m going back and retouching some of those older photos (including some that never got retouched), but I still spend an average of about 3 hours per photo.
And approaching 7.5 years of Photoshop, there’s still a lot more that I don’t know about Photoshop than what I know.
Photographer
Camerosity
Posts: 5805
Saint Louis, Missouri, US
Philip Brown wrote:
I think this right here is the magic.
The first pic is a close crop of a much, much wider shot taken at 85mm.
If I ever got to shoot it again, I would probably frame it as viewed here, but with 200 or 300mm If you want to see this principle in practice without leaving the comfort of your own home, put a person (doesn’t have to be a model) about six feet in front of a 4-foot-wide V-flat, sheet of plywood or drywall or even a 4-foot wide window), back off and frame the person for a waist-up shot through your camera with a 35mm or 50mm lens.
In studio I almost always place the model 6-10 feet from the background, because I want to see the shadows on the floor, not on the wall. I also like to use 10- or 12-foot wide backdrops.
If the model’s arms area extended at all (like bent at the elbows with hands on hips), chances are the elbows will stick out beyond the 4-foot width.
Then try a longer lens like an 85mm (or a 70-200mm zoom) with the person in the same pose of position. Keep increasing the focal length, moving back and framing the model (who should still be in the same position the whole time) the same way each time.
Unless the model’s arms are extended to the sides as far as they will reach, you should have background width to spare before you get to 200mm.
Same thing. You’re making a narrower slice of background take up more space in the image.
Philip Brown wrote:
Thanks for the suggestion.
And now for something completely different... First, I think the browns (skin) and blues (sky) are way too saturated. If that’s the look you want, that’s fine. If you are going for a realistic looking photo, I would lighten them up a bit.
Not too much, though. I like to have people’s skin tones look the way they actually look in person, rather than making everyone look Caucasian.
Second, look at the model’s face. See how the nose protrudes beyond the far edge (farthest from the camera) of the face? That’s called a split profile. Yeah, I know you see split profiles in magazines a lot these days, but they are usually unflattering.
Generally, the more symmetrical someone’s face is, the more attractive the person is considered to be.
Things that are closer to the camera seem larger, and things that are farther from the face seem smaller, so the side of the face that is slightly smaller should generally be closer to the camera.
However, with a split profile, the side of the face that’s farther from the camera seems MUCH smaller than the side that’s closer, making the face seem more asymmetrical. When a model is in a pose that creates a split profile, I either have him/her turn the head toward me (less than a 45-degree angle to the camera) or turn to a full profile position (facing 90 degrees from the camera).
A good rule-of-thumb is that, if any thing that’s on the far side of the face show in a profiole, it should only be eyelashes. (Men don’t have eyelashes that are long enough to see in a full profile, of course.)
As you can see, getting a bit lower gave you clear sky as a background, rather than a cluttered background.
One thing to be careful of, though, is that as you tilt the camera up or down (I,e., if the camera is not perpendicular to the floor or level ground – or parallel to the horizon), distortion begins to creep into the face and sometimes the body, as well as any buildings in the photo (where horizontal and/or vertical lines converge rather than being parallel).
Generally, I almost always have the lens below the model’s eye level. This makes the model seem taller. (Even if the model is 5’ 1” tall, and the person viewing the photo is 6’ 8”, the viewer subconsciously realizes that he is looking up into the model’s eyes.)
However, I almost never shoot below the model’s chest level, especially if the model is female, unless I am shooting with at least a 200mm lens and am at least 15-20 feet from the model. At that level, I can sit on the ground and shoot full-lengths. Distance minimizes distortion.
Otherwise, once you get below chest level, the waist, hips and thighs look larger than they actually are. I’ve had female models ask me to emphasize the boobs (which appear larger from slightly above them), but I’ve never had one ask me to make her waist, hips or thighs look larger.
So you don’t want to shoot from too high or too low.
Using a longer lens (from a longer distance) would have made the structure in the background appear larger, possibly dwarfing the model. You can always try shooting from different distances and vantage points with different lenses to see what looks best.
I would like to see just a little more space above the model’s head. Also, I like the version above, with the structure at camera left cropped out.
That leaves the brightness of the other structure near the right edge of the photo, pulling the eye to the edge, as an issue. Instead of cropping from the right, you could have burned it in to make it darker at the edge.
Using a gradient filter to make that structure uniformly dark (masking out the sky to keep it from growing darker at the edge) probably would be easier and look more natural than burning in the light areas.
Then a slight, SUBTLE vignette at the upper corners would have directed the viewer’s attention back to the subject. However, a vignette (without a little more space above the model’s head) might have drawn attention to how close the top of the subject is to the top of the photo.
Photographer
Garry k
Posts: 30130
Vancouver, British Columbia, Canada
Camerosity wrote:
That’s just my list for this year. Hopefully, we never stop learning and improving.
You’re doing okay, Garry. We all start at the same place, and we move forward as we can, as time permits, etc.
Photoshop is my nemesis, but I think I’m getting better.
I started shooting professionally with a paid internship at an afternoon newspaper the summer before high school (1962), and I worked part-time for the newspaper in high school. I got my first “real” camera three years before that. I’ve always shot since then, but not always professionally.
We shot on Royal Pan (Tri-X was available in 4x5 film packs but not sheet film) in 4x5 Crown Graphics. We developed the film in bulk in Kodak DK-50 in 3.5-gallon tanks. I was a whiz at dodge-and burn – and at making the dark areas of a print come up faster and darker by rubbing them with my fingers in the developer tray.
Because all of its packaging was yellow, Eastman Kodak was known as The Great Yellow Father. I was known as Yellow Fingers.
My best client in college (and several years beyond) was Neiman-Marcus.
Fwiw, I did my first digital shoot in late September 2011. (I think there are still four photos from that shoot in my portfolio. You can probably tell which ones they are.) I got Photoshop in early October. Retouching my first photo took seven weeks. I started over about once a week.
The photo you critiqued was shot on Sept. 29, 2012, and I was less than a year into Photoshop. Now that I’m between studios and looking for a new space to shoot in, I’m going back and retouching some of those older photos (including some that never got retouched), but I still spend an average of about 3 hours per photo.
And approaching 7.5 years of Photoshop, there’s still a lot more that I don’t know about Photoshop than what I know. Thank You and You appear to be doing all right as well
For Me - Professional Photography was the road not taken
My Father was a Photographer and his small circle of friends were as well . I picked up a camera in highschool ( shot some pretty girls and a vacation to Hawaii ) and thought I might pursue it as a possible career ...But after working a summer job in a camera store - decided on a different path for my life ...Something very different than photography
I have a great love of world music - especially concerts .And in the late 90s I was photographing some concerts for my own interest but i started sharing them with a local radio station that was playing the same sort of music that i loved ( African . Latin . Reggae etc ) In the summer of 2000 that radio stataion hired me to shoot a series of concerts they were hosting as part of our Jazz Fest
So I was walking around our downtown with my camera the night before our Jazz Fest started . I popped into a local record store that was hosting a in store performance by a singer by the name of Ivana Santilli . Got to meet her after her performance - we chatted and i snapped a few pix of her - and I felt pretty amazing because of that ( cus i liked her music , her style and her look )
Afterwards I am walking down the street after that experience and this African Canadian Gentleman walks up to me and says something like -" I see you have a camera - do you want to shoot a fashion show for me ?
I was skeptical but i agreed .
Basically what happened from that point is that this fellow later developed our Citys Fashion Week , I became his principle photographer and was thus became very involved in the world of Fashion and Fashion Models ( all while maintaining my non photograpy career )
After Shooting Runway for a few years and getting to know some of the Models - I started doing my own creatives . One of my Model Friends told me about Model Mayhem and once i got started with this site I was hooked
I consider myself an average photographer who has had the opportunity to work with better than average Models
My own photoshop skills are very rudimentary . And my aim is to get it right " in camera " so that minimal photoshopping is needed
My Photography has improved but my Photoshop hasnt kept pace . I am starting to look at outsourcing my work to skilled Retouchers as a result
Photographer
Garry k
Posts: 30130
Vancouver, British Columbia, Canada
With respect to the second Photo
I really like the angle of the subjects head - and I like how the curve of the background building draws the viewer to the subjects face
Photographer
Jarrett Porst
Posts: 131
Los Angeles, California, US
Cut him out of the frame and reduce the sharpness, add bokeh, of the background as well as reduce exposure (1/3-1/2). Get a vignette around your subject. Nothing extreme, 2-5% from the corners inward. Still using GIMP?
Photographer
Philip Brown
Posts: 568
Long Beach, California, US
Camerosity wrote:
First, I think the browns (skin) and blues (sky) are way too saturated. If that’s the look you want, that’s fine. If you are going for a realistic looking photo, I would lighten them up a bit. Thanks for the in-depth review. I appreciate it.
A bit of trivia though:
Those colors are almost exactly real life, in the second one.
(If you're comparing skintone to the first one, I think I tweaked that one :-} Plus the light was different then)
so I'm not sure oversaturated is the right adjective there.
All I did was bump up the exposure from the raw. No color tweaking done. So, pretty realistic colors as is!

Retoucher
Mcretoucher
Posts: 19
Tampa, Florida, US
in this case you take the background saturation down 50% , if you want to keep the original background , it will fix the problem.
our eyes follow color and light . take the background color down a bit .
thanks.
Photographer
Philip Brown
Posts: 568
Long Beach, California, US
Photographer
Philip Brown
Posts: 568
Long Beach, California, US
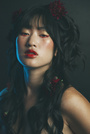
Decided to revisit the original. I just love the meshwork. Came up with this. ![https://lh3.googleusercontent.com/b8kXtmzB04l5j-uRnCaKjxJAoD6T1UiHa6xVqY4CWEX8oo3uAJQWdJTNJs1U4eeS_-Qeoi_UJgSg26Ig09quGB2YLpqXdYhPEngg28O89sSEMjbJRUoh07GbEvt2SnUO0YgwYeoqREyqAmj443PZXLshqsXRl-LGRgzwaSKEHijm2WKp4FfEidH2xmsLJ2QQY0c6WQc4URQtus2UTuO81di-jSFRPDD0Q6rZ0-paLrFHQ0BemD_mZXEFCXJ13W76g9_X0yHU57d3HO9VC2ckYpksAmrj6E0FDshudTzWJf4fN_b-Px3AC3uPjzEv1vSttPkBqTgJqp58AYYkdZ_KDZ42VE5FjUugZLd0307mYVT2vT47rsjqARf1YOo7Pd0O4pkj6L_lLxnvr3fO5IOZLRGDhVzjHtggCbgPBZdkqnmjAdOYzDF8AYVM7p-ljytS-VzoRaTIakDfCn5702GtT54NyPkAF2Spm9CAhT6kMB1BEmGD9Tqm5xf2Q1uUKZTtae2YKzfcngDa-JlDCI50SHkuVFYBxRdl9-8pm7GqBaabFbMb2fDz20kZa18wqlV3BkAyFzV5Vy6VKx27ODuaLhsjMvuzhyOqRS9OIQyDKM7pspWX-nZ6tjL-j-FMHXnHLHsckQysRdG1B_unZA=s600-no]()
Photographer
Shadow Dancer
Posts: 9779
Bellingham, Washington, US
Philip Brown wrote:
Decided to revisit the original. I just love the meshwork.
Came up with this.
![https://lh3.googleusercontent.com/b8kXtmzB04l5j-uRnCaKjxJAoD6T1UiHa6xVqY4CWEX8oo3uAJQWdJTNJs1U4eeS_-Qeoi_UJgSg26Ig09quGB2YLpqXdYhPEngg28O89sSEMjbJRUoh07GbEvt2SnUO0YgwYeoqREyqAmj443PZXLshqsXRl-LGRgzwaSKEHijm2WKp4FfEidH2xmsLJ2QQY0c6WQc4URQtus2UTuO81di-jSFRPDD0Q6rZ0-paLrFHQ0BemD_mZXEFCXJ13W76g9_X0yHU57d3HO9VC2ckYpksAmrj6E0FDshudTzWJf4fN_b-Px3AC3uPjzEv1vSttPkBqTgJqp58AYYkdZ_KDZ42VE5FjUugZLd0307mYVT2vT47rsjqARf1YOo7Pd0O4pkj6L_lLxnvr3fO5IOZLRGDhVzjHtggCbgPBZdkqnmjAdOYzDF8AYVM7p-ljytS-VzoRaTIakDfCn5702GtT54NyPkAF2Spm9CAhT6kMB1BEmGD9Tqm5xf2Q1uUKZTtae2YKzfcngDa-JlDCI50SHkuVFYBxRdl9-8pm7GqBaabFbMb2fDz20kZa18wqlV3BkAyFzV5Vy6VKx27ODuaLhsjMvuzhyOqRS9OIQyDKM7pspWX-nZ6tjL-j-FMHXnHLHsckQysRdG1B_unZA=s600-no]() Composition is still overly busy, yet static. If the model were painted to match the background you might have something.
I also notice that there is no catchlight in the eyes. Is that how it came from the camera? It seems off somehow, there should be catchlights in that environment.
I would advise that you learn from this and move on.
Photographer
Orca Bay Images
Posts: 33877
Arcata, California, US
Philip Brown wrote:
But maybe the plants behind THAT, make it too busy...? No. While the plants don't help, it's not the plants that make the background too busy. It's the sea of bright strong lines of the metal sculpture that pale the model by comparison.
Photographer
Philip Brown
Posts: 568
Long Beach, California, US
Shadow Dancer wrote:
Composition is still overly busy, yet static. If the model were painted to match the background you might have something.
I also notice that there is no catchlight in the eyes. Is that how it came from the camera? It seems off somehow, there should be catchlights in that environment. For what it's worth: thats how it was in camera.
which I suppose is kinda surprising, since sun was behind me, and relatively low.
Eh.

Photographer
Kris Krieg
Posts: 1341
Missoula, Montana, US
Philip Brown wrote:
Decided to revisit the original. I just love the meshwork.
Came up with this.
![https://lh3.googleusercontent.com/b8kXtmzB04l5j-uRnCaKjxJAoD6T1UiHa6xVqY4CWEX8oo3uAJQWdJTNJs1U4eeS_-Qeoi_UJgSg26Ig09quGB2YLpqXdYhPEngg28O89sSEMjbJRUoh07GbEvt2SnUO0YgwYeoqREyqAmj443PZXLshqsXRl-LGRgzwaSKEHijm2WKp4FfEidH2xmsLJ2QQY0c6WQc4URQtus2UTuO81di-jSFRPDD0Q6rZ0-paLrFHQ0BemD_mZXEFCXJ13W76g9_X0yHU57d3HO9VC2ckYpksAmrj6E0FDshudTzWJf4fN_b-Px3AC3uPjzEv1vSttPkBqTgJqp58AYYkdZ_KDZ42VE5FjUugZLd0307mYVT2vT47rsjqARf1YOo7Pd0O4pkj6L_lLxnvr3fO5IOZLRGDhVzjHtggCbgPBZdkqnmjAdOYzDF8AYVM7p-ljytS-VzoRaTIakDfCn5702GtT54NyPkAF2Spm9CAhT6kMB1BEmGD9Tqm5xf2Q1uUKZTtae2YKzfcngDa-JlDCI50SHkuVFYBxRdl9-8pm7GqBaabFbMb2fDz20kZa18wqlV3BkAyFzV5Vy6VKx27ODuaLhsjMvuzhyOqRS9OIQyDKM7pspWX-nZ6tjL-j-FMHXnHLHsckQysRdG1B_unZA=s600-no]() I like the shapes you've created with the steel structure behind the model. Personally, I would have placed a black background behind the steel structure to simplify and add contrast. It would be a very dramatic shot then. But that's probably my personal style. The foliage is a bit distracting to me. Cool location though. You've put some thought into scene.

Photographer
LongWindFPV Visuals
Posts: 7052
Las Vegas, Nevada, US
Philip Brown wrote:
I'm kinda torn on this shot.
I love the artwork framing the backdrop.
But maybe the plants behind THAT, make it too busy...? What's the intent of the shot? If I have a model in business casual or suit, I personally wouldn't be shooting with that as a backdrop. But, if it's a one time opportunity at that location then, I probably would've experimented with a lot "distance" between the main subject and the background with variations in depth of field. For the shot you posted, if the image is hi-res enough, crop it so it's a quarter length body shot and the male model IS the main subject. Meaning to say, you cropped out enough of the background so that it doesn't "compete" with the model.
Photographer
Shadow Dancer
Posts: 9779
Bellingham, Washington, US
Philip Brown wrote:
For what it's worth: thats how it was in camera.
which I suppose is kinda surprising, since sun was behind me, and relatively low.
Eh. As a fun experiment you can perform in a few minutes, select a few images with nice catchlights, "save as" so you have a copy to compare and then clone out the catchlights and see the difference.
There is a reason I noticed it. Catchlights can really liven up a face.
It's a simple thing to take care of in the field as well, I just made a white foam core circle that velcros onto the end of my speed light. Aim the light up and bounce a catchlight off the foam core. Just turn the flash power way down and it won't affect the overall lighting much if at all.

Photographer
MikeW
Posts: 400
Cape Canaveral, Florida, US
Well, I'd crop just avove the head and below the hand. Then, of all things, I'd change it to B&W and probably crop tight on the subjects right and a bit on the subjects left. This will reduce the busy background.

Photographer
BMA PHOTO
Posts: 53
Pawtucket, Rhode Island, US
Great you have full image. I'd crop it without that space and make you the subject matter. As mentioned, the hair on the face, the huge wrinkle in the shirt have to go and in the future you hands can't look timid. You want a power pose if you're gonna pose in a suit. I also don't have problem with background for if the image is cropped correctly the gap goes away.

Photographer
Orfinus
Posts: 23
Fort Lauderdale, Florida, US
I think the background idea is great.
However, as some others have pointed it is busy and distracting away from the portrait, after all, this is a portrait.
Perhaps shooting it with a real shallow DoF so it is more blurry would have helped. This can also be done in editing. Same thing with contrast and brightness, they need to be lowered compared to the foreground/subject matter and the image would shine. The closeup crop is also an improvement. Moving the model just a touch more to the front so the background recedes could have helped as well.
Other options is to experiment with asymmetric model placement with respect to the model or an unusual angle to bring out something even more unique. I think this image has lot of strong elements and that location is worth revisiting and experimenting with, if possible.
Photographer
SPVC3Y
Posts: 13
Huntington Beach, California, US
I like the shot, the problem for me is there’s no separation between the subject and the background. I think it could work better in black & white, should be able to get a nice contrast between the model & background.
|


