|
Forums >
Photography Talk >
Understanding Skin Retouching Regarding LIGHT
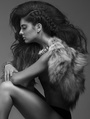
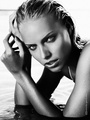
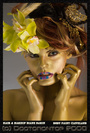
First of all, Im only trying to help.... not hinder. Im addressing the small amount of people who want to learn more about the core of retouching, not how quick and easy it is....cause it is NOT. Countless times this topic arises. Countless techniques. Impatience always prevails. 1) QUALITY skin retouching takes TIME. No quick software filters or 4-step technique applies to everything. Please reread this sentence for as long as it takes to sink in. 2) TEXTURE is about how the LIGHT affects the surface. Understand what that means and you can understand the techniques behind pros and amateurs alike. What do I mean about light? ZOOM in close. For every bump, or pimple....there is DARK side of it and a LIGHT side of it. For every large pore, the same holds true. The direction of the light determines which side is which. The "softness" of the light we use in photography determines the contrast between the DARK and LIGHT. This is why softboxes placed close to the model produces a more pleasing skin texture. Those of you who shoot with strobes or hard light will see skin texture more pronounced. now.... The professional retoucher's technique is to "Lighten" the DARK sides and to "Darken" the LIGHT sides -- which produces and more consistent skin texture. Often they work at the pixel level with a 2px brush. VERY Meticulous, VERY time consuming. For most of us, a 4px or 5px brush would suffice. Method 1: 1) Fill a NEW layer with 50% Gray. 2) Change this Layer's Mode to SOFT LIGHT. 3) With a paint brush (3-5px, 80% Hardness) Paint the Dark pixels with WHITE. 1) Fill a NEW layer with 50% Gray. 2) Change this Layer's Mode to SOFT LIGHT. 3) With a small paint brush (3-5px, 80% Hardness) Paint the Light pixels with Black. When you are done, adjust the Opacity levels to suit your taste.... Or you can set the Opacity of your brush to begin with (No less than 40%). Method 2: 1) Create new layer, lock the layer positioning so it doesn't move. 2) Create a clone brush (3px, 75% Hardness, Opacity = 8% "Sample All Layers = ON") brush that is set to LIGHTEN. 3) Paint Dark pixels to lighten them. Multiple strokes will lighten it with each pass. 1) Create new layer, lock the layer positioning so it doesn't move. 2) Create a clone brush (3px, 75% Hardness, Opacity = 8% "Sample All Layers = ON") brush that is set to DARKEN. 3) Paint Light pixels to darken them. Multiple strokes will lighten it with each pass. Method 3: Use low Exposure Dodge & Burn brushes to directly affect the pixels. This is not recommended as it is destructive to the pixels. These are VERY GENERAL techniques, but it outlines the foundation for evening out the texture in the skins surface. The reason why pros DO NOT BLUR is because it affects pixels beyond the scope of the area you wish to fix, and eliminates the chaotic patterns of real skin texture. What about skin tone? Most skin has some sort of tonal imbalance. Red spots, Dark Spots, Scars, etc. For the most part these can be clone over with a clone brush at 90% opacity and then corrected at the pixel layer to blend in with surrounding skin texture. If a person has large colored spots or sunburn, these can be adjusted more globally using the Hue/Saturation filter and adjusting the RED channel. This technique is found in the book SKIN by Lee Varis. Tips: 1) Always use a MUA for portrait work, the 20 minutes she spends can save you countless hours of retouching. 2) Use hard or soft lighting and know the advantages and disavantages of each as it pertains to how it affects skin texture. 3) Invest in a Wacom Pen Tablet or something similar. For those who have always used a mouse it will take about 2 days to get used to, but the change will pay off in ways you can't yet imagine. 4) Know your audience.... a 40 year old woman is not made to look like an 18 year old, so retouch accordingly. May 07 08 03:05 pm Link Thank you for posting this. I will be bookmarking this for future reference. May 07 08 03:08 pm Link This is a great post, but there is one detail that I disagree with. 1) Fill a NEW layer with 50% Gray. When you set your layer to Soft Light, filling it with 50% gray does nothing other than waste the time it takes to fill it with 50% gray. You can just as easily paint white or black on a blank layer to dodge and burn. May 07 08 03:10 pm Link It's nice from you to post this info. I use a different method but yours may work better and be faster. I will try it as soon as I have a chance! Thank you again for the post. VERY USEFUL!!!! May 07 08 03:10 pm Link Jesus "Christos" Superstar!  very good thread buddy! eduardo garcia May 07 08 03:22 pm Link An excellent post.... it's great when you learn something that actually produdes higher quality work! Nice job dude! I shall be changing some of my techniques now!!!! Marc  May 07 08 03:28 pm Link this is awesome! So awesome that you need a beer for this, however since you're not here I'll just drink yours for you! May 07 08 03:31 pm Link A slice of oblivion wrote: If you use the Alt/Option-click on the New Layer icon, it brings up the dialog which lets you set blending mode, opacity, and fill all at once, as well as assign a name. It doesn't really take much longer to click on a checkbox. May 07 08 03:42 pm Link Oh, and thank you Christos for a nicely detailed post! May 07 08 03:44 pm Link I will agree to this point. I do it this way for reasons outside of the scope of this thread. There are some advanced coloring techniques that I use with this layer and channel calculations -- when I do NOT use it in Soft Light Mode. But you are correct, for just spot texture correction the 50% fill is not needed. A slice of oblivion wrote: May 07 08 03:51 pm Link Christos wrote: Ok that was what confused me. Your work is amazing and it didn't make sense why you would add an extra unnecessary step. May 07 08 10:52 pm Link We do know that sometimes retouchers âtransplantâ texture from âtexture librariesâ to get some âidealâ look It would be really interesting to get tech guide how to create those textures from images with âprefectâ skin and how to apply those textures. May 07 08 11:43 pm Link OLJ studio wrote: You shoot a model with truly flawless skin with side lighting to really ramp up the texture of the pores. Use the shoulder, cheek, stomach, or any smooth skin that has pores. May 07 08 11:48 pm Link Christos wrote: Thanks, great post! May 08 08 01:07 am Link Wow! Now THIS is why I love this site! Thank you! May 08 08 01:41 am Link Thanks , copied and pasted in a .txt file for when I get to this level . May 08 08 02:08 am Link Awesome post. May 08 08 02:15 am Link thanks this is a brilliant post May 08 08 02:24 am Link Awesome post. Thank you. One question though for curiosity's sake. How long did it take you to edit your main image from start to finish? Danny May 08 08 02:31 am Link Richard Tallent wrote: I will have to try that in Photoshop so many different ways to achieve the same result it becomes about which method you become most comfortable with and gives you the results you desire. Its all pixel math in the end....... May 08 08 08:00 am Link great thread May 08 08 08:04 am Link Most images take about 30-45 minutes.. that particular one took about 45 minutes. A great MUA is essential in any Beauty Photography, and I was fortunate to have a great one that day. Each model has their good and bad points in terms of retouching...This model is a fitness competitor and she had some unevenness in skin tone and strong facial muscles. The lighting also played an important role as well. What sells her particular look were here eyes...what you see is what was there. Danny Griffin wrote: May 08 08 11:23 am Link ^ ^ This has been such a good week.... Thank you from the bottom of my hard drive! May 08 08 11:30 am Link The object here is really not to paint EVERY dark or light pixel. Just those that fall into the too dark or too light category...and even then you must consider the specular highlights and shadows on the models face. These must be approached individually. I favor second method of using a clone brush with multiple passes so I can selectively bring down the darks and lights accordingly. The method you suggest would be good for creating a tonal balance in a specified area, but would do little to combat large pores, and acne directly without affecting the pixels around target area. Remember, I am speaking to those who want to understand the methodology behind how the pro retouchers do it. Pros do have other methods like skin maps and such.. Julian Marsalis wrote: May 08 08 11:30 am Link Christos wrote: Yep I agree I just like trying different methods to be honest as long as they are not destructive to the image it becomes a learning experience to see what improvements can be made in how I do like to do it. The key for me is always using layer masks to control the degree of any change I make. May 08 08 11:55 am Link So what happens if I MUST Blur? I hate to address this because Blurring is VERY often misused. Avoid it whenever possible. However, there ARE times when I use Surface Blur selectively to even out splotchy skin or "mottling" as I call it. I never use it to take down the texture of the skin because the results are too strong. That being said.... How do you do it with minimal damage? Here is my method: 1) Copy the entire image on a new layer then turn the layer off. (This is your Backup! ...and will be used later.) 2) Use Surface Blur at a low setting to even out the skin tones and splotches in your SPECIFIED area (not Globally). Using a layer mask to affect just the part you want. Now that you have used Blur you need to put some texture into that affected area. Using your Backup Layer.... 1) Turn on Backup Layer and place above your final composition 1) Use Filter/Other/HighPass at 1 pixel. 2) Change the layer to Soft Light. You may need to repeat this process if the texture you put back into the image is not strong enough. Repeat at 1 pixel. I rarely do this but there are times when it calls for it.... but Always on a specified area only. Consequently, this is also how I sharpen my images at the very end. I NEVER use the sharpening tools. I always use a HIGH PASS layer at 2 or 3 pixels. -Christos May 08 08 12:52 pm Link Christos wrote: Hey Christos, great info about pixel level D&B. I'll be spending my free time practicing. Thanks. Can you elaborate on your sharpening method? Why High Pass method over USM? May 08 08 02:44 pm Link USM....is suitable for quick sharpening on a Internet ready file. But know this... While USM sharpens the edges and gives a good contrast, it will actually increase the noise value throughout the image. It is also permanent. A High Pass layer is not permanent, does not create additional noise and can be adjusted with the opacity setting. It also works at both 8bith and 16bit modes. Also by Changing this layer to Overlay, Soft Light and Hard Light, you may be able to target your sharpening to effect you want. -Christos Hey Christos, great info about pixel level D&B. I'll be spending my free time practicing. Thanks. Can you elaborate on your sharpening method? Why High Pass method over USM? May 08 08 02:55 pm Link Christos wrote: USM's Threshold setting is quite effective at reducing the increase of noise. Use of Smart filters also makes its use not permanent, as would duping the layer before sharpening--which is what High Pass sharpening requires anyhow. Christos wrote: Copying the layer and applying a USM to that layer is arguably more effective than using a High Pass layer for sharpening purposes; it can be masked, is equally not permanent, can be adjusted with the opacity and blend-if settings, and can use different blending modes to change the effect May 08 08 05:59 pm Link I agree to everything you said. Masking it the key to controlling global filter results. Perhaps I should state that my personal preferences find that USM too aggressive and prefer not to add any additional noise. I have observed that the degree of sharpening is a personal one, and I will leave it at that. Kevin_Connery wrote: Christos wrote: USM's Threshold setting is quite effective at reducing the increase of noise. Use of Smart filters also makes its use not permanent, as would duping the layer before sharpening--which is what High Pass sharpening requires anyhow. May 08 08 09:17 pm Link Christos wrote: No worries. It's a rare thing in Photoshop that there's Only One Way To Do something; pretty much everything has a trade-off somewhere. May 09 08 12:01 am Link The High Pass filter actually adds what I feel is better control of the sharpening process in my book it becomes very clear as to what will be sharpen vs what will be left alone 50% gray = left alone. Then you can control the degree of sharpening via which overlay mode you select and opacity and can easily tweak the effect by painting on the layer with gray tones from black to white. Fun fact High Pass overlay layer inverted = g.Blur and can be used for skin smoothing.... May 09 08 08:01 am Link Wow thats really interesting. And makes so much sense the way you put it. May 09 08 09:35 am Link Christos wrote: What is the benefit in doing this 50% gray step? May 09 08 09:50 am Link For most, the 50% step is not necessary. But for me, it adds a neutral blend from opacity of your brush strokes. Should I should to enhance this layer later on (through selective coloring, channel calculations, or alternate blend modes)....the 50% gray adds value. Someone else pointed out that you could eliminate this step and I agreed.... I use it in my own workflow for other tonal balancing procedures. Kevlar Vest Girl wrote: May 09 08 10:42 am Link . May 09 08 10:48 am Link May 09 08 10:53 am Link bump May 11 08 12:46 am Link Fantastic thread, love your stuff. May 11 08 12:51 am Link All of my work is done with the healing brush and cloning tool. This is "portrait retouching" which leaves the subject with more normal, natural skin. It removes all the blemishes, scars, wrinkles, etc. but doesn't make it look fake, porcelain or unrealistically flawless. This method maintains the proper lighting on the skin. And it takes far less time than "glamour retouching". May 11 08 12:59 am Link |