|
Forums >
Photography Talk >
Homemade light modifiers.here's what works for me
This thread rules! i made this dish from a $5.00 piece of thin scrap sheet aluminum. About an hour with tin snips, a few rivets and SHAZAM! Works great and it's super light. I made the ports by the highly scientific method of going "Hmmmmm, that seems about right." It gives a really nice, slightly mottled light due to the slightly uneven spread, which is what I want. The best part is I absolutely don't worry about it. I even use it as a tote to carry extension cords and all that sort of junk.    http://www.chipmorton.com/ Dec 26 07 05:40 pm Link DIY 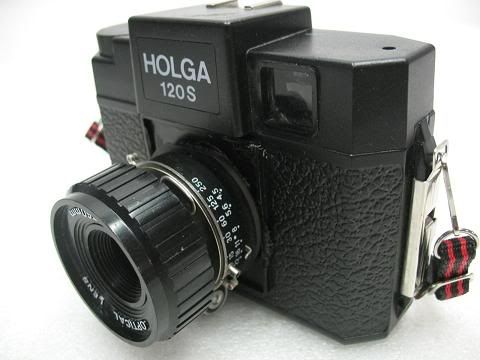 Holga w/ a shutter, sync adapter and apertures. one holga + one broken lubitel = Hulk Holga Dec 26 07 05:55 pm Link I built a mirror board for my last shoot...beautiful dappled gobo effect when bounced.. I'll post pictures when I get home later this week..Great Hulkga, Damon. Oh, the cameras! I'm game. home made/ hacked cameras? Bring it... I'll post images of my converted polaroids (Ster-oids) later , too! Dec 26 07 06:10 pm Link slave to the lens wrote: BRING IT! Dec 26 07 08:34 pm Link *BUMP* Dec 27 07 02:29 pm Link AJW Photo wrote: When I raced cars there were (among several others) two types of people. Thoughtful, creative people that could think up and build/modify/repair parts, tools, etc. and people that couldn't think of or build anything. Dec 30 07 01:40 pm Link As promised above (sorry for the delay.. holidays, ya know) My Hema-roid ( it was a pain in the ass to make) Polaroid 250 (with Zeiss coupled viewfinder and crap optics) that has had a 127mm f4.5 taken from a CU-5 Polaroid (still amazingly cheap on Ebay and a decent source for Tokinon lenses and Copal shutters that are near bulletproof) This was my cheap answer to the 114mm Polaroid 195..but it was 11 dollars for the camera (thrift store), the lens came with a whole CU-% kit that was at a yard sale for 24 bucks ( 2 lenses, battery pack thats still good,small CU ringflash and plenty of stuff I've hacked into other projects)  Yes, I know the viewfinder is set for 114. It's been adjusted (hence the name Hema-roid) Here's the SteRoids: A pair of 110 pathfinders (A and B) that I got as part of a hundred dollar lot sale (owner didn't even know how they opened, and I wasn't going to show him...) They've been converted to packfilm using a modified version of the one found at The Landlist (GREAT source for Pola info) These are Ghetto hacks, to be sure. I've made a few since these, but have no images up yet. They were lighttight and took rockin images so I don't care how they look! Har. FrankenRoid:   (I cleaned this one up before selling it)  FrankenRoid V.2 (with a back hacked from... a CU-5)  I have a few projects to do with some portrait cameras ( the passport 4 and 2 shot Polaroids) yet... great and tough little bodies> Jan 06 08 03:03 pm Link Bump Jan 06 08 03:04 pm Link back Jan 06 08 03:04 pm Link up Jan 06 08 03:05 pm Link You guys are nuts. I think that's why I like this forum. You have inspired me to go back to my garage workbench where most of the parts are waiting for a variable switch box for continuous lighting of my home made lights. My deal was picking up a couple bathroom mirror light fixtures when a lighting store went out of business. I had left over 12-2wg wire and an old plug and used that for one light and mounted it to a 2x2 stuck in a large bucket of bricks and stones. For the second one I bought a cheap utility extension cord, cut off the female end and used that for my wire. I did not have another 2x2 so used a scrap metal pole set into a large block of wood; I fed a loop of wire through the lighting housing and through a radiator clamp and put that on the metal pole - which is thus adjustable for height. Here's the result ... while it was still in my garage. https://modelmayhem.com/pic.php?pic_id= … id=1980656 I wonder if we could apply some of these techniques for underwater lighting ... Jan 06 08 03:31 pm Link I haven't got the balls to hack up my polaroids yet. I've been considering it...  you win. Jan 06 08 03:49 pm Link Hey Ryan, those absolutely kick ass. Well done, brother! Jan 06 08 03:56 pm Link yay for this thread! now i feel better after my posting about building your own ringflash  Jan 06 08 04:21 pm Link Elitist douchebaggery aside, I'll choose the best way to spend my time. I suppose this bars me from membership in any elite PPA like organizations though...bummer. no, PPA or ASMP wouldn't ban you, that's just silly Jan 06 08 04:34 pm Link BlindMike wrote: ok, i'm JEALOUS of both the space and the wall! LOL where in cali are you? Jan 06 08 04:35 pm Link Damon, The 110A &B are beautiful paperweights ( ok, singleloaders if you cut your own film) Bring them down, I'll loan you a sawzall and dremel. Cut a back off of a cheap Pola ( Reporter, swinger, etc) and JB Weld! Ground glass can be cut at a glass store ( frosted works fine) for a few dollars and hot glued into a spent pack to reset infinity focus. I'll try to find my pics og my Pola 110B hack with the 545i back. Not true 4x5, but it has a pretty cool falloff around the edges that's minimal..plus its more readily available film. Jan 06 08 04:44 pm Link Jan 06 08 04:49 pm Link holly fuck saved + bookmarked inspiring Jan 06 08 06:01 pm Link Still to come: Photos of the shooting table made with inexpensive tent couplers and 3/4" pipe ( can be broken down in 5 minutes) 1k Dimmers / 4 light dimmer board for under 100 bucks... Jan 06 08 07:42 pm Link slave to the lens wrote: I have the tools (well, the ones I don't have will be had once I go back down to san diego) Jan 06 08 08:07 pm Link Jan 06 08 10:04 pm Link there's some really talented camera makers/ hackers in Flickr groups as well Jan 06 08 10:08 pm Link homemade portable battery pack https://www.modelmayhem.com/p.php?thread_id=87450 homemade contact printing frame w/ reg. system http://www.f295.org/DIYforum/cgi-bin/fo … 145201740/ Jan 11 08 02:13 pm Link THanks for tracking this thread down Damon.. Great post! Feb 13 08 01:28 pm Link Feb 13 08 08:25 pm Link If you've done any research on the Expodisc or Expocap products, you may have come across people suggesting the use of a normal disposable coffee filter as an alternative. The results were quite positive. Since I don't own an Expodisc, I can only compare the coffee filter against a white card WB test. (since this is basically what the expodisc is intended to replace... ok ok an 18% grey card, but who's counting) For those that don't know, the Expodisc is a small filter device you place over your lens during the time you manually adjust the white balance of your camera. When in unusual light situations the results will usually far exceed the 'auto' capability of the camera. I decided to test it out, and took it a step further by adding the coffee filter to an extra UV filter I had laying around. Normally in a UV filter, there is a threaded ring that you can carefully unscrew (to release the glass). Just loosen the ring, slip the filter under it, and tighten down. Works great for me. The process for using it: Point the filter AT YOUR LIGHT SOURCE, not at the subject being photographed. In fact, it's better if you move to the location you are photographing, as if you were the subject, and pointing the camera at the light source to do the manual white balance. Then move to the proper position and shoot. The only light source in this room was a single compact fluorescent bulb in the lamp seen overhead in the image. For that shot, I just held the filter over the camera, pointed at the light, and set the WB. Before (auto WB)  After (coffee filter WB)  Control (white card to set WB)  Photographs showing how to make the Filter: Cutting out the coffee Filter:  Finished Product:  Make it yourself for about a nickle... And save $89.95... particularly if you have a spare UV filter around the house. Happy building! -Jason W Feb 13 08 08:29 pm Link - Jason W wrote: What if my light sources are behind me? Such as with strobes Feb 13 08 08:53 pm Link Zebadiah _MI wrote: Put the filter on the camera, point it at the strobes, do the manual white balance (which fires the strobes because it releases the shutter on the camera) Feb 13 08 09:16 pm Link Sweet!!!! Gimme MORE MORE MORE!!!! Feb 14 08 07:36 pm Link Somebody else has a great project too??? Feb 15 08 08:36 pm Link the first two shots in my port were made with this:   that would be Sterelite bowels for $5.99 Aluminum Foil Spray mount Craft Foam from any art store like the rest of ya'll, it's more about having fun than spending big bucks. If I was a "pro" I'd invest in my craft, since this is my hobby, my hobby is having FUN with photography. I also found a kick ass way to make some snoots with the craft foam, white paer and velcro... more to come on that project great ideas from the rest of ya'll as well! Viva ingenuity!!!! Feb 15 08 09:03 pm Link you guys are awesome. great thread Feb 15 08 09:08 pm Link cool thread, I am keeping it bookmarked! Feb 15 08 10:37 pm Link From time to time I get emails from a fella who follows this thread but is no longer a member of MM. He sent me this yesterday: DIY Beauty Dish:  Looks good! Thanks to Steven Bigler for the above plans. You might want to save it and zoom in. Feb 17 08 08:35 pm Link my DIY trick was to make one of those pop-open light discs. We had some pop-open promotional signs at work that were no longer being used, so I cut the old cloth off of the spring steel ring, then went to the fabric store, bought some white rip-stop nylon, and sewed it to the ring. It's nearly 5ft in diameter, and works great for all sorts of things. Feb 17 08 08:58 pm Link As was mentioned early in this thread, there's lotsa similar projects in Strobist.com Don't forget the glorious Mac n' Cheese box for snoots, grids, gobos and such for shoe-mount speed lights. Feb 17 08 08:59 pm Link Cool beans this thread is BACK!!!!! Feb 17 08 09:00 pm Link Damon Banner wrote: I have the supplies to make this now... (except for the glass). Just need to get busy on it. Feb 17 08 09:01 pm Link Damon Banner wrote: Look at the size of those negs! You'd have economize on contact prints using that size film.. Feb 17 08 09:04 pm Link |


 LOL
LOL