Retoucher
Kevin_Connery
Posts: 3307
Fullerton, California, US
Marcus J. Ranum wrote:
It's slightly OT but can someone describe for me what "apply image" does/means?? It's frustrating to me because I can see what it DOES but I lack the framework to understand it. It's mixing the specified channels using the specified blending mode and opacity, and puts the results in the currently selected channel. (Or composite, if you've selected the RGB or CMYK 'channel'--which is rarely a good idea.)
It's kind of like the channel mixer, but you can only mix 2 channels at a time, while specifying different blend modes directly, as well as apply a mask to what is being applied, all in the same step.
Adobe's explanation isn't a bad place to start, though that covers using it in a very different way than most people use it. A websearch for 'photoshop calculations' will probably bring up some good guides--Calculations and Apply Image are very similar tools.
I tend to use Apply Image or Calculations when I want to build a mask from existing data, using the existing channels to create the mask for me. Or to mix data from a usable channel into an unusable one (blue channel in an underexposed shot taken indoors with Daylight setting, for example), so other salvage work can be done.

Photographer
Photons 2 Pixels Images
Posts: 17011
Berwick, Pennsylvania, US
Sean Baker wrote:
I think I'm failing you here as I'm not sure what you're talking about. I get CPD and that makes sense, but I'm lost at the spot per 100px? Would it not be possible to simply do everything in terms of a pixel size, or were you referring to this in context of automating the skin workflow?
[Incidentally, re: the skin workflow, pupillary distance as measured with the measuring tool would be one reference which you could use to automate] No, you aren't failing me. It isn't easy for me to explain what's in my brain sometimes, but I can see it clearly and it makes perfect sense to me. And the voices agree. 
OK. My linoleum floor has something similar to a noise pattern on each square tile. By the "spot per 100 px" what I mean, to use the linoleum analogy, would be if I were to measure the amount of visible "noise" on a single tile (the area of) and count the number of noise "spots" then figure the average size of a spot with a margin of error.
I know it doesn't come out as actual "spots" but I couldn't think of another way to describe it. This would come out in terms of a pixel size. At least close enough to get a good reference for what you need based on the image you're working on.

Photographer
Sean Baker Photo
Posts: 8044
San Antonio, Texas, US
Photons 2 Pixels Images wrote:
No, you aren't failing me. It isn't easy for me to explain what's in my brain sometimes, but I can see it clearly and it makes perfect sense to me. And the voices agree.
OK. My linoleum floor has something similar to a noise pattern on each square tile. By the "spot per 100 px" what I mean, to use the linoleum analogy, would be if I were to measure the amount of visible "noise" on a single tile (the area of) and count the number of noise "spots" then figure the average size of a spot with a margin of error.
I know it doesn't come out as actual "spots" but I couldn't think of another way to describe it. This would come out in terms of a pixel size. At least close enough to get a good reference for what you need based on the image you're working on. I guess I'm struggling to understand how you mean to quantize said spots in an automated fashion? It seems to me that if the goal is simply to provide replacement noise to a system wherein we've replaced a certain range that we can simply calculate the start and end sizes for the progressively scaled noise function which gives an identical result to an equivalently HP & GB'd copy. Or was this for a different purpose in the first place?
Photographer
Photons 2 Pixels Images
Posts: 17011
Berwick, Pennsylvania, US
Sean Baker wrote:
I guess I'm struggling to understand how you mean to quantize said spots in an automated fashion? It seems to me that if the goal is simply to provide replacement noise to a system wherein we've replaced a certain range that we can simply calculate the start and end sizes for the progressively scaled noise function which gives an identical result to an equivalently HP & GB'd copy. Or was this for a different purpose in the first place? I think we're talking about the same thing but in different terms. Remember, I'm completely new to all this. It sounds to me like I'm thinking the same thing you're saying, I just can't get it out right. 
And you are correct, this would be to calculate the range that we are trying to achieve in order to replace what was removed. The result I'm thinking in my head would be consistent with the GB radius used in the separation.
WOW! It's too early for me to be thinking about this without my coffee in me yet. I hope I'm making sense.
Photographer
Sean Baker Photo
Posts: 8044
San Antonio, Texas, US
Photons 2 Pixels Images wrote:
I think we're talking about the same thing but in different terms. Remember, I'm completely new to all this. It sounds to me like I'm thinking the same thing you're saying, I just can't get it out right.
And you are correct, this would be to calculate the range that we are trying to achieve in order to replace what was removed. The result I'm thinking in my head would be consistent with the GB radius used in the separation.
WOW! It's too early for me to be thinking about this without my coffee in me yet. I hope I'm making sense. Put like that I agree we're talking similarly with different terms used. Coffee is just beginning to flow here, so I'm a bit behind. I think there's potential but it's going to require a number of attempts at implementation with 'field' validation in PS to verify that the indended frequencies are being output by the algorithm. A huge step forward if it works, though.
-----
And on a separate note, I've been thinking on the difference between pixel-level D&B and blur based techniques and what makes them fundamentally so different. Each is designed to locally level contrast at varying sizes (radii for blur; brush size for D&B), so why do we think of them as fundamentally unlinked? And what I'm wondering, perhaps due to personal bias, or simply lack of caffeination, is whether it has to do with replacement texture. Again this is where I think bias may be creeping in, but work with me for a second - no matter how good the retoucher, no one traces perfectly with the brush through the crevice / pore / etc. to reshape without creating a bit of an edge where one didn't exist previously. And isn't that the same as creating new texture at the same spatial frequency as the brush size? Reducing that frequency in one location, but recreating a bit of it elsewhere? Selectively replacing a frequency range with a more even application in the same range? I may not be explaining that well; it's only just occurred to me; but for anyone interested and reading, I'd love to hear some thoughts.

Photographer
Kelvin Hammond
Posts: 17397
Billings, Montana, US
Wishful thinking... I wish there was a 'color spatializer' action that does for color, what this action does for sharpening. 
Photographer
Sean Baker Photo
Posts: 8044
San Antonio, Texas, US
Smedley Whiplash wrote:
Wishful thinking...
I wish there was a 'color spatializer' action that does for color, what this action does for sharpening. What do you want to do with the color that you're trying to separate?
Photographer
Photons 2 Pixels Images
Posts: 17011
Berwick, Pennsylvania, US
Sean Baker wrote:
Put like that I agree we're talking similarly with different terms used. Coffee is just beginning to flow here, so I'm a bit behind. I think there's potential but it's going to require a number of attempts at implementation with 'field' validation in PS to verify that the indended frequencies are being output by the algorithm. A huge step forward if it works, though.
-----
And on a separate note, I've been thinking on the difference between pixel-level D&B and blur based techniques and what makes them fundamentally so different. Each is designed to locally level contrast at varying sizes (radii for blur; brush size for D&B), so why do we think of them as fundamentally unlinked? And what I'm wondering, perhaps due to personal bias, or simply lack of caffeination, is whether it has to do with replacement texture. Again this is where I think bias may be creeping in, but work with me for a second - no matter how good the retoucher, no one traces perfectly with the brush through the crevice / pore / etc. to reshape without creating a bit of an edge where one didn't exist previously. And isn't that the same as creating new texture at the same spatial frequency as the brush size? Reducing that frequency in one location, but recreating a bit of it elsewhere? Selectively replacing a frequency range with a more even application in the same range? I may not be explaining that well; it's only just occurred to me; but for anyone interested and reading, I'd love to hear some thoughts. I think I get what you're saying. I'm at work on my cellphone so can't give this my full attention but I think you're definitely on to something. This is kinda what I'm hoping to accomplish. Once the unwanted frequencies are removed they can be replaced with something more visually pleasing yet still natural looking without going pixel level. It would save a lot of time for sure.
Retoucher
Kevin_Connery
Posts: 3307
Fullerton, California, US
Smedley Whiplash wrote:
I wish there was a 'color spatializer' action that does for color, what this action does for sharpening. Which part? Hue or saturation?
You can create saturation masks (though it's a different kind of a pain than tone frequency masks), and you can make hue-based masks as well.
Photographer
Sean Baker Photo
Posts: 8044
San Antonio, Texas, US
Sean Baker wrote:
Quick note re: texture / noise replacement of removed frequency bands. I've not worked out the why yet, but I recently stumbled across the fact that applying a highlight mask to the replacement texture while blending it in Soft Light gives a much, much more realistic and pleasing effect. I suspect it has something to do with captured vs. artificially-injected tonal information but again that's a subject for another day. The point is, it's (IMO) eerily realistic @ ~20% opacity. I'm an @sshat. It's because Soft Light is protecting the highlights. I still think it looks better than a lowered-contrast linear light blend, but the blend mode is the reason.
Photographer
Kelvin Hammond
Posts: 17397
Billings, Montana, US
Kevin_Connery wrote:
Which part? Hue or saturation?
You can create saturation masks (though it's a different kind of a pain than tone frequency masks), and you can make hue-based masks as well. Sean Baker wrote:
What do you want to do with the color that you're trying to separate? I guess I'm wishing there was some action that would separate warm tones from cool tones (within the same image), or even separate by some user defined perimeter.
Ah, after looking at CS4, I see that they've simplified masks, so maybe I just need to upgrade. I know I can do it manually in CS3, but it takes a long time.
My goal is to simplify the color palette, so the photo takes on a look like old school illustrated posters-
![https://www.2blowhards.com/archives/Coke%20poster%20-%20swimsuit.jpg]()
![https://www.bikernet.com/news/images/PhotoID20429.jpg]()
See how the palette in this example is different from normal photography? I just thought that maybe there might be a way to spatially separate color like we are doing with tone frequency masks.
Photographer
Art Of Imaging
Posts: 13136
Brooklyn, New York, US

grahamsz wrote:
I think i've come up with something even more interesting. Here's a step by step tutorial on how I applied a selective bandstop filter to eliminate skin noise with periods between 5 and 15 px.
Here's the original image:
I then use photons 2 pixels action above to perform spatial frequency separation using a 5px blur. Once that's done I move to the low frequency layer and lasso the skin, taking care to avoid the eyes, lips and hair.
Now I apply a 15px feather, followed by a 15px gaussian blur. This in effect eliminates a particular range of frequencies in the skin, which in signal processing should make it bandstop filter.
And finally i switch to the high frequency layer and clone out blemishes
Total editing time for this little sample, about 3 mins.
Apologies again to the model here. She's actually got great skin, I just have a bunch of shots of her with fairly hash sunlight hitting her skin at an unflattering angle. I really should go take some of myself and use those. i am not sure what i am doing wrong, but i am not liking it, I have tried this and i got people saying its too blurry, and i agree
http://i18.photobucket.com/albums/b130/ … 1248845296

Retoucher
Virtuoso Skins
Posts: 333
Asheville, North Carolina, US
This thread is full of win.
Photographer
Kelvin Hammond
Posts: 17397
Billings, Montana, US
Craziest Benny wrote:
i am not sure what i am doing wrong, but i am not liking it, I have tried this and i got people saying its too blurry, and i agree
http://i18.photobucket.com/albums/b130/ … 1248845296 If you click on all of the frequency layers so they are active, the image will be extremely sharp, then you can drag back opacity on each layer to taste. That's what's so awesome about it.
I've found that the HF3 layer is the most critical in terms of any blur factor, and I usually leave that one at 100%, while HF2 & HF3 are better somewhere between 25-45%.
The copy layer masks (HF1-3 copy), can be painted in to give you an extreme amount of additional sharpness, or just a little if your brush opacity is set low.
The amount of variance available is astounding.
Photographer
Art Of Imaging
Posts: 13136
Brooklyn, New York, US
Smedley Whiplash wrote:
If you click on all of the frequency layers so they are active, the image will be extremely sharp, then you can drag back opacity on each layer to taste. That's what's so awesome about it.
I've found that the HF3 layer is the most critical in terms of any blur factor, and I usually leave that one at 100%, while HF2 & HF3 are better somewhere between 25-45%.
The copy layer masks (HF1-3 copy), can be painted in to give you an extreme amount of additional sharpness, or just a little if your brush opacity is set low.
The amount of variance available is astounding. hmmm thank you for this tip, i will try it out soon 
Photographer
Photons 2 Pixels Images
Posts: 17011
Berwick, Pennsylvania, US
Craziest Benny wrote:
hmmm thank you for this tip, i will try it out soon Just curious...which action set are you using for this?
Retoucher
Virtuoso Skins
Posts: 333
Asheville, North Carolina, US
Photon, I'm going to test out your actions soon, been meaning to for a while, but have been so busy.
I notice a lot of fr separation for editing. One quick way I do it, to eliminate ISO noise or isolate your colors while editing details, is simply go into LAB color and work the channels.
I have been experimenting fairly heavily on various methods of enhanced sharpening trying to utilize the luma channel in LAB color, but so far I have not figured out anything earth shaking that surpasses anything discussed here.
Photographer
Photons 2 Pixels Images
Posts: 17011
Berwick, Pennsylvania, US
Virtuoso Skins wrote:
Photon, I'm going to test out your actions soon, been meaning to for a while, but have been so busy.
I notice a lot of fr separation for editing. One quick way I do it, to eliminate ISO noise or isolate your colors while editing details, is simply go into LAB color and work the channels.
I have been experimenting fairly heavily on various methods of enhanced sharpening trying to utilize the luma channel in LAB color, but so far I have not figured out anything earth shaking that surpasses anything discussed here. I was using a High Pass filter on the Lum channel from LAB mode to sharpen edges but found that I could only go so far with it before getting halos. Then I'd ether have to back off to a point where I didn't think it was sharp enough or go through a pixel at a time to mask out the halos. Then Sean came along with the frequency separation. I haven't looked back since. There is still some artifacting and halo noticeable when you push it too far, but not nearly as much as the High Pass method.
If you don't work in 16 bit mode, make sure you switch over to it first before running the action or grab the script from the first action set I posted here. I should include the script with all of them, actually.
And by all means, if you can think of anything else you want to see in there let me know.

Digital Artist
Koray
Posts: 6720
Ankara, Ankara, Turkey
After giving it a short break, today I decided to experiment a little more and got some more interesting effects by blurring and/or sharpening surface blur separated layers. Fun stuff
Retoucher
Virtuoso Skins
Posts: 333
Asheville, North Carolina, US
Photons 2 Pixels Images wrote:
I was using a High Pass filter on the Lum channel from LAB mode to sharpen edges but found that I could only go so far with it before getting halos. Then I'd ether have to back off to a point where I didn't think it was sharp enough or go through a pixel at a time to mask out the halos. Then Sean came along with the frequency separation. I haven't looked back since. There is still some artifacting and halo noticeable when you push it too far, but not nearly as much as the High Pass method.
If you don't work in 16 bit mode, make sure you switch over to it first before running the action or grab the script from the first action set I posted here. I should include the script with all of them, actually.
And by all means, if you can think of anything else you want to see in there let me know. I will soon as I get my main machine up that has CS4, been in a tech hell, thought my MB died, got a new one, rebuilt the machine, it's not the MB  Back to ordering parts Back to ordering parts
So I'm stuck with CS for a while longer, so I can't test out your action because of the smart shapes 
I do want to see how it compares to Lukos, which works well for me on some images.
Photographer
Photons 2 Pixels Images
Posts: 17011
Berwick, Pennsylvania, US
EDIT: See my post below... OK. I updated the original Frequency.zip file with the new action set that is backward compatible to Photoshop 7 (when Apply Image was introduced.) http://www.nunuvyer.biz/Photoshop/Frequency.zip Some things to note in this one. There are 2 Action Groups along with the script included in this one. The new stuff is in the Action Group "Frequency.atn" with the Photoshop 7 action labeled as Photoshop7 once you load this set into Photoshop. If you are using the script due to working in non RGB/16 mode, make sure this Action Group is named "Frequency" and the action you want to run is named "Layers" or change the parts in the script on line 21 to reflect what you have. Any problems just let me know. I'm home today and other than some yardwork, I'll be bored.
Retoucher
Virtuoso Skins
Posts: 333
Asheville, North Carolina, US
Thank you, you rock!
I'm going to test it out when recover from passing out, been retouching for about 18 hours straight I think...
D.
Photographer
Photons 2 Pixels Images
Posts: 17011
Berwick, Pennsylvania, US
Photons 2 Pixels Images wrote:
OK. I updated the original Frequency.zip file with the new action set that is backward compatible to Photoshop 7 (when Apply Image was introduced.)
http://www.nunuvyer.biz/Photoshop/Frequency.zip
Some things to note in this one. There are 2 Action Groups along with the script included in this one. The new stuff is in the Action Group "Frequency.atn" with the Photoshop 7 action labeled as Photoshop7 once you load this set into Photoshop.
If you are using the script due to working in non RGB/16 mode, make sure this Action Group is named "Frequency" and the action you want to run is named "Layers" or change the parts in the script on line 21 to reflect what you have.
Any problems just let me know. I'm home today and other than some yardwork, I'll be bored. OK. I didn't have CS to test this one. It seems CS doesn't have some of the features I tried to include in the action set so it won't work. Sorry. I'll see what I can do to work around that.
Photographer
Photons 2 Pixels Images
Posts: 17011
Berwick, Pennsylvania, US
Photons 2 Pixels Images wrote:
OK. I didn't have CS to test this one. It seems CS doesn't have some of the features I tried to include in the action set so it won't work. Sorry. I'll see what I can do to work around that. Good news....maybe. I installed Photoshop 8 (CS) so I can test the scripts/actions to make sure they are backward compatible and if not, make adjustments. So, gimme some time and I'll figure out where the version I just posted went wrong.

Photographer
Cycle_xpressions
Posts: 5
Littleton, Colorado, US
WOW, I have been following this post for a while and with my limited skills I have been afraid to attempt it, but I gave it a whirl tonight and it looks amazing.
One question, and again remember I am really poor at photoshop, but when I do blemish editing on the LF layer it is really blurry so I am unable to see the edits. I must be missing something right?
Also the tones layer, what am I missing here? I have tried to play with this layer and I am not seeing the results, what is the function of this layer and how is it best used?
Also on the workflow side of things, is everyone making color adjustments then doing this action? I was just curious what everyone's workflow is in using the action.
Thank you guys so much, there are a few major players that made this action happen but there are also alot of people who suggested great things to refine the process. You guys are amazing and my hats are off to you for being secure enough in your craft to share with us.
Thanks to everyone
Photographer
Cycle_xpressions
Posts: 5
Littleton, Colorado, US
![https://i789.photobucket.com/albums/yy174/jeepnout/Actiontest.jpg]() This is just running the action, does it look like I am understanding this? Give me your thoughts and suggestions so that I can play around with this wonderful tool some more Thanks
Photographer
Photons 2 Pixels Images
Posts: 17011
Berwick, Pennsylvania, US
Cycle_xpressions wrote:
WOW, I have been following this post for a while and with my limited skills I have been afraid to attempt it, but I gave it a whirl tonight and it looks amazing.
One question, and again remember I am really poor at photoshop, but when I do blemish editing on the LF layer it is really blurry so I am unable to see the edits. I must be missing something right?
Also the tones layer, what am I missing here? I have tried to play with this layer and I am not seeing the results, what is the function of this layer and how is it best used?
Also on the workflow side of things, is everyone making color adjustments then doing this action? I was just curious what everyone's workflow is in using the action.
Thank you guys so much, there are a few major players that made this action happen but there are also alot of people who suggested great things to refine the process. You guys are amazing and my hats are off to you for being secure enough in your craft to share with us.
Thanks to everyone You aren't missing anything here. When the action finishes running (depending on which action you are using) the image should look the same as the original or, if you grabbed the last action (Others.atn or Others.zip) then it will appear a bit sharper.
For skin corrections, you use the LF layer to adjust general skin tones to even them out some. You use the HF layer to do the spot touchups such as cloning, healing, etc.
I hope that makes sense.

Photographer
Jinxt Photo
Posts: 38
Newport News, Virginia, US
After peeking in on this thread over the past few months and trying to wrap my head around it I think I'm finally starting to realize just how useful and amazing this all is. I've been playing around with this for the past few hours and it really is a technique for the history books. What I've been doing with it is creating the 2 frequency layers (I start with a GB of 3.2 as default... I'm working with 12mp files from a D300), adding a clipped curves adjustment layer for sharpening as described by Sean on Page 3, turning the Low Frequency layer into a Smart Layer and then running a Local Contrast adjustment using USM at 14/40/0. I created an action out of that for my general starting point. Once it has run I then tweak the Curves layer as needed to add/subtract sharpening. For portraits, since the Low frequency layer is a Smart Object I can just double click on it to open independently for editing which allows me to focus on blending the skin tones (being lazy and using the laso tool matched with some feathering and surface blur as needed to even out skin tones). When that is saved the changes go back to the original and you can then switch to the High Frequency layer for healing/cloning out leftover detail from any blemishes. I feel like I have a long way to go in order to use this to its fullest potential (it's a learning process for sure), but thank you guys so much for giving me a swift kick in the ass towards the right direction. I look forward to others coming out of the woodwork and sharing how they've been using this and hopefully with a group effort we can really start finessing it and taking it in different directions. I am also waiting in anticipation for Koray's explanation on how he got the effect produced in the SB example of his GB/SB/Nik comparison post. Thanks again for proving that MM isn't just a bunch of ego-maniacal trolls

Digital Artist
Michael C Pearson
Posts: 1349
Agoura Hills, California, US
I've been messing around with Imagenomic's Portraiture plugin on the low frequency layer. It cleans up skin tone beautifully while ignoring the skin texture that's preserved on the high frequency layers. Here's how you use Portraiture to get the best results: Create a duplicate layer, then run the filter. Adjust the skin tone color selector to target the tonal range of the skin that needs photoshop loving. Leave the small detail slider on minimum. We want to keep that barely visibile low frequency "noise." The medium detail slider should be used with care. If you push this one too far, it looks artificial. Unleash your wizard fury on the large detail slider(depending on image). After you're happy with the settings you like, start at zero and raise the threshold slider until you see the skin look smooth but realistic. Mask out the layer, and paint it back to the skin areas that need work (I love this part). Finally, adjust the opacity and you're set. Now go clean up that high-frequency layer! Here's an example of something I did in under three minutes(!) thanks to the amazing techniques in this thread (minimal high frequency work). ![https://a0.vox.com/6a0110184cd071860f011016832c98860c-pi]()

Photographer
Fist Full of Ish
Posts: 2301
Aiken, South Carolina, US
This is very exciting! Wow!
Digital Artist
Koray
Posts: 6720
Ankara, Ankara, Turkey

Photographer
Viewu
Posts: 820
Bradenton, Florida, US
I just ran two of the actions posted here. I cannot thank you enough for posting here everyone, especially the OP.
But man oh man my head is spinning and my eyes are going in circles.
Photographer
Viewu
Posts: 820
Bradenton, Florida, US
syd47421 wrote:
Syd's Graphic Equalizer
needs a couple of tweaks in the levels outputs, but the thing works.. and you can use the theory of it to make as many separations as you need. I almost hate to ask but my brain is getting to tired to search. How do I load in a script such as the one above? I looked around in CS4 and I already knew where my scripts but didn't see anything that jumped out at me telling me how to load a new one.
Thanks
Photographer
Photons 2 Pixels Images
Posts: 17011
Berwick, Pennsylvania, US
Viewu wrote:
I almost hate to ask but my brain is getting to tired to search. How do I load in a script such as the one above? I looked around in CS4 and I already knew where my scripts but didn't see anything that jumped out at me telling me how to load a new one.
Thanks Copy the script to your "Presets/Scripts" folder within the Adobe/Photoshop folder.
Then restart Photoshop.
If done right, you should now have access to it under File>Scripts>whatever
Photographer
John Pringle
Posts: 1608
New York, New York, US
Thanks, I will check this out.
Photographer
Viewu
Posts: 820
Bradenton, Florida, US
Photons 2 Pixels Images wrote:
Copy the script to your "Presets/Scripts" folder within the Adobe/Photoshop folder.
Then restart Photoshop.
If done right, you should now have access to it under File>Scripts>whatever Thanks!
Photographer
Jinxt Photo
Posts: 38
Newport News, Virginia, US
Koray wrote:
I'm being unclear on purpose. Ask when you get stuck.
Plus I think I made up two new ps terms  So far so good. I'm seeing how the Surface Blur creates more of a detail map than a High Pass effect. Matching up a SB layer alongside the typical BG plus some clipped level adjustments creates a friggin scary-ass detailed and sharpened image. It's almost like LucisArt or TopazAdjust without ANY of the cartoonish halos. This must be what deconvolution is all about.
I've been toying with it on full-res 12mp files and I'm liking the effect when I run SB at 30/15 and 40/20. It keeps all of the defined edges where they need to be and I end up pulling plenty of detail out of it. It IS very much reminding me of Nik's Tonal Contrast
This makes me want to test what happens with other types of blurring just for the hell of it.
I'm not quite understanding why a Luminosity Mask channel is being created unless it is being used for masking some of the adjustments and such (I didn't use it for anything so I may be doing it different than you are).
This is something I'm definitely going to spend some time with.
Photographer
Photons 2 Pixels Images
Posts: 17011
Berwick, Pennsylvania, US
Viewu wrote:
Thanks! I'm sorry, I wasn't paying attention. My bad.
You are trying to load an action, not a script. To load an action, go to your actions palette and in the upper right corner, there is a drop-down menu. Click that, then click Load Actions...
Navigate to where the action is and load it. You may want to place it in the Actions folder first and load it from there.
To be on the safe side, once you do this restart Photoshop and make sure your action is still there.
|


 I'm home today and other than some yardwork, I'll be bored.
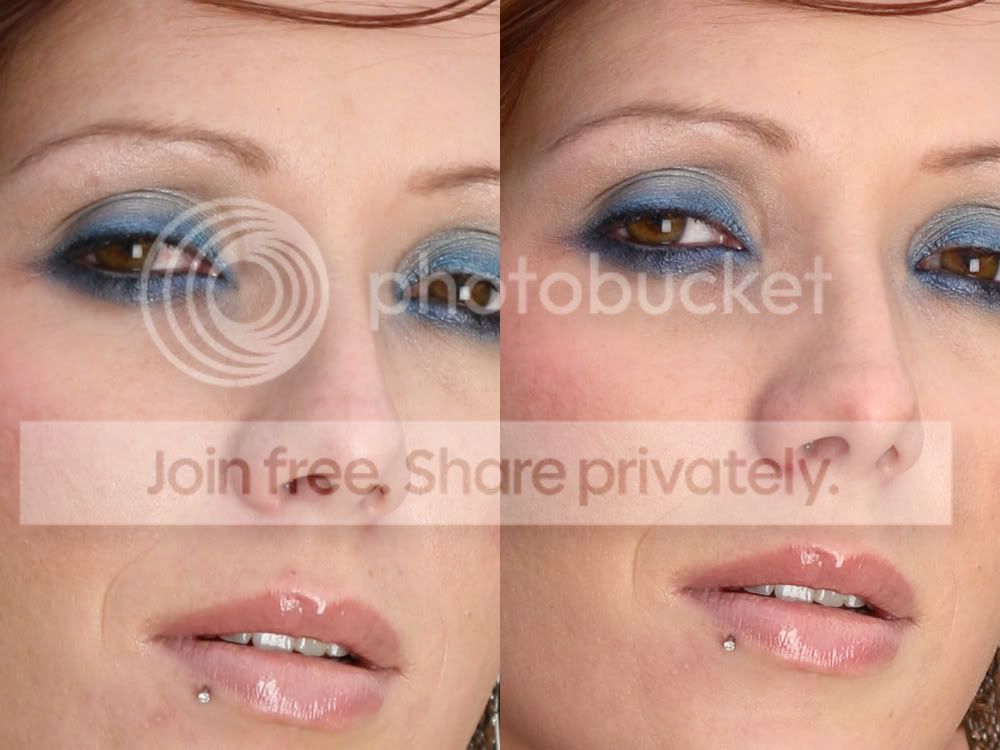


 Back to ordering parts

