|
Forums >
Digital Art and Retouching >
Even Skin Tone....AM I the only one DUMBFOUNDED?
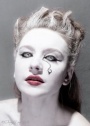
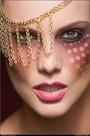
I've been using photoshop for 6 months now and I still can't find a way to smooth and even skin basically without blurring. I check out tutorials online however I never seem to find any that can show me how successfully execute the look I want. Here is a link to an image that I love. I'm not a professional. I'm willing to listen. A lot of you wow me with your work. So those that are willing to help please tell me something good. This is a direct link to what I want my images to look like. It's not perfect but close to what I want. http://i114.photobucket.com/albums/n248 … XAMPLE.jpg What techniques do you all suggest? May 29 09 08:59 pm Link That's blur. Or Imagenomic Portraiture. Same difference in my book. Skin tone is referring to color, so you're probably talking about skin complexion. May 29 09 09:06 pm Link yes a pretty gross example.. May 29 09 09:08 pm Link TheEighthSin wrote: Well if you can email me something better please do....your work is amazing...how do you get the skin to be so smooth? May 29 09 09:13 pm Link there is a post somewhere down the page people where linking some tutorials you can follow and get some better ideas of what to do. 6months with photoshop is a good basic start, but for example, me after 9 years, I still find out new things and better ways to do the same thing. May 29 09 09:19 pm Link I only use heal tool and clone tool...  go figure hehehe go figure heheheMay 29 09 09:22 pm Link Use the healing tool to touch up major blemishes, then try this http://retouchpro.com/tutorials/?m=show&id=213 Don't give up if it doesn't work the first time. It takes some practice to get the feeling for matching the radius to the scale of the "grunge" Also, never forget that removing freckles is a mortal sin.  May 29 09 09:35 pm Link I agree that is a poor example and in my opinion your work would be better off if it did not take that direction, unless for some "artistic" purpose. However, if you wanted to achieve that look you could mask the flesh, blur it, air brush it with a skin town, then dodge in some highlights before applying a lot of contrast or overlay on the skin. May 29 09 09:45 pm Link there's 9 ways to skin a portrait with photoshop... best advice i heard was to "just take your time...and practice often" May 29 09 10:26 pm Link TheEighthSin wrote: Yeah, that was WAY overdone. May 29 09 10:30 pm Link Yeah it looks so fake I'd be interested on how this is done: http://lh5.ggpht.com/_nyB2OeEAzKU/SbaAI … gn_thu.jpg http://www.glamboulevard.com/wp-content … _small.jpg May 30 09 12:17 am Link try this (and yes you will need to play with it- this is just a demo!) duplicate your background layer twice set the first dupe to exclusion mode at 20% set the second dupe to screen mode at 50% notice that the skin brightness should be about the same, but contrast has gone WAY down now add in d&b or healing brush, lots of masking, and you can get nice smooth skin tones while keeping some texture May 30 09 12:37 am Link please don`t do that, it looks fake and it will look fake to everyone else. Use the heal brush as suggested. When that`s not doing what you want, use the clone tool and experiment with brushes, opacity and hardness. If you really want, fiddle with some layers... Pores are there because you have them. May 30 09 01:07 am Link Lamia_ wrote: good skin and foundation...? May 30 09 01:08 am Link SONCERAE wrote: From the Digital Art & Retouching Forum FAQ May 30 09 01:33 am Link Thank you guys...ok I get it that image was gross lol. May 30 09 06:12 am Link Ew, that example is way too edited.. looks cartoonish. A lot of people use surface blur, but I personally don't like it. I just use make up, and the heal and clone tool, also. May 30 09 07:44 am Link There is no short cut all the blurring tutorials above will leave other issues. https://www.modelmayhem.com/po.php?thre … 5900&page= do this. You will thank yourself for it. Or you can check out this helpful post with links to other things people do https://www.modelmayhem.com/po.php?thre … ost9990687 May 30 09 08:58 am Link it is way overdone to the point of cartooning. try the heal tool then the clone tool and when it looks even use your brush tool and pick the color of her skin with the dropper tool (thats when you click the color change option and go over the photo and click instead of on the color scale, if you didnt know that) then with a low opacity genly brushe around her face to give it more even color kind of like a sheer photoshop foundation hope that helped! May 30 09 09:06 am Link I use the healing brush set to different opacity . You can grab the skin around the blemishes set the brush (healing tool) to lighten to lighten the dark areas and set it to darken to darken the lightened areas that need to go down. Very effective. May 30 09 09:20 am Link Traciee D wrote: The opacity of the healing brush cannot be set or adjusted, at least not through CS3. You can only adjust size and hardness. May 30 09 10:49 am Link Dodge, Burn and specific color correction... tedious, but all texture remains intact May 30 09 01:48 pm Link Lumigraphics wrote: Sorry meant the hardness of it...OOPS! typo May 30 09 01:56 pm Link Lumigraphics wrote: Traciee D wrote: The opacity of the healing brush cannot be set or adjusted, at least not through CS3. You can only adjust size and hardness. True, but you can use some of the different blend modes (lighten and darken), and you can use healing on a separate layer and set the layer opacity (or use a mask). May 30 09 02:19 pm Link Lumigraphics wrote: Traciee D wrote: Kevin_Connery wrote: Yep, do it all the time. Technically you CAN adjust the opacity by using Edit->Fade after every brush stroke, but that would get old in a hurry. May 30 09 04:14 pm Link Try Mama's light powder actions....they work for me..... May 30 09 04:17 pm Link Kodak Digital Gem May 30 09 04:26 pm Link I'll post this in this thread also since it works well for this need. https://www.modelmayhem.com/po.php?thread_id=439098 This thread talks about "high frequency (details) and low frequencies (tones) in images and how to separate them out onto their own layers. Then you can proceed to work on just the part you want to. You can adjust tones all you want without destroying any detail or work on the details without messing up the tones. I forget what page it's on, but there is a link to an action I made that will set up the layers for you and a lot of discussion in the thread on how to do what you want to do. Good luck! May 30 09 06:27 pm Link SONCERAE wrote: Before I say anything, is that your work or something you want to accomplish? May 30 09 06:39 pm Link O my goodness all this talk about opacities and dodges and blurs looks like chinese to me. I'm so lost.... May 30 09 08:56 pm Link SONCERAE wrote: Pick up a good book on Photoshop. May 30 09 09:08 pm Link Your skin looks fine to me! May 30 09 09:11 pm Link clone stamp tool is all you need... once you get the feel for brush type, size, and opacity, skin can be perfect and still lok like skin in minutes. May 30 09 09:21 pm Link TheEighthSin wrote: yup..maybe try models with better skin to begin with.. May 30 09 09:22 pm Link RobertGaliano wrote: Problem with clone is that you lose skin texture. May 30 09 09:26 pm Link ya don't loose texture if you take the right sample, and apply it carefully... that's the whole idea of a "clone".. replace bad skin with "cloned"good skin May 30 09 09:30 pm Link |


