|
Forums >
Digital Art and Retouching >
HighPass Sucks (+ solution)
Summary Information and Links now at bottom of post Bottom Line Up Front: High Pass is an inaccurate spatial-frequency gaussian based separation technique. The steps below and the actions provided effect a much more accurate result than can be accomplished otherwise. Background: Ultimately, this is a spinoff of Mr. Connery's thread on deconvolution as an image sharpening technique here, wherein I set forth my method for finer control of such while both remaining within Photoshop and not spending additional $$ on plugins. Key to its success is the separation of high and low spatial frequency image data and the fine-tuning of each. Separation of spatial frequency data has a number of applications in image editing. Whether for the oft-suggested "High Pass Sharpening", to recover detail lost in an OOF / moving image, or to enhance local contrast throughout the image, the accurate separation of frequency data is relevant for anyone who is a stickler for image quality. Findings / Technique: In my own experimentation, I've found that HP gives exceptionally high differences from 'truth' when separating high and low frequency information. The proposed alternative technique for working with 8bit image data is as follows: 1.) Start with two copies of the image to be separated. 2.) Working on the bottom copy, run the gaussian blur filter at the intended pixel frequency (same as you would input into the HP filter). 3.) Selecting the top copy, choose Apply Image from the Image menu at top (Shift+Ctrl+A on PC; Cmd+Shift+A for Mac). 4.) In the Layer dialog, select the bottom layer which you blurred in step 2. 5.) In the Blending dialog, choose Subtract. 6.) Enter '2' into the Scale box, and '128' for the Offset. 7.) Preserve Transparency, Mask, and Invert should not be checked. 8.) Choose OK. 9.) Your top layer will now look much as a HP result, albeit a bit flatter. Set the Blend Mode to Linear Light. Opacity should remain at 100%. Working in 8bit mode, this will give you an accurate frequency separation to about 129/32k or 1/256. Working in 16bit mode, however, we encounter a problem with the offset factor applied in Step 6 above (50% grey in a 16bit system cannot be expressed by an 8bit number). This can be overcome using the alternate technique which follows: 1.) Start with two copies of the image to be separated. 2.) Working on the bottom copy, run the gaussian blur filter at the intended pixel frequency (same as you would input into the HP filter). 3.) Selecting the top copy, choose Apply Image from the Image menu at top (Shift+Ctrl+A on PC; Cmd+Shift+A for Mac). 4.) In the Layer dialog, select the bottom layer which you blurred in step 2. 5.) In the Blending dialog, choose Add. 6.) Check the Invert box. 6.) Enter '2' into the Scale box, and '0' for the Offset. 7.) Preserve Transparency and Mask should not be checked. 8.) Choose OK. 9.) Your top layer will now look much as a HP result, albeit a bit flatter. Set the Blend Mode to Linear Light. Opacity should remain at 100%. Conclusion: Accuracy for this technique is fantastic, with a maximum difference from the original of 1/32767. Unfortunately, this technique is not valid while working in 8bit mode as it doesn't have a perfect middle gray as 16bit does. Afterword: Walking through all these steps can get a bit tiring, and I've created an action which I'll link below to run you through them. It works in a separate window utilizing the 16bit technique above to retain an accurate separation, but, as I'm not an Actions Wizard, it will not move the data back into your original document for you. If someone more adept than I would like to add that in I will gladly update this post; otherwise it remains to the user to bring both or either layer into your document for use. What will you do with it? - "High Pass Sharpen"? - Create a high-spatial-frequency mask? - Create a low-spatial-frequency mask? - Something else? Post your results and findings here. It's time to up the ante on sharing what we find. Action Please Note: As outlined above, this technique is designed to end with the image on screen looking exactly the same as it did when you started. The difference is that your image data is now separated onto two separate layers (separated by size of detail - spatial frequency), allowing you to edit them independently. If you want to apply "high pass sharpening" with this technique, simply disable the low frequency ('blur') layer and it will appear immediately. ------------------------------------------------------------------ | Links to subsequent valuable information & downloads | | contained within the remainder of this thread. | ------------------------------------------------------------------ JeF Briguet describes a similar procedure to reduce moire here. grahamsz discusses healing at different spatial frequencies for skin evening here. grahamsz provides a visual explanation of spatial frequency here. Photons 2 Pixels' first skin smoothing action can be downloaded here; instructions here. grahamsz elucidates one of the best and natural skin smoothing techniques around here. Photons 2 Pixels' second skin action set is here and mentioned here. syd47421 posted his implementation of a PS 'equalizer' here, discussed here. Photons 2 Pixels' multistage separation actionset can be obtained here, discussed here. I post a simple noise-generation script here and discuss its purpose here. Photons 2 Pixels' third generation skin & sharpening actions are here, discussed here. Photons 2 Pixels makes my noise script user friendly and replicable here, discussed here. Koray demonstrates a series of derivative local contrast enhancements here and explains it here. Panzerwolf laid the foundation for describing what's wrong with the HP filter, which I explain here. Lanenga does a nice writeup including a number of other techniques here, including both scripts and videos for use in skin retouching. For authors: If your contribution is not listed here and should be, or if I've listed something incorrectly, please send me a note so that I can keep this up to date and accurate. Thanks! Apr 18 09 04:30 pm Link Apr 18 09 04:38 pm Link Edit: I see nothing wrong with appreciating the beauty of science/mathematics behind image processing. Your post is insulting to the sharing generosity of Sean; I for one do not appreciate. ronald n. tan www.ronaldntan.com Paul Dempsey wrote: Apr 18 09 04:50 pm Link ronald n. tan wrote: i'll second that... an take it one further that the processing of an image IS in fact an art. Having a more technical approach to said art does not in fact invalidate it as an art, merely changes the design and process of said art. Apr 18 09 05:00 pm Link Can we see an example? Apr 18 09 05:09 pm Link
Post hidden on Nov 26, 2009 10:11 am
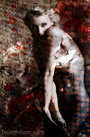
Reason: not helpful Comments: People are still responding to this 7 months later, and bringing the discussion off-topic. No need. Apr 18 09 05:17 pm Link Modstudios wrote: Sure. The image below is the difference between a HP + GB solution for frequency separation and the original image. Processing was done in 16bit mode with a 5px radius when the image was 800x527. Resized to save reading space, but no other modifications were made. Apr 18 09 05:21 pm Link Very very cool stuff (despite the number of naysayers). It does seem to give a much truer sharpening than the HP sharp. As an aside, I really don't understand all the trash-talking... Do you guys really not use any sharpening? Or just not care what method you use? Or just don't understand what he's talking about, and mouthing off anyway? [Yes, I realize there are more applications for HP than sharpening, but my guess is that this is by far the most common use by most of us.] Apr 18 09 05:21 pm Link On a website full of Gaussian blurred faces, threads like these never get the praise they deserve. Thanks for writing this Sean. Apr 18 09 05:23 pm Link Take the joy out of photography? I love love people who have a passion for building a better image. Thanks for the tips SEAN, I'll try them when I get home! Apr 18 09 05:23 pm Link  Apr 18 09 05:44 pm Link To those offering thanks, you're welcome. To those offering support, thank you. --------------- Action has been updated to allow selection of separation radius; that was an oversight in the first version. Apr 18 09 05:46 pm Link Paul Dempsey wrote: Is it your assumption that a person needs to be a stupid dolt in order to appreciate art, or do you feel the opposite, that smart people can't appreciate art. Apr 18 09 06:01 pm Link Jarrad Kevin wrote: Great composite for demonstration. Out of curiosity, how're you exceeding 100% for the blend mode? Duplicate layer? Apr 18 09 06:03 pm Link Sean Baker wrote: Yes, one layer at 100% and another at 35%. Apr 18 09 06:08 pm Link Sean helped me work through the process earlier today, and I came up with a varient on full sized files. I have never seen sharpness like I achieved today, and I've been doing this for 20 years. Apr 18 09 06:21 pm Link Robert Randall wrote: Just wait till you apply a clipping-masked curves layer to that high-frequency layer Apr 18 09 06:41 pm Link Going through the 16 bit method, I get to the second step 6 and I have no place to enter scale and offset. Can someone point out what I'm missing?  Apr 18 09 09:57 pm Link Photo Visions wrote: wha...? Apr 18 09 10:23 pm Link Photo Visions wrote: Are you kidding? Why even post in the thread then... just move on and spare us. You take the joy out of reading helpful posts in a forum that is generally filled with crap like your post. Apr 18 09 10:32 pm Link Wow Sean thanks. I for one appreciate good info like this to help make my images look better, contrary to the dumbasses that lack the intellect to understand simple steps to help improve their work. Apr 18 09 10:43 pm Link Apr 18 09 10:44 pm Link Photo Visions wrote: After looking at both of your portfolios, I've made up my mind which post to take seriously. Apr 18 09 10:49 pm Link Do I understand you correctly, this action is designed for a 800 px @ 72 dpi file size? I've tested it on several images that size it looks great. Apr 18 09 10:50 pm Link Paul Dempsey wrote: No, he's giving the artist yet another tool to control his/her creations and to understand the medium in which he/she works. How can you so casually dismiss knowledge like this? I don't understand that. Apr 18 09 10:56 pm Link Sean, I have no clue what your talking about with the layers and whatnot but I really do appreciate your humbling announcement to share your research with the masses. Kudos to you and others like you. Apr 18 09 11:07 pm Link Paul Dempsey wrote: Those darn scientists! Dabbling in the black arts of photon measurements, Bayer demosaicking, image reconstruction, and all the ills of digital! We should go back to the days when photographers didn't need to worry about optical properties and light, chemistry, emulsion coatings, and thin-film behavior, and any of those other over-analytical processes... Photo Visions wrote: No worries. Many photographers base their career on Holga-esque images. For those photographers, no understanding of sharpness, acuity, or related issues is necessary. Apr 18 09 11:08 pm Link Yes, thank you. It's rare to see a generous and helpful post like this on MM. Still, I wish someone could point out what I'm missing and why it doesn't work for me. Where to you enter the scale and offset? Apr 18 09 11:17 pm Link Don't know if I would say High Pass sucks... but I did like your post, and copied it to a file for more experimentation. Keep up the good work in finding new solutions. I was able to appreciate the technical side after reading through it... at first I was like WTF. Never judge a post by it's intro LOL Apr 18 09 11:19 pm Link Paul Dempsey wrote: You mean I spent all those years in a darkroom making certain the D-76, Acufine, and Rodinal were at the precise temperature, making certain the development times were spot on, the agitation just so, the dryer at the correct temperature all for nothing? I was messing with the art- huh? - by practicing precision and by testing my Tri-X in various chemistries until I found which worked best when I needed to pull or push my film speed. Apr 18 09 11:20 pm Link Tim Hammond wrote: Under blending, further down theres "Add" and "Subtract" not what you have selected (linear dodge add). Apr 19 09 02:12 am Link Sean Baker wrote: Just quickly trying it out: Apr 19 09 02:54 am Link I like the sharpening look. I'll be adding this technique to my tool box. Thanks Sean. Apr 19 09 04:02 am Link Sean, First, It is immediately apparent you know much more about images and Photoshop than I will ever know. Second, thanks for going to all trouble to document what you have discovered to assist those who can benefit from this treatment. I will try it on some of my projects to see how it turns out. Third, pay no attention to the negative comments. You think differently from some of us (me included) but I see no problem with that. Without people like you we never would have had Photoshop and all the very cool plugins to assist us in the creative process. Our "art" would not be the same if not for people who think like you. Apr 19 09 04:20 am Link DarkSlide wrote: The action is designed for any sized image and any separation radius which you care to use (at least, up to the limits of PS). I just used one at 800px for the example due to MM size limits. As Mr. Randall noted, he was able to use a derived technique on much larger files. Sentimental Treasures wrote: A bit of deliberate dramatic flair, I apologize. I didn't want the information to be lost entirely with its technical nature. That backfired a bit of course (scroll up Yingwah Productions wrote: This is exactly it. Let us know if you're still having trouble (or use the action Yingwah Productions wrote: The scale is dividing the difference between the two images (the blurred copy and the original) by two. We do this for two reasons - first, it allows us to use Linear Light for our blend mode at 100% which is convenient, and second because if you want to go back and put a clipped-curves layer on the high frequency detail it allows you more room to push the high and low luminance points. If that doesn't make sense, don't worry, just try applying a curve to it and see what I'm talking about Yingwah Productions wrote: You can use your same way of starting this process. Setup your channel mixer adjustment layer in your image. Now select the uppermost visible layer and choose Stamp Visible to create a merged copy of the entire scene by pressing Shift+Ctrl+Alt+E (Cmd+Shift+Alt+E on Mac). With the new layer selected, run the action as before. You've now separated your created channel's spatial frequencies and can use either the high or low data to suit your needs, exactly as you did in the past, mind you a bit more accurately. As Mr. Kevin notes, it will not be as dramatic out of the box as the old HP method if you use it for sharpening / local contrast - the advantage lies in having fewer artifacts. Yingwah Productions wrote: Think about the example image I posted showing how different a HP + GB reconstruction of the image was from the original. Clearly the image is largely dark, but with points which were markedly different. Using threshold command and the eyedropper tool, I sought out the greatest points of difference between the original images and the separation results to determine the more accurate method, recording those levels of difference as a 16bit number. I hope that helped clarify a bit. Apr 19 09 04:34 am Link DMHolman wrote: When you've hung out in here long enough, you come to realize there are a large number of people that can't accomplish much in life. They need some form of reinforcement in their lives, and they seem to have chosen the art card for help with that. They can't make art, but they can hide behind the art card. Their arguments use the ploy of deflection to acheive credibility, much the same that OJ did during his murder trial. Everyone knows they are talentless hacks, but when they produce a snap shot of their girlfriend tugging at her soiled panties while sticking her ass out and giving the cell phone that come hither look that reminds you of a deer about to meet it's maker, they argue the picture is their art, and that somhow validates everything, and they are no longer a talentless hack screwing a toothless hag, they am be ARTEESTS! Apr 19 09 05:49 am Link Craig Thomson wrote: "You can only think outside the box when you know what the box is" Craig Thompson. Apr 19 09 05:55 am Link Robert Randall wrote: Although you're obviously a talented photographer and are well respected as a brilliant technician, I think possibly your true calling is in writing posts like this one. Apr 19 09 05:56 am Link And with that, I am officially going to kill your math teacher. I really could not understand a one word you said there. Though I do appreciate the organisation of your discussion, as much as I couldn't understand what you meant. I really wish I could understand how all those words translate in picture form. Apr 19 09 06:57 am Link Wow, I still just don't understand the people who think that to be an artist you can't understand anything technical behind what you are doing. You have to know what you are doing to implement your vision, otherwise you're just pointing and shooting. Thank you Sean for the information! I look forward to trying it out. Apr 19 09 07:04 am Link |


 .
.


 ), but in the end at least a few can appreciate the utility of this.