Dodge and Burn Tutorial
Dodging and Burning is a method of lightening and darkening specific areas of an image, regulating local exposure to even out texture and contours. It digitally acheives (and with much more control) an old darkroom technique of witholding light (dodging) to keep an area light, or increasing the exposure to darken (burn) areas.You’ll find the dodge and burn tools on the toolbar to the left of the default Photoshop setup, or by pressing ‘O‘.The problem with using the standard tools is that they work destructively, they won’t operate on a blank layer so you’ll be making permanent changes to your working layer. This would be fine if none of us ever made an error or changed our minds, but to give us the option, we have a couple of methods available.
I split my workflow into two parts, pixel level dodge and burn, and carving. For pixel D&B I use the Curves method outlined below to even texture whilst zoomed in from 100% to 400%. Carving is more about shaping the contours of the face and enhancing contrast, and I like to work at 50% view or less to keep the whole image in context. I often do this second step on a 50% grey layer, my own preference and the choice is ultimately up to you.
The Curves Method and Pixel D&B
You can do this a number of ways using a number of other adjustments, but the premise is this; you increase lightness using an adjustment layer, you mask it out with black, and on the mask you can then paint the effect back into the required areas with white. You decrease lightness on a different adjustment layer and treat it the same way. Others may use different adjustments for this, I use Curves which is why I’ll explain this method here. I’ll be using RGB, and the following assumes some familiarity with curves, masks and adjustment layers.
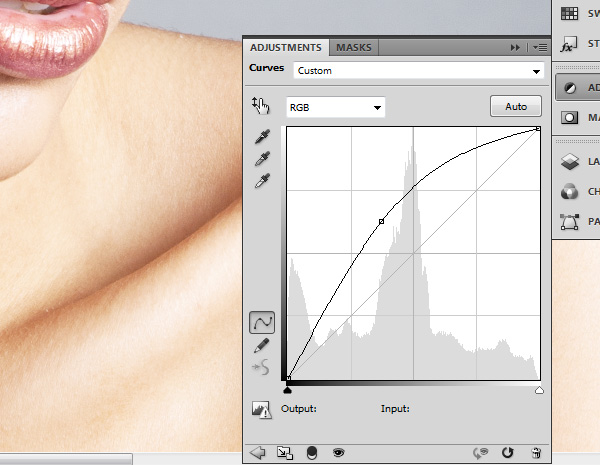
Open a Curves adjustment layer and with a single point pull the midtones up, this will be your dodge layer;
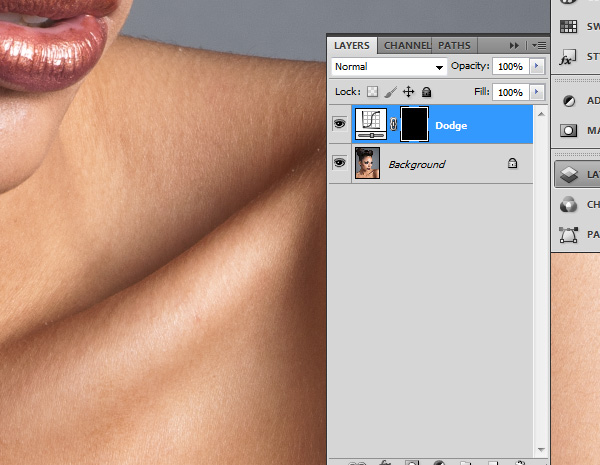
Fill the mask with black, hiding the effect of the curve (by default the mask should be selected and pure white, so just hit Cmd/Ctrl+I to Invert);
For the burn layer, start a new Curves adjustment and pull the midtones down with a single point;
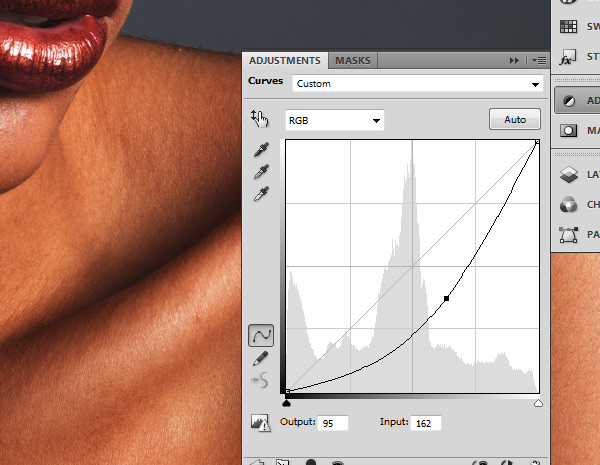
Invert the mask and name this layer Burn;

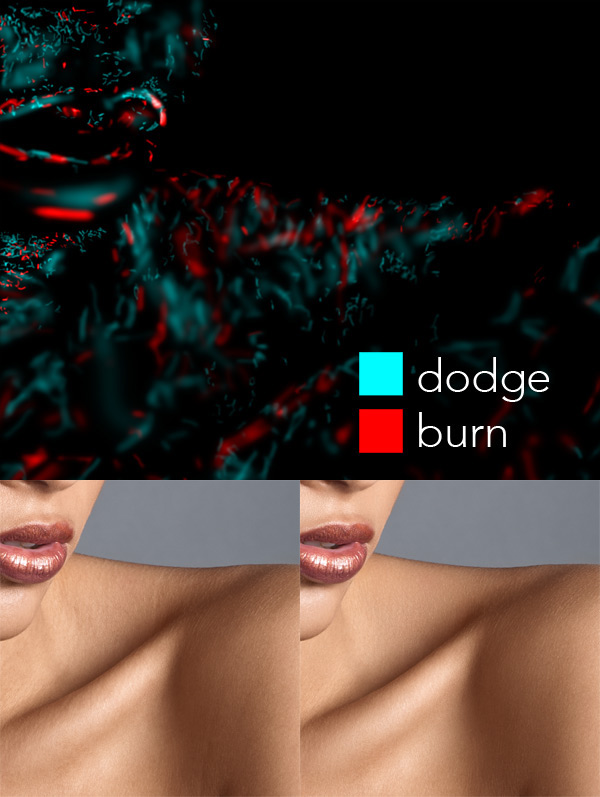
Paint with a soft white brush onto the Burn mask to darken, and the Dodge mask to lighten.
My preference is to use a low Flow setting, between 1% and 5%. Many use Opacity but I prefer the ability to build up the effect in one stroke instead of lifting the pen.
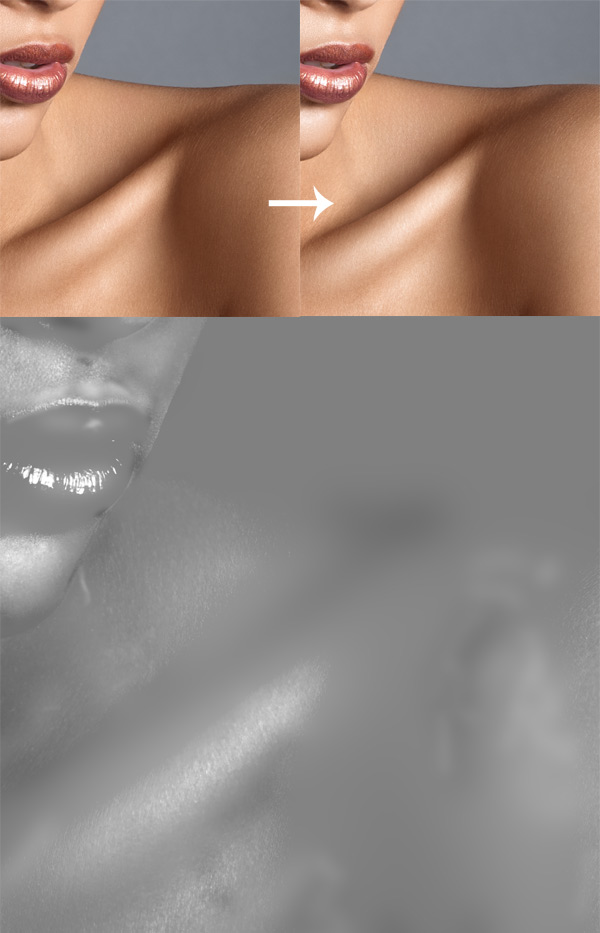
This is a composite of the two masks after dodging and burning, coloured to distinguish the lightened areas from the burned, and the result;
Carving and 50% Grey
The next part of my workflow involves adding contrast and contour to shadows and highlights. To demonstrate this using the 50% grey layer method, select Layer>New>Layer and in the resulting dialog box select Mode: Soft Light and check the box next to ‘Fill with Soft Light neutral color (50% gray).
You can paint onto this layer with black or white, or indeed any colour but as we’re dealing with luminosity stick to black and white. Again using a soft brush with a low Flow/Opacity zoom out so you can see the whole image or most of it, and you can accentuate the shadow and highlight or even alter the appearance of shapes. Remember that generally, lightening an area makes it appear closer, darkening helps it to recede.
In the below example, I’ve also selected the whites of the image (using Select>Color Range) and filled them with white to accentuate the highlights further.
Daniel Meadows
Daniel Meadows is a British freelance retoucher who has worked with award winning photographers and major fashion and cosmetic brands such as Chanel, L'Oreal Paris, Elle Magazine, and more. With nine years of experience in digital retouching, his technique demonstrates subtle forms of perfection. You can view his portfolio and tutorials on his website at http://www.dmd-digital-retouching.com/.
Follow Me:


May 15, 2015 at 1:46 am, Ruud van Gaal said:
It seems like you’re using dodge & burn in the first part as skin smoothing. Isn’t it easier to use a bit of frequency separation (high-pass filter) and blur that on the parts you want smoothed? I normally only D&B with relatively large brushes and the 50% gray overlay, which seems a lot faster.
May 16, 2015 at 1:23 am, Daniel Meadows Retouching said:
Hi Ruud, I cover that in the ‘Practice’ section of my next article here, so keep an eye out for that, as I’m quite sure it’ll be contentious! If you want commercial, industry standard results the first thing I’d recommend is dropping the FS step you suggested entirely.
May 18, 2015 at 2:30 am, Ruud van Gaal said:
Ok, looking forward to that then! FS does feel a bit synthetic, although useful.
May 10, 2015 at 2:26 pm, Nirlipto Nasir Hussain said:
Just if you give us indicate and with image, then we can realize well, like step by step with arrow and image. Thanks..
April 22, 2015 at 2:42 pm, keano12 said:
Nice tips!